
Website News Archive: November 2010
25 November 2010
 Happy Thanksgiving, everyone! Given that I'm
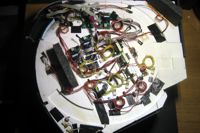
single with no relatives east of the Mississippi, I had no familial obligations today, so I decided it was high time to get started wiring the city. The scariest part was drilling the holes
for the wires to reach the structures; in some cases, the foundations warped, so it became a nail-biting challenge to correct the problems. Once that chore was resolved, I was easily able to
install the electronics, thanks to the stand I
made yesterday. With 18 EL panels, 12 streetlights, five animated signs, between three and six animation devices (the decision-making isn't
wrapped on this yet), plus an unknown number of LEDs (18 so far, with a possibility of up to a dozen more), the underside of the access panel started looking
like a small Cray—and that was before making any power supply connections.
24 November 2010
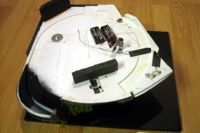 |
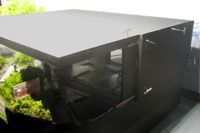
Thinking ahead about the need to wire the city, I realized that I'd have to be able to work on the access panel upside down. But how could I do this without destroying the delicate detailing permanently attached to it? The answer is to create a special stand that safely holds the panel upside down. I cut a series of Foamcore support ribs that align with the streets, and glued them to a Foamcore base; then I made an indexing jig that orients the corner of the access panel to the stand. Before the glue set, I test-fit the stand by placing it upside down over the city to check if any adjustment was needed. Then I did a dry run, inverting the city (a trick in itself) and placing it on the stand. This will greatly simplify the task of wiring the dozens of LEDs, EL panels and animated signs I've installed.
22 November 2010
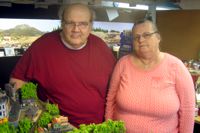 The weekend was a blazing success. While attendance
wasn't huge—34 guests total for both days—there's an advantage to smaller crowds: you get to speak with everyone and spend more time with them. Plus, many people stayed a long time, as opposed
to just stopping in for a few minutes—some were there almost all day Sunday. It was especially rewarding for me since I got to chat with two more
Railwire members, Bob "NTrainz1" and Larry "Blazeman." But what left me utterly thunderstruck was meeting Dwight and
Jean De Leeuw (pictured above), who drove from Chicago just to see the James River Branch! I kid you not. They did see and do other things on their trip, and naturally they enjoyed taking in Rick's
sprawling Sceniced & Undecided, but the primary purpose of driving 800 miles was to see my layout. They spent nearly four hours at Rick's, most
of that time studying and discussing the JRB. I've never had anything like that happen to me in my life, and it shall likely remain a standout event for the remainder of it. Dwight and Jean, I hope your
visit was as rewarding for you as it was for me, and that your trip home was a safe and pleasant one!
21 November 2010
The open house yesterday went fine, more or less. While location and lighting were terrific—much improved over last year—the attendance wasn't thrilling (although there's no one to fault for this). I threw caution to the wind and ran the N scale layout in the hobby shop and the barber pole all day, and they operated flawlessly. However... another LED has burned out. It's aggravating to think that LEDs are supposed to outlast tungsten lamps by many years, yet I've had three die so far. The one I lost today was on the crossing flasher; fortunately the one that died is on the back of the flasher, facing away from viewers. But given these LEDs are all driven by an electronic circuit designed for the task (thus the LEDs should not be subject to excessive current levels), it leaves me scratching my head as to what can be done to prevent this, particularly as there's no way to replace these LEDs without rebuilding the models from scratch. Anyway, in a few minutes I'll be back on the road to head down for day two of the Open House. Hope to see more folks today!
20 November 2010
The car is packed, and soon I'll be headed out to Rick Spano's for the Open House. Beyond completing the fuel oil company, last night/this morning I built a stand on which to place the layout. Last year it sat on a folding table, which positioned it too low to really enjoy; the stand will raise it up closer to eye level. I also had very little light on the layout, so I'm also bringing a pair of compact floods. I hope to see some of my regular visitors at the open house—I'll be there both days. The address is 7 Heather Drive, Trenton, NJ, 08638.
19 November 2010
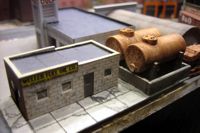 One last modeling spurt late Friday night
allowed me to finish the Weller Fuel Oil Company and some of the surrounding scenery. It's not much, but every bit helps. I elected to stick with modeling
items instead of infrastructure such as lighting wiring, as I felt that visual things would provide bigger bang for the buck, particularly as there wouldn't be much of an opportunity during
the Open House to take in the lighting effects; at least I'll still have the crossing flashers running, as
I usually do.
17 November 2010
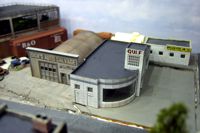 Frustrating. At a time when I'd really like
to be able to model like fury, the Universe is throwing no end of real life crap at me. So progress has been pretty paltry of late, and the layout will more or less have to stand the way it is
right now for the Open House, with no functional animations or lighting. Not that this is the end of the world; I just thought it
would be nice to bring the layout a lot closer to being done for a show where visitors will have a chance to study it much more intensely than they had at Timonium. At the very least, there
will be no bare brass! The gas station has been decaled and weathered.
14 November 2010
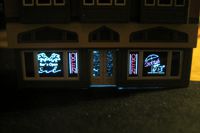 A whole bunch of real life has put layout progress
in pause mode, but hopefully I'll accomplish at least a little this weekend. After having installed and illuminated neon signs in the bar windows, I'm now pondering
how to wire it into the lighting power supply system—with four supply lines, two of which are giant (in proportion to the building) ribbon connectors, it is going to be a challenge to install...
10 November 2010
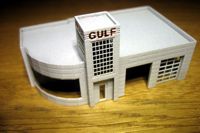 It's a landmark day: no more bare brass or
unpainted buildings! The gas station is close to done; I only have the pump island and interior detailing left to do. Since the project was begun sometime late 2006,
it's only taken four years to reach this point! But what's really exciting is to look at the little progress bars on the construction
page: nearly all of them are at or very close to 100%. Pretty soon I'll remove them since it won't make any sense to display them anymore.
9 November 2010
 |
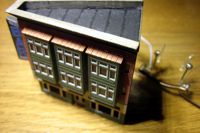
With a two-day Open House less than two weeks away, and with a steady barrage of real life stuff with which to contend at the same time, I've been on a mission to find little round tuits that would have an impact on the layout's first impression for new visitors. Today was the day to take care of the little roof parts over the bay windows on the bar, as well as the first floor interior and lighting.
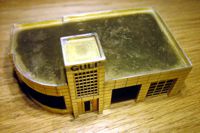
Next, I turned my attention to the gas station, with the goal of not having any raw brass left on the layout by the open house. It was embarrassing: the brass roof had a considerable layer of dust on it, as did the project's web page, which was last updated on 26 September 2008—over two years ago! It took me a while to get my head back into the project, but soon enough I had the soldering iron fired up and I was whipping the neglected model into shape. Indeed, I did find a silver lining to the fact that the project sat idle for so long: my soldering skills have improved substantially, and so I had the bulk of the assembly work done in 15 minutes flat—talk about making up for lost time!
With work proceeding so swiftly, I was soon faced with some decisions about how to detail the station scene. At the outset, I'd planned to animate it with effects similar to those of the Mobil station on my N scale White River and Northern, which featured a rotating sign and a car that raised and lowered on a lift. Subsequently, the station got moved to a location that precluded such animation because it was right over the hidden helix, with no clearance for a mechanism. The station's current and final location would allow for animation, but I've since decided not to do the car lift, because the building now faces the side of the layout where it's difficult to see the interior. However, I'm on the fence about a rotating sign; I haven't found an example of a real Gulf sign that rotated, but that doesn't mean one never existed.
At the very least, I've challenged myself with the task of installing lights in the canopy over the pumps. Since I've gone to a fair degree of trouble illuminating the station itself, it seemed silly to leave this one normally bright feature unlit. In addition, to make up for not animating the car lift, I've decided to include a welder effect in the repair bay. So, while the building has come quite a long way in a short time, it's still got quite a long way left to go...
Incidentally, my abandoned factory has been getting quite a bit of attention at the Railwire, and I'm grateful for all of the kudos it's received.
8 November 2010
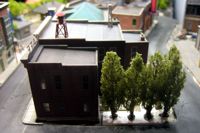 The evolution of Emma's Cafe
has taken an interesting new twist. Not long ago, as I was fleshing out the center of town, I felt the space behind Emma's needed a little building of some sort—a laundromat, newsstand, tailor, whatever—but
now that's completely changed. I'd turned the layout around to work on the property surrounding the abandoned factory, and I started
staring at the space behind Emma's from that rare perspective. At the same time, in my peripheral vision I caught a glimpse of the bunch of trees intended for the now-defunct cemetery, and I
put them together. The result: a cozy little al fresco dining area behind the building. Inspiration came partly from Paganini Ristorante,
a favorite haunt of mine in Doylestown, PA, which is on an intersection in the middle of town, with an outdoor dining area tucked right into the corner. It will definitely be one of those
little details that gets "discovered" as people study the layout. Although it's not very far along just yet, the row of trees is installed, which sets the scene nicely.
7 November 2010
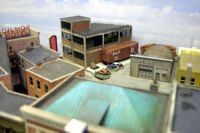 |
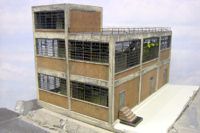
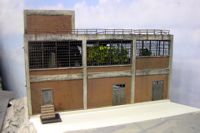
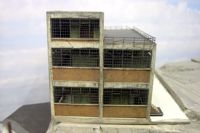
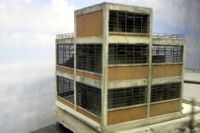
One last tweak on the abandoned factory: all of that work on the internal effects got the life crushed out of it when I applied a solid back wall. So I got this funny idea this morning: draw a fake wall. I have no more of the etched brass windows, and for this effect the windows didn't need to be physically modeled; I created the artwork in CorelDraw and printed it on acetate. The effect was perfect; it opened up the whole building and gave it much more air. Now it looks the way I'd intended. I created a little mini-gallery of the building so you can see how the effects change depending on the angle of view.
The final image shows the (more or less) complete scene. A derelict boxcar will be permanently parked in front of the factory, and used for storage by the auto salvage business next door. A chain link fence will completely surround the factory and auto salvage property, with a gate at the front of the Quonset hut. I must say that I'm very pleased with the effect the factory creates; while it's hard to be absolutely certain, I have the feeling that it's a much better choice than either a cemetery or a park. It holds up the corner of the town and creates a more substantial backdrop for the taller buildings; plus it blends in perfectly with the rest of the businesses on the block.
Even though I've come a long way—it's amazing for me to realize that the gas station is the only remaining unassembled structure—I do still have quite a lot of work left to finish. I could be wrong, but I'm pretty sure the layout won't be done in 2010. Not that this is important; I've always said that it'll be done when it's done. But I have a hankering to move on to other projects, and I don't like having unfinished business lying around—I have enough of it as it is, and it would be especially embarrassing to have this layout sitting idle when it's so close to completion.
6 November 2010
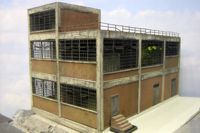 The abandoned factory
is finished. It's been rollercoaster ride building it, but I've learned quite a lot by taking on the project, and that's made dealing with all of the
problems worthwhile. The next steps are to lay the track for the siding and scenic the building foundation. This is going
to force me to come to grips with the intersection of Front Street and Mirror Road, which is right over the lower tunnel portal. I've been putting this off because it's been a royal PITA getting
this complicated little spot right—as an example, the day before the Timonium show I discovered the tunnel portal was too narrow, and the GP7 end railings were hitting it, so I had to hack it with
a knife. With so little layout left to work on, I've run out of excuses for not finishing it.
5 November 2010
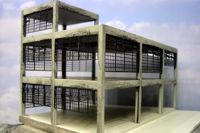 Returning to modeling mode, I picked up
where I left off with the abandoned factory. It's proven to be quite a scratchbuilding experience, with nearly as many failures as successes. Ultimately
the final results are shaped by both, and possibly wouldn't look as interesting as it does had I not faced—and corrected—so many flaws, most of which are detailed in two new construction pages:
Part 2 and Part 3.
4 November 2010
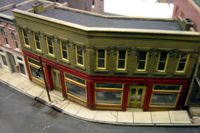 I'm still "recovering" from Timonium—I
haven't even unpacked the layout yet. As noted previously, I'm pondering ways to deal with the town structures. But I've also had more to
ponder than just how things will be assembled; at Timonium, I believe it was Gary Hinshaw who made the observation that the unfinished five and
dime interior made it look like the building was simply empty, ready to rent. I agreed, and the more I thought about it, the more I liked the idea. But I also still like the idea of
having a fully-detailed interior to see and enjoy. So I remained torn over the fate of the building for the last several days. Now I believe I may have an idea for a third option, one that
straddles the two: detail the interior with some empty shelves and fixtures, maybe some cardboard boxes and other detritus. This way I have an interesting, detailed interior that maintains the
"for rent" theme, which I like—it's kind of moody.
2 November 2010


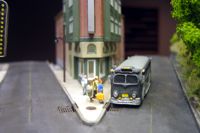
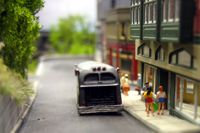
 |
The Timonium show was quite an experience. Although attendance was evidently way down, I was still able to meet quite a few Railwire Irregulars in person (click the images at right for captions). Unquestionably the best aspect of this was that Railwire members tend to be what I'd refer to as "real modelers." The majority of the attendees spent maybe a whopping thirty seconds or so (no exaggeration) looking at my layout and offering the obligatory "Nice work!" remark—as if they could pass judgment on anything based on what amounted to a passing glance. By contrast, the Railwire fellows spent a significant amount of time actually studying my work; thus their compliments were earnest, for which I was genuinely appreciative. They'd also ask intelligent questions and offer sensible suggestions; in other words, it was a meaningful exchange between peers, which was refreshing and rewarding. Additionally, I had the distinct privilege of spending some quality time chatting with Michael Duggan of Paw of a Bear, another real modeler who does some extraordinary work.
Meanwhile, although I've stepped away from the workbench for a bit to decompress from the show, I haven't been entirely idle these past couple of days; I've been quite busy making decisions and plans that will affect the way I deal with certain issues on the layout, and having to cart it down to Maryland taught me some valuable lessons. Originally I was going to leave the buildings easily removable from the layout. While this does provide certain advantages, once the wiring is complete for those buildings that have lighting or animation effects, removal will then become a serious chore. Some helpful folks suggested adding electrical connectors, but this would be impractical for structures having animated signs, where I'd have to install 12- to 16-pin connectors in cramped quarters; one building in particular would be a nightmare owing to two animated devices, one of which is mounted to the layout while the other is mounted to the building. So, I've decided to semi-permanently attach the buildings using screws inserted from the underside of the access panel and threaded into lugs soldered to the building interiors. This will reduce setup/pack up time substantially, as well as eliminate potential damage from constantly installing and removing all of the buildings, while still allowing me to get into the guts of things to make repairs as needed.
If you haven't been back recently, be sure to check out the October News archives for loads of progress updates and images.
Copyright © 2007-2013 by David K. Smith. All Rights Reserved.