
An N Scale Layout in Z Scale
For the last eleven years, I've claimed that I'd built the world's smallest working train layout (as seen in this video). Actually, that was the second one I'd built; the first was a slightly larger proof-of-concept version, which I donated to Rick Spano for his Sceniced and Undecided. Subsequently, I've thought about making more models of layouts, including an N scale rendition of a club-sized N scale layout in a warehouse, having two trains following complex routes, and being operated by a bunch of N scale club members.
Although these plans have yet to materialize, I started thinking about making one for the James River Branch when I began work on Version II. I thought it would be a no-brainer to make a slightly-smaller clone of the N scale version. However... once I'd selected the building that would become the home of Jim's Trains, I was in for a bit of a surprise—which hadn't hit until after I started installing the barber pole: the window in which the layout would be displayed was barely three scale feet wide!
Thus, what was intended to be a Z scale model of a 4- by 8-foot HO scale layout became a Z scale model of a 2- by 4-foot N scale layout! After I picked myself up off the floor, I made a few quick calculations... the modeling scale would be an eye-popping 1:35,200, and the finished layout would measure .125 by .200 inches—or, roughly one third the size of its predecessor. I very nearly abandoned the project just based on these numbers; fortunately, I tried anyway.
As sometimes happens with a uniquely demanding project such as this, I expended a considerable amount of time and effort in the trial-and-error phase. My first inclination was to make a geared micro-mechanism that was essentially a miniaturized version of the one I'd made in N scale, which I spent a week building. It was an elaborate, finely-crafted piece of watch-like machinery that ultimately didn't work; the amount of friction to overcome was unexpectedly high, requiring enough motor torque to threaten shredding the delicate plastic gears.
Disheartened, I briefly considered taking the "easy way out" and building a simple circle layout, but I felt that would look a bit too much like a music box. I was on the verge of abandoning the project again when I noticed something about the belt that I was trying desperately to move along an oval path: one end of the tube could be shaped differently from the other. In other words, with one end attached to a single rotating shaft, the free end could be deformed into an oval shape, with no need for any kind of fancy geared mechanism—in fact, no mechanism at all.
So, I developed a whole new device that was nothing more than a length of flexible plastic tubing attached to the shaft of a low-RPM miniature geared motor. It could not have been any simpler! As a bonus, this time around I didn't need to make any rolling stock, because the cars would be far too small to make individually; instead, the whole train was simulated by cutting "teeth" into the edge of the tube that would poke up just above the surface of the layout; they were painted with a silver Sharpie (it's a passenger train) to enhance their visibility.
Meanwhile, instead of fabricating the layout from laboriously-shaped pieces of brass soldered together, I made the whole thing out of styrene, which greatly accelerated and simplified construction. After carving an oval hole in a piece of black .060-inch sheet styrene, I shaped some miniscule bits of .030 styrene into a mountain and tunnel, which served the functional necessity of suspending the center of the layout in the oval hole (just as it had on its predecessor). Then I added a sky backdrop made from .010 white styrene colored with a Sharpie.
The mountain was covered with a thin, lumpy layer of Squadron putty to make a forest—at 1:35,200, trees would be nothing more than a rough texture. After painting the layout with green for vegetation and grey for rock around the tunnel portals, I made buildings from nearly-microscopic bits of .010 x .020 strip styrene colored with Sharpies so as to avoid adding thickness.
After carefully inserting the train-shaped tubing into its oval slot, I bonded the layout to a styrene support block that was in turn bonded to a mounting plate attached to the motor. This was an iterative process that involved fitting and sanding and fitting and sanding until the support block was exactly the right height. The mounting plate was made relatively large to provide a convenient means of attaching the mechanism to the layout under the building.
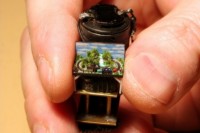
This N scale model of an HO layout is nearly 3 times bigger than the new one.
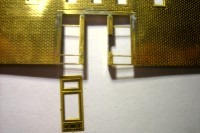
The size of the store window (bottom) dictates the size of the model layout.
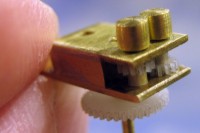
This is what the impressive but failed first mechanism attempt looks like.
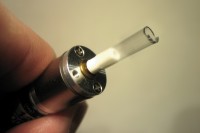
Thin tubing is fastened to the shaft of a geared motor, cut to shape and painted.
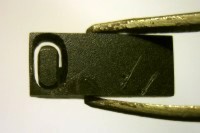
The tubing is formed into an oval by an opening cut in the styrene layout.
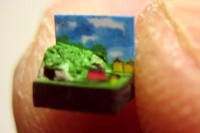
A mountain with a tunnel, buildings and other scenic details finish the layout.
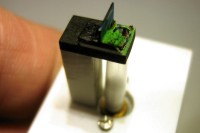
The tubing is inserted into the layout, which is then mounted to the motor.
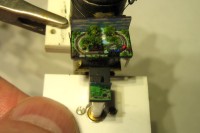
The new layout is compared to its predecessor.
Long before starting the project, I'd thought about illuminating a building or two, but with a layout so incredibly small, the tiniest SMD LED would be enormous, filling most of the layout; even fiber optics would be too bulky to install. I'll still make a spotlight to hang overhead, as I'd done for its bigger brother, to draw attention to the layout and make it easier to see. I'm also going to mount a sign in the window to tell all the Z scale shoppers of Naughtright that they're looking at N scale.
One thing I'll need to do as a result of this achievement is revise the article about the N scale version, since clearly that one is now no longer the world's smallest; strange to think that it's now three times bigger than the new (but still unofficial) record-holder. Naturally I made a video of the new one, which was a major challenge to shoot. Even with a macro lens, the camera would not focus close enough to get a good view; I had to blow it up 400% in post-production to make a decent-sized—albeit seriously grainy—video image.
|
|
One last thought on scale: the animated layout I'd made over a decade ago was not carefully crafted to be a precise N scale model of an HO layout; everything was eyeballed. It was only by happy accident that it turned out to be surprisingly accurate, which I just recently learned from a modeler who'd measured the objects in one of the photographs. Well, like its predecessor, this new layout was entirely eyeballed as well, with no real intent to precisely represent an N scale layout in Z scale; it's only N scale by virtue of its overall dimensions. So if anyone measures the passenger cars running on it and finds they're exactly the right size, I'll most certainly faint dead away.
Copyright © 2007-2013 by David K. Smith. All Rights Reserved.