A Working Barber Pole
It all started back about two decades ago when I made an N scale illuminated and animated barber pole, which still tends to cause a fair amount of drop-jaw (there's a brief video of it in action on Rick Spano's layout). As I'd indicated in its construction article, I deliberately chose to model a wall-mounted type, as opposed to the easy-to-model kind that stands atop a stanchion, in order to keep people guessing how it was done. And as I began work on the James River Branch, I had every intention of doing it again in Z scale.
This time around, in addition to working at a smaller scale, my goal was to up the ante by increasing the accuracy, which amounted to making it less than a third of the size of its predecessor. You see, while the N scale version looks impressively small, it actually measures nearly six scale feet tall—that's a mighty big barber pole! I knew in advance that, by going significantly smaller, I'd have to forfeit illumination; even with today's nearly-microscopic SMD LEDs, there was simply no practical way to do it. I suppose having something so incredibly small that actually rotated ought to be enough of a thrill.
Before getting to work, I researched barber poles to learn how the stripes were oriented and which way the pole rotated; as it happens, every element, including the pole's movement, has a specific meaning. It would have devalued all of the hard work invested in the project to have gotten such details wrong (as I had for the N scale version—I was lazier back then). Plus, it was quite fascinating to learn a little about the rich and amazingly ancient history of barbering.
One thing that helped get the project off to a quick, smooth start was finding a ready supply of tiny gears: Mikroantriebe has a fantastic supply of metal and acetal gears and worms (as well as motors and other great goodies); the broad variety of gears allowed me to select the best ones for the task, since the gears ultimately dictate the height of the pole. Another very useful gadget source is Gizmoszone, which is where I obtained the motor for this project. What made this one special was that it's a mere 8mm in diameter, yet has an integral 1:700 planetary gearhead! This substantially reduce the space requirements for the finished mechanism.
The principle behind the new mechanism is the same as the old one: a styrene pole is held in position by a pair of horizontal brass tubes, and turned by tapered counter-rotating drive rods inside the tubes. See the illustration at right. The tubes and rods are made quite long so that the gear assembly is well back inside the building where it won't be seen. Incidentally, the brass tubes of the old version also carried current to an axial-lead microbulb suspended inside the hollow styrene pole; this time, of course, that wasn't an option.
Construction began with four lengths of .050-inch OD thin-walled brass tube. One end of each piece was ground to a 45° angle with a Dremel tool; then the pairs were soldered together at a 90° angle to make two L-shaped parts. One leg of each part was shortened to .055 inches and drilled out with a #60 bit to accommodate the styrene rod. The other legs were left a full inch long so that the mechanism would not intrude on the barbershop interior, which would be visible through the window.
The tubes had to be held exactly parallel, so I made assembly brackets from .030 x .125-inch brass bar stock. These brackets were tapered along the edges for a tight fit against the tubing. After soldering them to each of the tubes, I drilled and tapped them for two 00-90 screws. Then, .030 brass wire was cut to make two drive rods that fit inside the tubes. One end of each was tapered to a point with a Dremel tool; to the other end I soldered short bits of tubing that press-fit into the acetal gears.
At this point I was able to determine the approximate length the barber pole itself needed to be: .120 inches, of which .100 would be visible. This scales up to 22 inches, with the rod being around 8 scale inches in diameter. This happens to be a near-perfect match for a real one from the only manufacturer in the United States that still makes them, the William Marvy Company: the glass cylinder of their Model 824 barber pole measures 8 by 24 inches.
Cutting the styrene rod to exactly fit between the drive rods was an iterative trial-and-error process, because the fit had to be precise: the ends of the rod had to gently "kiss" the drive rods. Too long, an the rod would bind; too short, and the drive rods would not make reliable contact. Once I had a rod of the right length, I set it aside to serve as a pattern for one that would have red and blue stripes, because there was no way to apply the stripes to an eighth-inch long bit of styrene.
Really demanding projects such as this one tend to have one procedure that stands out as being so difficult that it nearly dooms the project. In filmmaking it's referred to as the "widowmaker shot"—that one shot that nearly kills you trying to get right. For the crossing flasher, it was attaching the LEDs to the targets; for the signal, it was threading the ultra-fine wire leads down the stanchion tube; and for the barber pole, it was applying the stripes to the rod.
After trying about a dozen different methods, the one that finally worked best was my first idea, which had initially failed: decals. The problem was getting them to adhere reliably to the styrene rod. Curiously, I found that commercial decals didn't stick as well as DIY decal material; however, they would still come apart during the process of cutting the rod to length. Ultimately, after countless attempts to get just an eighth of an inch of decent-looking stripes, I managed to extract a useful piece intact by spraying the rod liberally with clear fixative both before and after applying the decals.
With all of the main components fabricated, assembled and functional, there was one last mechanism part to make: the gear retainer. It's made from a piece of flexible plastic (the inner protective sheet from a Micro-Trains car storage box). After cutting out a rectangle and bending it to shape, I drilled it to fit over the assembly screws, and attached it with a pair of 00-90 nuts.

This is the illuminated/animated barber pole I made for my last N scale layout.

The mechanism for the N scale barber pole is relatively enormous.
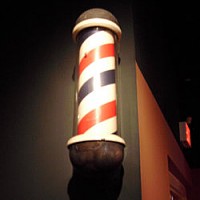
Reference photos like this one help with the design of the model.

This illustration shows how the device functions.

The ends of thin-walled brass tubing is ground at a 45° angle.

The angled tubing parts are soldered together into L-shapes.

One leg of each L-shaped part is cut down and drilled out for the styrene rod.

Assembly brackets are soldered to the tubes to hold them together.

Tubing soldered to the drive rods is press-fit into the gears.

Decal material is wrapped around the styrene rod to make the spiral stripes.

A gear retainer is made from a piece of thin flexible plastic.

The finished barber pole is ready to be powered.

The mechanism is installed in the building along with the motor drive.

People gathered on the sidewalk draw the eye to the completed scene.
In order to test the mechanism, I set it up in a jig with a temporary motor drive. Seeing the pole rotating on its own was quite a thrill, since I honestly wasn't sure that the mechanism was actually going to work when scaled down so small.
|
|
One interesting aspect about this project—which it shares with most others—is the time to completion. It took roughly seven or eight evenings to complete, yet I could have built one, start to finish, in about two hours; most of the time is spent figuring out how to make things, as opposed to actually making them. Such is the learning process!
![]()
![]()
![]()
![]()
Copyright © 2007-2013 by
David K. Smith. All Rights Reserved.
Reference photo is Public Domain.