Jim's Trains/Don and Stan's Barber Shop
This pair of shops, named for real people and places of my youth, reside in the Miller Engineering Pitman Deli kit. Originally slated to occupy a Shire Scenes kit (now tentatively planned as a Pharmacy), the shops replaced Emma's Cafe, which has moved a few times and is now located in the first floor of the Gilmor Hotel.
Unlike many other buildings for Naughtright, this one did not undergo any significant structural modifications. Construction began in the usual fashion, by soldering the building walls together. Also, all corner joints were filled in with solder to prevent light leaks. The slots around the windows and doors on the front wall for the awning were filled in with solder as well, even though I may attach an awning to the building—at the outset of the project, I'd not yet decided if I would or not; however, if I did, I wouldn't use the awning supplied in the kit, since it was etched with "Pitman's Deli."
Prior to installing the storefront windows and main entrance, I modified the frame parts to accept the barber pole, and also test-fit the animated N scale layout. Then I bonded the windows and entrance in place with CA. Given the way the barber pole fit, there'd be no practical way I could paint the window parts separately and install them after painting; besides, I'd intended all along to make all of the storefront woodwork white.
The roof was next. While I understood the practical limitations of making a sloped roof from sheet brass, I also preferred the roof to be properly sloped. So, I made my own from .030-inch sheet styrene, a slightly tedious process given some of the odd shapes involved. I started by making the end wall cap, since it was straight. After it was bonded in place with CA, I then cut a side wall cap part to fit the desired slope, using the first part as a pattern for the second. The front part was next, followed by the roof itself, which was covered with strips of masking tape to simulate tarpaper.
The cornice posed a different challenge: the kit "suggests" the cornice with an angled part, whereas a real cornice is usually built up in layers to form an ornate structure. So I made mine from layers as well, beginning with the original decorative part, plus strips clipped from overly-thick etched brass Z scale ladders, topped with strip styrene.
The last bit of work to do before painting was to add corbels over the windows. The kit would have been more costly and harder to build if it had "proper" lintels and sills, which are usually three-dimensional shapes, as opposed to the flat etched-in lines on the kit. Unfortunately, Micron Art's "Z Scratch" product line, which I've been using to upgrade other buildings, didn't include a lintel shape that fit these windows. This is where I turned a prior problem on its head: owing to the fact that I'd destroyed the window frames in my first attempt to make way for the barber pole and had to buy a whole new kit, I had a spare wall from which I extracted matching etched lintels. These I attached to the building—along with bits of decorative styrene and windowsills—before painting, so that they'd look like part of the structure, as opposed to spare parts glued on afterwards, as I've found details such as these can sometimes appear.
After everything was in place, I gave the building a vinegar bath, masked off the storefront area, and sprayed it with flat white. When this was thoroughly dry, I masked off the storefront and sprayed the building with ruddy primer. I weathered the white parts with the very lightest dusting of dark grey powdered chalk; then I applied Doctor Ben's Driftwood stain to the brick areas to create a mortar effect. After I brushed Floquil Antique White on the cornice and lintels, I applied an India Ink wash; then I painted the tarpaper roof with Floquil Weathered Black. The only thing left to do before beginning the interior work was to add a few details, such as a chimney with TV antenna. Since the building will be sandwiched between two others, the sides were pretty much left alone.
This building is unique in that it has not one but two animated devices: a working N scale layout and barber pole. Follow along on how these tiny scene-stealers were made...
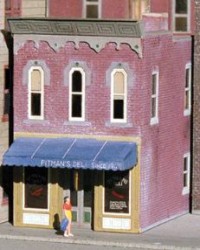
Here's the Pitman Deli as it appears in its original form.

Construction begins, as per usual, by soldering the main walls together.

The slots for the awning are filled in with solder.

The windows and entrance are modified to accept the barber pole.

A new roof is made from .030-inch sheet styrene.

A new cornice and new window lintels are added to the building face.

The building is masked around the storefront, and it is sprayed flat white.

With the storefront masked off, the rest of the building is sprayed ruddy primer.

After detail painting, various washes and powders are applied.

Crowds of people around the window draw attention to the layout on display.
![]()
![]()
![]()
![]()
Copyright © 2007-2013 by David K. Smith. All Rights Reserved.
Miller Engineering product photo used with permission.