Website News Archive: December 2008
30 December 2008
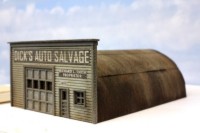 Staring
at the finished Dick's Auto Salvage building for three days, I'd grown dissatisfied with
the metal roof, especially the way it appeared in photographs—the metal "glowed" unnaturally. I wanted
something much more subdued, a cross between the two reference photos on the project page. So, I took the building out
to the garage and sprayed the roof with primer grey paint, then brushed on an India ink wash followed by some Rustall.
27 December 2008
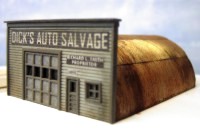 |
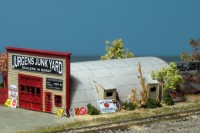
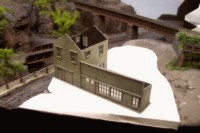
Today I decided that I wanted to tackle something different, something that I might possibly be able to knock off inside a day. That something turned out to be Dick's Auto Salvage. It was right in the neighborhood of the Second Street houses, where I've been focusing a lot of my attention lately. With so many longer-term projects populating what looks like a brass-plated town, I desperately needed to see another building finished besides the train station. It was a fun project; the building received enough modifications to differentiate it from the original kit (at right are "before" and "after" versions), although it did present a few unexpected challenges, such as the sign, which took five tries to get right. All that's left to do is install it on the layout.
26 December 2008
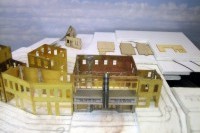 With
the house to myself for a few hours this morning, I revisited the Second Street houses project.
Something was bothering me... those shotgun houses. I suppose it was a wave of laziness that came over me when I decided
I didn't want to invest the time in "northeasternizing" them. Two strokes of luck were with me: the Lake City
House is nearly the same size as a shotgun house, and I had two of them. So the shotgun houses have been replaced by Lake
City Houses, and now I'll be searching for a new "mother-in-law" house. Plus, I've been trying my best to talk
myself into replacing the Nansen farmhouse with Billy's House. The problem remains that it's a finely detailed kit that
would be relegated to the back of the layout, behind a row of city buildings. The photo above shows Second Street from my
normal viewing angle; note how the one-car garage at the far left is completely hidden from view. This isn't disastrous,
but it's a bit disappointing. Thus the garage might become something of a "photos only" item.
While searching for a "mother-in-law" house substitute, I occurred to me to use a mobile home. MakeMyModel makes several classic mobile homes, any one of which would be ideal, but they're all out of stock. In fact, everything at MMM appears to be out of stock, leading me to suspect they may be going out of business. This would be a great shame! Their products are far from perfect, and they're a PITA to finish, but they still provide sorely-needed Z scale detail items. Thankfully, Zscale Monster appears to still be stocking MMM, so I placed my order—with fingers crossed. You can see the evolution of the housing selection process on the Second Street houses project page.
25 December 2008
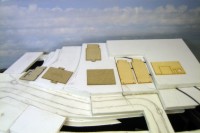 Merry
Christmas, everyone! Yes, I got to do some modeling on Christmas Day. With the development of the Second Street
area, I've come to the task of selecting houses for it. This was not an easy thing to do, by any means, given that
I have three times as many kits as I can use. This new web page details the
difficult process, one stage of which is shown at right: playing "checkers" with the house foundations.
23 December 2008
 |
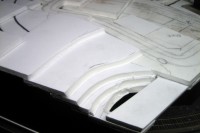
Here I am going into two weeks of vacation, and what happens? I start getting a case of "modeler's block." So, after rattling off a blog entry about it, I forced myself to get some modeling done, and managed to finish off the back of the Naughtright access panel, which has gone unfinished since the panel was rebuilt back in August. Part of the reason it's gone unfinished for so long is because I've been uncertain as to how the Front Street bridge would run—if indeed there would even be a bridge. Now the area along Second Street has finally begun to coalesce, so I cut up some chunks of Gatorboard and glued them together with Liquid Fusion, which must be left to cure for the next 24 hours under the pressure of some weight. Offsetting this spurt of progress was the disappointment at seeing how little real estate is available for houses along this street—I'll be lucky to squeeze in three, and I've got over a dozen house kits. Obviously I've got some decisions to make, which will be hard because I like all of the kits.
15 December 2008
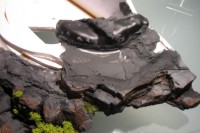 |
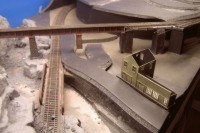
This evening I've made a tiny tweak to the plan. It's bothered me for some time that the Stephen A. Greene & Sons Building Supply faced away from the font of the layout. Not that everything on the layout needs to face the font; indeed, some structures are more interesting from the back. But although the main lumber yard building was no better facing either way, it did seem just a bit awkward in its original 3/4 rear-view pose; if anything, it made the nice custom sign (the artwork for which is shown above right) difficult to see. Out of the blue I was struck by one of those classic "Ah-hah!" moments, followed by, "Why didn't I think of that earlier?" I just added a street at right angles to River Road, and rotated the main building 90 degrees. As a bonus, the new orientation allows for a larger lumber storage building.
In other news, I've added one more rock casting to the rural access panel. After the last round of rockwork was completed, it seemed as though the campground parking lot would be more interesting if it was moved out closer to the edge of the rock face below; then the area behind it looked like it could use some drama, so I added another cliff there. I hope that's the last rock casting I need to do—I'm out of Hydrocal, and I'd hate to buy a whole container just for another tiny job like this one.
14 December 2008
 |
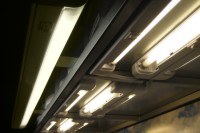
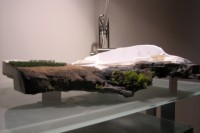
Well, home improvement projects trumped modeling yesterday, and today things got off to a start in a totally different direction. With the completion of so much scenery along the front edge of the layout, photographs of the foreground increasingly highlighted an issue: lack of light. The front edge of the layout actually overhangs the shelf by a couple of inches; meanwhile, the fluorescent lighting fixtures are set back a few inches from the front edge of the shelf above, leaving the foreground in shadow. So, today's first project has been the addition of a new three-foot, low-profile fluorescent lighting fixture that projects out from the upper shelf on flat steel brackets. After having lived with a dark foreground for over a year, all that extra light will take some getting used to!
In other news, the rural access panel has sprouted legs. With so much scenery-making taking place on the panel, I've been removing it fairly regularly for access, and adding legs has made it safe and convenient to place the otherwise irregularly-shaped panel down on a workbench. I simply glued three V-shaped chunks of foamcore to the bottom; I'll be following suit with the other access panel.
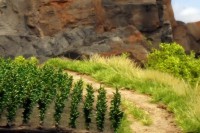
Last item for the day: I turned my DSLR on the cornfield and surrounding area to see what things looked like with better color rendition and enhanced depth of field (right). The pocket camera is fine for documentation, but it tends to render my spring green trees in circus colors, and it could never match the depth of field possible with the SLR plus Helicon Focus.
13 December 2008
With scenery spreading fast and furious, the layout is changing noticeably almost on a daily basis, so today there's a new layout overview shot. Also, the barn has been moving along, with the foundation now installed permanently on the layout—which means scenery can continue in that area, too. My plan for today: complete the scenery support for the campground area, and apply a great big batch of Sculptamold. If this happens, there will be another new web cam shot tomorrow morning.
12 December 2008
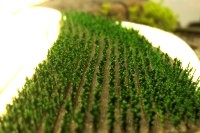 Introducing
a 1:220 cornfield—one of those "always wanted to do" things that I finally got a chance to actually do!
It was a fun, challenging little project that involved some rather unorthodox construction techniques. I've added
a new web page devoted to the process of creating evenly-spaced corn rows with
furrows in between.
11 December 2008
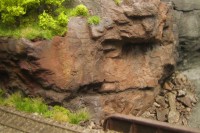 |
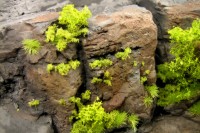
While thundering ahead with greenery for all of the rockwork I finished last week, I fired off a new The Layout Today shot, which followed right on the heels of a new, gloriously green gallery pic (compare it with the earlier one taken from the same angle, two pics down).
Tonight I learned what I can't do, though: take macro shots of some of my hand-carved rockwork. Although the area in the upper image looks fine to my eyes, the camera clearly sees the many hundreds of tiny air bubbles that pepper the rock faces. Fortunately this area is towards the back of the layout, while the rockwork shown in the lower image dominates the foreground, and fares better under close scrutiny, although it's 100% rubber mold.
10 December 2008
Wait... I thought that road bridge was gone from the plan for good. Well, after much consideration, I reinstated it yet again, except this time it serves the dual purpose of extending Front Street more realistically, and it provides a way for the lower track to disappear in the trees, rather than having yet another tunnel. The notion of eliminating one of the tunnels was the driving force, really. Even better: it leaves the speeder/tool sheds intact, since the road is now further away from the river.
7 December 2008
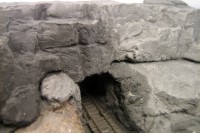 |
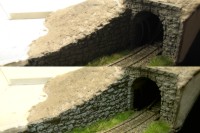
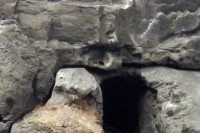
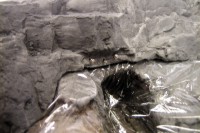
Here's a classic little "day in the life of a modeler" example. The upper tunnel portal, shown at right in a "before" photo, had some problems. The rock mold at that point had some deep clefts that created weak spots, and so the top of the portal broke apart as I pulled the mold off.
So, I performed a bit of surgery. I embedded some pins in the edge of the access panel base to reinforce the new rockwork and help keep it from breaking away; then I pressed a blob of wet Hydrocal onto the pins. When it had dried (but not fully hardened), I carefully hand-carved the graft to match the surrounding rock using a chisel-blade knife.
Although the removable portion of the scenery is clearly visible in the "after" photo, this will not remain so. The obvious joints to the left and right of the portal will all be disguised with vegetation; the portal itself will be heavily weathered, by which time the remaining visible joints will look like natural cracks in the rock face.
In other news, I've solved a dilemma with the farmhouse windows. Replacements were created by clipping the transoms off of N scale etched brass doors from Scale Link.
One last item for the day: I've made a minor change to the plan. The road bridge just outside of Naughtright is kind of like a blinking light: first it's on, then it's off, then it's on... and now it's off, this time for good (check out the progression in various versions of Naughtright). I decided that the contours of the scenery in this area might be a bit too extreme to support the bridge and road; there would likely need to be either retaining walls or rock cliffs or both. So, I axed it. And in its place, the trackside tool sheds have returned—another "blinking light" layout feature that's been on and off a few times.
6 December 2008
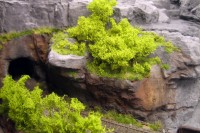 With
the rock casting on the access panel finished, there's been
a (small scale) explosion in scenery-making. Trees have sprouted up on the bluffs over the James River. This
process will likely continue until every square scale foot of terrain that can be "greenified" will
be. It's also got me working on some web pages on modeling greenery.
5 December 2008
With the house all to myself this evening, it turned out to be the perfect time to do some long overdue rock casting (which I do in the kitchen). And so the Landsend Farm access panel got rocked, which will allow scenery-making to continue apace, particularly around Frisch Falls. This significant cosmetic change inspired a new The Layout Today shot.
Meanwhile, the farmhouse has gotten under way, although its construction has not been as smooth as planned; I'd imagined it to be pretty much a straight build of the stock kit. But between ideas for revisions and an unpleasant surprise, it's begun to follow a construction path nearly as twisty as that of the barn.
4 December 2008
WARNING: The Robot Objects website is still live, but the company appears to be quite dead—both of their phone numbers are disconnected, and they are not answering emails. If you've ordered from them recently, you're out of luck. And if you have been tempted to order from them... DON'T.
Copyright © 2007-2013 by David K. Smith. All Rights Reserved.
