
Landsend Farm, Part 3 of 8: The Farmhouse
The appearance of the GCLaser farmhouse kit is somewhat deceiving. For one, the kit was revised since the prototype photo was taken. For another, it's a much more complex kit than one might expect. Not that this is a bad thing in any way; but... as per usual, I simply can't seem to build anything as-is, and so the house was subjected to numerous modifications.
Once I'd separated the parts from the frets, I sliced the foundation off the bottoms of the walls in preparation for making my own stone foundation. This required assembling the walls with braces in all of the inside corners. Other changes were made as well; for one thing, the doors simply had to go—they looked as if they were straight out of a 60s suburban ranch. The doors I chose as replacements were leftovers from Mountaineer Precision Products barn kits (since discontinued), which were of a style much better suited for a farmhouse.
Progress then came to an unexpected halt when I found that some of the window trim pieces were inexplicably missing—I clearly recalled cutting them from the frets, but they had somehow gone AWOL. Ironically, early in the project I'd toyed with the idea of replacing all of the windows with etched brass for a finer, cleaner effect, but then dropped the plan after I considered the effort required to cut new openings in the plywood walls, and decided the ROI was too low to make it worthwhile. But with the window frames missing, I had to revisit the idea of replacement windows—not a pleasant prospect given that the walls had been assembled, making modifications to the window openings a royal pain.
I was about to go to the trouble of installing Micron Art #9110 etched brass windows when I realized that it would not solve the original problem—missing window frames—because they were just windows, with no frames. That's when I expanded my search for potential solutions, and found that the etched brass N scale transoms I had in my spare parts drawer (Scale Link #NF6—the same source of windows for the passenger station) were etched in a way that made it look like they had frames; even better, they were very nearly identical in size to the kit's existing windows, making the upgrade process much less painful—I only had to clear out the openings, instead of cut new, larger ones. Double window sets were soldered together in pairs before bonding them to the walls with thick CA. The final touch was the addition of windowsills cut from .010 x .020 strip styrene.
The house foundation was made from Paradise City Depot stone walls (the same materials used for the barn foundation). Wall parts were cut and fit to the shape of the house, only upside-down; this placed the flat side of the stone wall parts against the underside of the house for a tight fit. After painting and weathering, the wall assembly was then embedded top-down in the Foamcore scenery base.
The porch got the most intense modification of the project. The ceiling was eliminated, rafters (leftovers from MPP barn kits) were bonded to the underside of the roof, new roof supports were made from stripwood, the kit's bulky railings got replaced with slender etched brass parts left over from one of Miller Engineering's Victorian houses, and the floor got new sills. Also of note, the angle of the porch floor was adjusted. If built as the kit was designed, it would be dead flat; but real porches are always angled down so that rainwater will flow away from the house.
The nearly-finished house received cardstock baffles to prevent the "empty building" effect, followed by a couple of light coats of flat white spray paint. I deliberately left the coverage a bit on the weak side, as this tends to give it a natural, slightly weather-beaten look. The porch deck was painted with Floquil Primer, then the posts, railings and roof were installed.
Glazing the windows was a tedious process since the glazing material had to be cut to exactly fit each window opening in the walls in order to sit flush against the etched brass frames. Next, I installed a single LED for lighting, strategically located on what I imagined was the kitchen ceiling. A cool white LED was chosen to simulate a fluorescent fixture—perhaps a big old circline. I also installed a bug light on the porch. The LEDs were wired to a small piece of PC board mounted to the floor that acted as a terminal strip and a strain relief for all connections. Then I attached the roof and applied Paper Creek Model Works cedar shake shingles.
Final detailing touches included some chairs (StoneBridgeDesigns) and figures (Preiser) for the porch; a gutter (brass channel stock) and downspout (brass rod stock) for the porch roof; a TV antenna (Micron Art) and flashing (aluminum foil) for the chimney; a small heater vent on the back of the house (bent sewing pin); and an electric meter (brass wire, a bit of strip styrene, and a slice of styrene rod). The very last items to add came after the house was permanently glued to its foundation: the steps for the porch and back door.

GCLaser's farmhouse kit has the right lines for the setting.
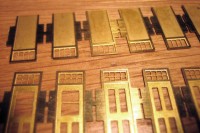
The transoms on these N scale etched brass doors will make new windows.
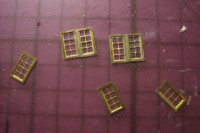
After clipping the transoms from the doors, pairs are soldered together.
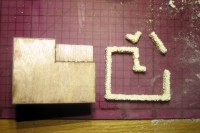
The foundation is made from stone wall parts cut to fit the bottom of the house.
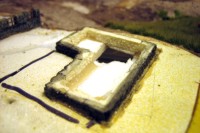
The finished foundation is installed upside-down on the layout.
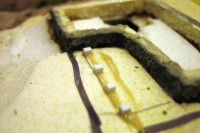
Styrene footings for the porch are glued in place prior to adding terrain.
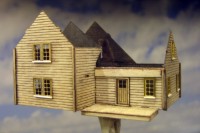
The different materials used to detail the house can be seen before painting.
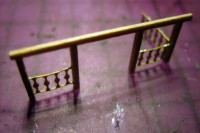
A new porch is made from stripwood and leftover etched brass parts.
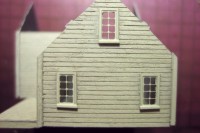
A light coat of paint on unprimed wood simulates a weather-beaten finish.
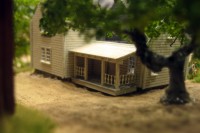
The porch is assembled to the house after everything is painted.
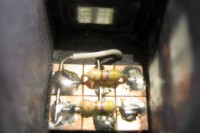
A circuit board is installed inside the house to power the two LEDs.
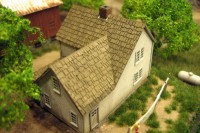
The cedar shake shingles are actually N scale—just don't tell anyone.
Copyright © 2007-2013 by David K. Smith. All Rights Reserved.
GCLaser product photos used with permission.