
Landsend Farm, Part 8 of 8: Cornfield
The cornfield for Landsend Farm posed a special challenge. None of the construction techniques recommended by the corn's manufacturer (Micron Art) or by other sources seemed as though they would produce satisfactory results, and given that the cornfield was located at the front edge of the layout, it had to look really good. In particular, I was seeking a reliable way to precisely space the rows, as well as to simulate the furrows in between, as seen in the reference photo at right.
I'm not certain how it happened, but double-sided foam tape came to mind. Corn rows are typically spaced between two and three feet apart, and 1/8-inch thick foam tape (available from TapeCase) would separate the rows by about 28 inches—perfect. It then became a matter of finding a way to modify the foam to simulate the furrows. Knowing that heat tends to cause foam to shrink, I first tried a soldering iron. While it worked, the depression was poorly shaped, and it took quite a bit of time to get the foam to deform—time that would be multiplied by the many rows involved.
Then I struck upon a risky thought: expose the foam to a flame, with the hopes that the adhesive along the top and bottom surfaces of the foam strip would prevent the edges of the foam from shrinking as much as the center, thus possibly producing a curved depression. Using a "clicker" lighter, I held the flame to the side of the vertical tape spool, very nearly in contact with the foam. To my amazement, it worked perfectly.
Note: If you're inclined to try this yourself, be extremely careful. The foam itself is relatively flame-retardant, but the paper separator is not, and it will catch fire. The foam does not shrink quickly, which means the flame must be held next to the tape for a period of time; meanwhile, the paper separator will begin to singe, and eventually ignite. A fire can be extinguished easily enough by just blowing on it, but by then the foam will be ruined. Therefore, careful timing is a must!
The furrowed foam tape was painted while still on the spool, since painting the tape would not be convenient once it was assembled to painted corn. I simply sprayed the edges with a few light coats of Floquil Roof Brown; the natural texture of the foam made for a good-looking, earthlike surface.
Next came the corn, Micron Art #1008 X 3. To make handles for painting, I taped the edge of each fret to the edge of the cardstock to which it was attached for shipping, and sprayed both sides of the fret with Testors Gloss Green. Then I taped the cardstock to the edge of a shelf in the garage allow the corn to dry.
Before assembling the cornfield, I cut a piece of Foamcore to match the contour of the long edge of the space. The field both curved and sloped; plus, it sloped in two directions at once! Not to mention that three of the four sides of the field ran on angles. The Foamcore piece provided both a guide for the complex shape, as well as a means to mount the assembled field on the layout. I applied a strip of painted foam tape to the Foamcore, followed by corn, which I "buried" a little to simulate younger plants. It then went on from there like lasagna, with alternating layers of tape and corn.
This is where the project started to turn just a little sour. I hadn't realized that the Micron Art corn was meant to remain fixed in silhouette; I thought the plants could be twisted with tweezers into 3D shapes in order to improve their appearance from all angles, particularly endwise, as opposed to just side-on. But the stalks were generally too thick to allow bending, and some plants were actually connected to others, making bending impossible. So, the process became something more like "controlled mangling." A few test photographs taken along the way helped determine if I was on the right track.
I'd briefly considered starting over using minitec kits instead, but I'd already invested enough scratch in this project as it was; plus, minitec's exquisitely delicate corn plants were designed to be shaped one leaf at a time, and I envisioned myself still bending leaves at an assisted living facility. Finally, after mangling the corn into something reasonably acceptable, the field was misted with Dull Cote prior to permanent installation on the access panel. The end result was not as good as I'd hoped, but good enough to do the job.
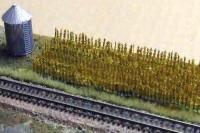
This is how the Micron Art corn kit is presented by the manufacturer.

Cornfield image Copyright © 2007 by Derek Ramsey. Used with permission.

The key to both row spacing and furrows is the heat-deformation of foam tape.
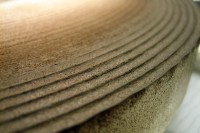
The deformed foam tape is sprayed with Floquil Roof Brown paint.
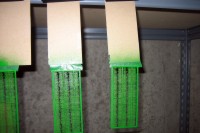
The etched brass corn plants are sprayed with Testors Gloss Green.
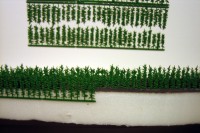
Corn and foam tape are sandwiched together in alternating layers.
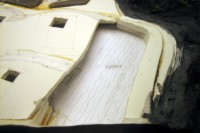
A hole on the access panel accepts the cornfield assembly.
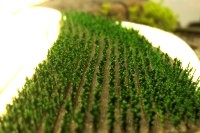
The finished cornfield is placed in position for photographic study.
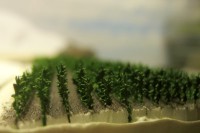
This low-angle view captures the furrows created by the modified tape.

Later, the cornfield is surrounded by scenery material to blend it in.
Copyright © 2007-2013 by
David K. Smith. All Rights Reserved.
Micron Art product photo used with permission.