
Website News Archive: August 2009
25 August 2009
With a family wedding (extended family, but just as involved) on the way, there won't be much time left for modeling for the next couple of weeks, so I've decided to fire off a new overview of the layout.
23 August 2009
 |
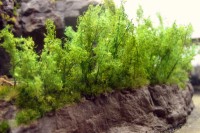
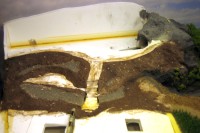
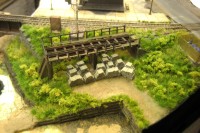
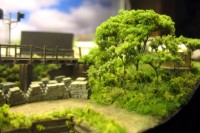
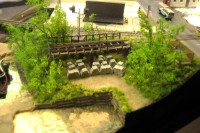
Today's lesson was about how more can be better. I'd relocated the trees removed from around the coal trestle, merging them with the trees in the foreground along the river (top photo). That's when I realized my mistake with the trees I'd originally placed around the coal trestle: not enough of them. It wasn't the quality of the trees that was the problem, it was the quantity. So I dug through my drawer of trees and came up with several dense bunches (they're supposed to be bamboo, but they can also pass for young trees of some anonymous species).
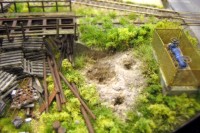
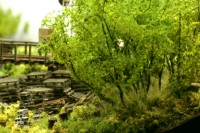
After tearing out the ground cover between the coal trestle and the water main valves to make room for three fat bunches of trees (second photo), I planted them in their respective craters and filled in the ground around and between them with tall grass tufts. The result was the precise look I had wanted all along (third photo), and now the whole area began to take on a finished quality that made me want to shrink myself down to 1:220 and go exploring. Of course, this is all forcing me to get to work on the lumber shed, and finally finish it so that the whole foreground area will at last be done.
22 August 2009
 |
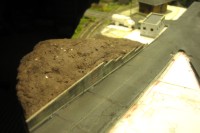
Although it may seem as though I'm totally obsessed by the junk pile under the coal trestle, I have in fact been working on other things as well. I've begun adding curbs to the streets so that I can move forward with scenery in certain areas—in particular, the hill over the tunnel. Curbs are a snap: strips of .030 x .060 strip styrene, distressed, painted, weathered, and bonded to the edge of the street with CA.
The hill over the tunnel required a retaining wall along Railroad Avenue; since this wall faces away from the viewer, simplicity was the order of the day—a piece of grooved sheet styrene did the job. The instant it was installed, I had a batch of Sculptamold mixed up and ready to apply. As per usual, the batch was too large, so I used up the excess on the area around Landsend Farm Pond.
21 August 2009
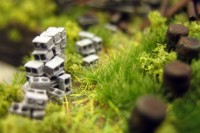 Being
the detail freak that I am, I continued to work on the newly-renovated junk pile under the
coal trestle. This evening I added a collapsing pile of cinderblocks—good ones,
courtesy of the Lew Skroo's kit from BAZ. Even though they're a serious challenge to paint and secure in place (I crushed three
of them with my tweezers, and plugged up a fourth with CA), I'd love to have bunches more of them. Perhaps I can convince Robert
Ray to sell them separately...
20 August 2009
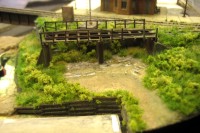
Sometimes I'm asked how I come up with my ideas. How do I plan the things I build? Well, more often than not, I don't plan much of anything at all. If I've done something by design, it's often based on real world observations. Usually, however, things happen as a result of a sequence of events—a sequence that could never have been planned out in advance. Here's a good example of how this process of serendipity works.
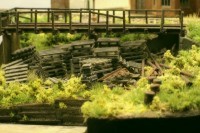 |
After removing all of the trees from the area around the coal trestle, I went one step further and removed the objects from under the trestle as well. These were supposed to represent stacks of cinderblocks, which I'd adapted from stacks of N scale bricks made by California Freight and Detail. But they've been bothering me all along (one Z scaler remarked that they looked like silver bullion). Perhaps as a background detail they'd be fine, but in the foreground they just never worked; besides, the whole area seemed too "neat and tidy" for my taste—I wanted the look of years of neglect.
Meanwhile, I've been struggling over where to locate some piles of old pallets I'd wanted to put somewhere in the lumber yard—there just didn't seem to be anyplace with enough room for a decent collection. When these two independent issues finally collided (what took so long?), the answer suddenly became embarrassingly obvious: stacks of old pallets belonged under the trestle... replete with weeds, scrap lumber and other junk. This is pretty much how things really were at two lumber yards in the town where I grew up: the areas beneath the disused coal trestles essentially became dumps.
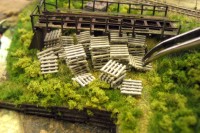
Naturally I found some pallets in my obscene supply of Z scale kits and details. Made by RSLaser, they seemed to be a bit large, and indeed when I compared them to some Micro Engineering N scale pallets, I found that the N scale ones were actually slightly smaller! Now, I know that pallets come in different sizes, but I thought this seemed to be a bit of a stretch. So I checked the pallets that came with the Lew Skroo's kit from BAZ, and these seemed to be the "right" size—but there were only four of them. Granted, pallets are easy enough to make from scratch, but I also wanted a good healthy heap of them, and wasn't looking for that sort of model-making entertainment.
My solution? I cut down the Micro Engineering N scale pallets so they were a little smaller, and sprayed them with light grey primer followed by irregular shots of Floquil Instant Weathering to give them individuality. After covering most of the exposed earth with weeds, I placed the pallets in carefully-planned disarray under the coal trestle, and gave them a final India ink wash. Then I finished things off with bits and pieces of "lumber" scrounged from laser-cut kit frets, plus some other assorted discarded items including old rusted pipe and general miscellaneous unidentifiable junk. Now it looks just the way I'd always wanted, and this has added to the amazingly rich history of this tiny corner of the layout.
18 August 2009
 So
now the foreground area around the coal trestle is back to weeds and grass. SAMtrees didn't
cut it, SuperTrees didn't cut it, and that pretty much leaves me with DIY trees. Starting with some
online inspiration,
I've got a simple tree armature winding device on the drawing board to mass-produce twisted wire parts, and I'm looking at
new sources of foliage; I'm even considering possible improvements to the weeds and grass.
16 August 2009
 Further
observations on trees... my comment yesterday about how delicate SuperTrees are came to startling reality when I snapped the
one tree in the photos below in half by simply blowing on it gently to remove loose ground foam. I turned that minor tragedy
around by breaking off the lower branches to make small trees and saplings, and temporarily positioned these on the layout.
I can't decide if it works or not, because I'm not sure if the results look like small trees, or just tiny bits of weed covered
in ground foam. SuperTrees look extraordinarily good in larger scales for full-sized growth—some N scale scenes I've seen are
jaw-dropping. But when working with individual pieces to make Z scale saplings, the results aren't as convincing. I just might
have to bite the bullet and start fabricating my own trees from scratch for the foreground areas.
15 August 2009
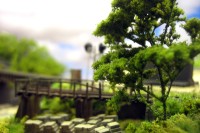 |
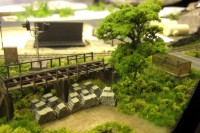
Working on the scenery around the area of the fuel oil company has had me studying surrounding areas as well, including the terrain around the coal trestle. After a time, I became dissatisfied with the trees. Despite using what, to my eye, look to be the finest commercial trees available, I came to the conclusion that, while acceptable in the background, in the foreground they suffered for being what they were: foliage material glued to twisted wire. That's not to say this isn't a viable technique; some modelers have made extraordinary trees using these materials. I bought them to save me the trouble, and as has happened time again, my efforts to save effort didn't pay off. And the more I looked at the foreground area—especially macro photos of same—the more dissatisfied I became.
So, with a need to take some kind of action to make improvements, I tore out all of the trees around the coal trestle—carefully, as I intend to use them elsewhere—and patched up the small craters left behind with weeds. Then I cracked open a large, sealed box of SuperTrees I had tucked away in hopes of using them on an N scale layout someday (which may not happen), and started picking through the dry, musty weeds in search of candidates. When I found a couple, I marched them out to the garage along with a can of grey primer, a can of spray adhesive, and a jar of fine ground foam. I returned with my first "SuperTree," which I (temporarily) planted and photographed for evaluation. It certainly has more natural lines than the twisted wire trees it replaced, but I think I'll have to refine some of my techniques—for example, I need to find a way to remove the ground foam from the trunk. Also, I'm somewhat concerned over how incredibly delicate and susceptible to damage it is—at least if the twisted wire trees were damaged, I could easily bend them back into shape. I think I'll make just a couple more, and then live with them for a while to see how I feel about them.
11 August 2009
 Let
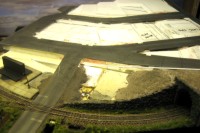
there be... asphalt! Well, the phrase doesn't exactly roll off the tongue, but it sure
represents a huge difference to the layout. After reducing my brains to mush with two back-to-back "extreme animation"
projects, I needed to do something much simpler. But I also wanted to have some level of impact greater than 2 by 4
scale feet. The answer was to finally paint, weather and install the streets of Naughtright. With the one-piece street system
finally in place, I wasted no time and immediately embedded the Canal Street storm drain in paving
material (sanded caulk), and completed the Canal Street grade crossing, which has been an
eyesore since... heck, I can't even remember since. See, mush for brains!
Copyright © 2007-2013 by David K. Smith. All Rights Reserved.