Canal Street Storm Drain
I can just hear the thoughts of readers as they wonder how a Z scale storm drain rates an entire web page—here or anywhere else, for that matter. I confess that I do perhaps take absurd delight in minutiae. If it helps, think of it as a unique experience: where else would you find a website with a page about a Z scale storm drain?
Now that I've got that bit of uselessness out of the way, let me say that making a Z scale storm drain—properly, at least—is not the easiest thing to do, particularly since no one to my knowledge manufactures one. But, I contend that it's something one must make if one aspires to achieve realism.
The notion of making it in the first place occurred to me as I was planning the street to the right of the passenger station. Wearing my civil engineering cap, I noticed that the street sloped down to the grade crossing, with a slight dip just before the tracks. It dawned on me that this would create a flooding problem during heavy rain, and so I made plans to install a storm drain where one logically belonged.
Storm drains come in all shapes, sizes and styles; Google "storm drain" (that is, if it's inconvenient to take a short drive) and you'll find enough variations that an array of other objects may look substantially similar. So, for me it was a matter of sifting through my burgeoning collection of etched metal kits and details.
As an aside, I have this habit of collecting almost anything made of etched metal, even if it's not directly relevant to my modeling, or even to railroads—there are loads of potentially useful items made for ships, airplanes, tanks and so forth. Admittedly it can be an expensive habit, but it can pay off at times like these. (This could lead to a tangential discourse on why Europeans tend to be so far ahead of Americans in the detail parts market; I'll save this for another time.)
I'd considered several possibilities, including fences, locomotive grilles, outdoor furniture, and so on. The problem with most of them was that the openings were too small; while they looked great in raw brass or stainless steel form, I anticipated that painting and weathering might tend to fill them in. (Not to mention they may possibly be too small to notice, which could lead to yet another tangential discourse along the lines of "how big is a Z scale brick"; I'll save this for another time as well.)
When I came across a porta-potty kit from 1zu220-Modelle (#15002, Dixi-Klo), it seemed I'd found the ideal storm drain grate substitute. Porta-potties are too modern for my layout, but as I'd said, I buy stuff whether it's relevant or not, and for precisely this reason: a component of any kit may come in handy as something entirely different.
As it happens, included with the porta-potty were several small palettes, presumably used for porting said potties. The slots were perhaps a tad large, but after painting and weathering, they ought to be about right.
I suppose I could have just painted the grating, glued it right to the road, and be done with it; but no, I had to go and get all serious about a freakin' storm drain. As an attempt to justify all of this nonsense, the drain will be located less than two inches from the front edge of the layout, right next to the track, so it will fall under a fairly high level of scrutiny.

Who would ever guess that a porta-potty kit could provide a storm drain?
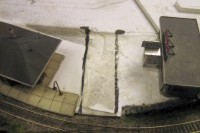
Canal Street slopes downhill toward the track, and is in need of drainage.

This etched brass part makes a perfect storm drain grate.
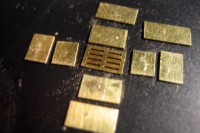
The parts to make the storm drain are cut from an etched brass fret.
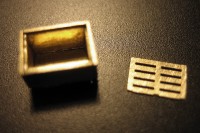
The assembled storm drain is ready for painting and weathering.
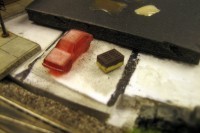
A hole is cut in the scenery base for the finished storm drain.
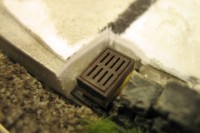
The drain is glued into place on the access panel.
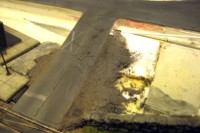
The drain is surrounded by paving material.
I began construction by clipping the etched brass palette apart to extract the future drain grate. Next, I cut nine small pieces from a brass fret (frets are so very useful—I never throw anything out) for the drain enclosure: two were needed for each side to make the stepped lip, and one for the bottom.
After painting and weathering the drain and grate (Floquil Weathered Black followed by Doctor Ben's Weathered Rust), I bonded the grate in place on the drain enclosure. One may wonder why I went to the trouble of painting and weathering the parts separately; well, believe it or not, I discovered that the shiny interior of the drain reflected light through the grate, so it had to first be painted inside before the grate was attached. After final assembly, I installed the drain on the layout; later, when the road was built, the drain was completely surrounded by pavement, flush with the top.
So ends my storm drain story. And for those of you who may think I'm alone in my obsession, I'm not.
Copyright © 2007-2013 by
David K. Smith. All Rights Reserved.
1zu220-Modelle product photo used with permission.
