
Streets and Roads, Part 1 of 4: Paved Road Surfaces
Realistic roads go a long way to heightening overall layout realism. But roads often get neglected, I think because modelers don't know how to model them either from a design standpoint, or a materials standpoint, or both.
How wide are roads, anyway? If you research this topic, you'll find there are really no universal standards. Various state and local municipalities may post guidelines, but you'll also find a myriad of variations in real life, from narrow, white-knuckle country roads to generous, multi-lane urban thoroughfares. Road dimensions will vary according to age, budget, traffic, and special needs such as turn lanes, shoulder parking and so on. Pay attention to the roads you drive on, and you'll get more than enough ideas. I'll start with about an inch (18 scale feet) for a typical little country road or narrow side street, and work up from there; I keep a few Z scale vehicles on hand while I'm designing my roads to make sure things stay believable-looking.
What to use for a road paving material is a Frequently Asked Question, and you'll get nearly as many different recommendations as responses. For my N scale layouts, I used my own concoction of 50-50 Sculptamold and Hydrocal, tinted with black powder dye. The Sculptamold extends the working time of the Hydrocal, and gives it a nice texture. I wasn't too sure about using my "special mix" for the James River Branch, however; the texture was probably too coarse for Z scale, and I'd be working in some extremely tight little corners. I was also faced with a number of challenges, including a grade crossing through a turnout, an entire town that's removable, and others.
So, for absolute control, I decided this time I'd try sheet styrene... only I'd use black styrene instead of white. Why black? After all, roads aren't black; they're grey. What I liked was the idea of having black underneath the grey paint, so that if the paint was scratched or worn, I wouldn't have bright white showing through. (The exception would be areas modeled as concrete instead of blacktop, where I'd switch to white.)
Black styrene isn't easy to find—I've never seen it in a hobby or craft shop. But, as it happens, I found an online source back when I built the roadbed for this layout, and I'd ordered a couple of different thicknesses to have on hand (not knowing what other applications it might serve). The .030 sheet seemed perfect for road surfaces.
To establish the road, I traced along the edges of a strip of masking tape with a pencil. Then, to make all of the oddly-shaped pieces needed, I made paper templates, and traced them onto the styrene with a sharp knife. I cut the sides of the road parts on an angle to simulate the slope of the edge of the blacktop. The road surface was sanded and distressed, then sprayed with a couple of shades of primer grey.
Road stripes and other markings turned out to be much easier with styrene streets, since they could be applied before the roads were installed (making road stripes in situ is not fun, I can tell you). For large features, such as the wide lines at stop signs, I used masking tape to outline the shapes, and lightly sprayed the area with paint. For road stripes, I used a colored pencils; they make crisp, narrow lines.
Installing the roads provided an opportunity for some added realism. Real roads are built up in layers, and so I attempted to model the type of macadam used for the base layer, which is a blacktop material that's higher in aggregate (gravel) and lower in binder (asphalt); this can sometimes be seen along the shoulders. I started with a material I'd tested for use as a blacktop, but rejected due to the amount of effort required to shape the surface: sanded caulk.
Sanded caulk is sold as a substitute for standard tile grout; it differs from regular caulk in that it has a much longer open time, so it can be "finessed" for a longer period. It comes in pale colors like tan and grey, which were too light for this application, so I added some black and brown powdered dye; I also threw in some Z scale ballast to give it a little more texture.
I applied a glob to the layout, pressed the styrene road part into it, then carefully shaped the caulk along the shoulders with a knife. Once the caulk was cured, I weathered the road with powdered chalk: black along the center of the travel lanes for oil grime, and tan along the shoulders for mud and dirt.
The city streets were made from the same material but using subtly different methods. First, the street boundaries were marked on the layout with a Sharpie. These lines were traced onto plain paper with a pencil. At this point I took the time to triple-check the road geometry by placing the structures on the paper and adjusting the lines as needed. Then the lines were transferred to the styrene by taping the paper down and lightly cutting along the lines with a sharp knife. The streets were separated from the sheet by cutting along the knife marks.
After the streets were extracted from the styrene sheet, the surface was sanded to add fine texture. Crowns were created by burnishing the back of the styrene with a screwdriver handle against a carpet. The surface was distressed with a pointed cutting bit in a Dremel tool, then holes were cut for storm drains.
Painting consisted of several layers of various grey color spray paints, from light Krylon Metal Primer to Floquil Grimy Black. Cut and torn paper masks were used to create areas were different "vintages" of asphalt met. Afterward, lines were applied with colored pencils; then streaks, stains and other grime was added using powdered chalks. Once decorated, the streets were installed on the layout with construction adhesive (Loctite Power Grab) over strips of cardstock to help maintain the crown shape.
This method provided perfect control over the street geometry, and simplified the process of making curbs and sidewalks: because curbs are flexible, it's easier to make them fit against a street, rather than cutting a street to exactly fit against existing curbs. Z scale is far less forgiving, given that curbs are only a few thousandths of an inch high.
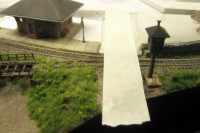
The road is marked out by tracing along the edges of a piece of masking tape.
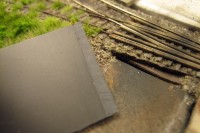
The back of the styrene part has a relief to clear the tie ends at the crossing.
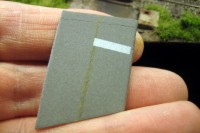
The road is spray painted grey and markings are added before installation.
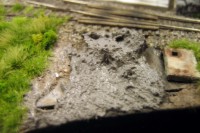
The special sanded caulk mixture is applied to the layout.
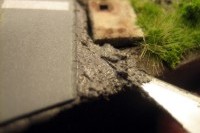
The caulk is shaped along the edges to simulate the shoulder.
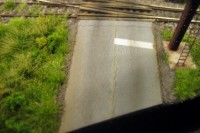
Powdered chalk weathering is applied to complete the road.
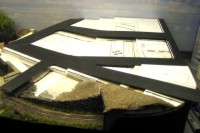
The city streets are all cut from a single piece of styrene.
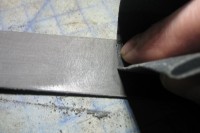
The styrene is sanded to give the surface some fine texture.
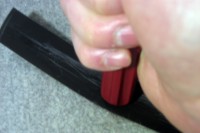
A crown is created by firmly burnishing the back of the styrene.
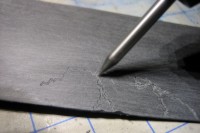
The street surface is distressed using a sharp pointed cutting bit in a Dremel.
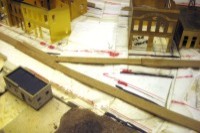
Cardstock strips are installed to help maintain the crown profile.
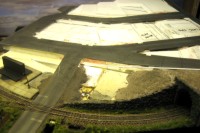
The street system is bonded to the access panel with Loctite Power Grab.
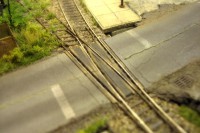
The pavement for the access panel butts up against the grade crossing.
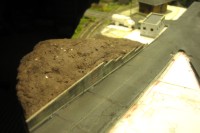
Curbs are made from .030 x .060 strip styrene bonded to the edges.
Speaking of those curbs... I made mine from .030 x .060 strip styrene. I scribed joint lines every inch or so, sprayed them with Testors Light Aircraft Gray, weathered them with a light India ink wash, and bonded them right to the edges of the streets with plastic solvent.
Copyright © 2007-2013 by David K. Smith. All Rights Reserved.