
Stephen A. Greene & Sons Building Supply, Part 3 of 6: Foundation, Weigh Plate and Outbuilding
Random modeling tip: To increase the realism of virtually any structure, give it a foundation. Everything needs one, from a relay shed to a skyscraper, and yet few kits provide proper foundations. Not only do they enhance realism, but they add versatility, since they allow buildings to be installed on slopes or uneven ground.
The foundation for the building supply structure was built up from layers of sheet styrene, which were cut using the building itself as a pattern, allowing for strips of left over etched brass brick material to be bonded along the edges. Then styrene positioning blocks were bonded to the foundation inside the building so as to maintain its precise position.
Incorporated into the foundation base were footings for the overhang support posts, and the concrete pit for the weigh scale. An N scale etched brass plate from Kestrel Designs got sliced into three pieces, soldered back together, and trimmed down to suit the Z scale space, fitting perfectly under the building overhang by happy accident.
After painting and weathering the foundation, I painted and weathered the weigh plate. To achieve the look of old, well-worn steel, I first sprayed it with a dark brown primer. After applying an India ink wash, I sprinkled powdered graphite over it, and gently rubbed it in with a paper towel; this gave it the right look, and also brought out all of the surface details.
Once the foundation was secured to the layout, I added concrete steps for the doors, then filled in the surrounding area with ballast to simulate gravel, which I bonded in place just like ballast. To kill the "fresh gravel" look and give it a sense that it had been there a long time, I brushed in light earth-colored powdered chalks.
The final touches on the building included a small roof over the freight doors, which was made from a scrap of ply attached to brackets cut from Lew Skroo's loading dock brace parts, and finished with a slice of corrugated metal; brass gutters and downspouts; and the light over the door on the Nail Brothers part (transferred from the original location on Lew Skroo's half).
In addition to weeds and grasses, the surrounding property was detailed with piles of assorted building materials, such as scrap lumber (cut from kit frets), cinderblocks, pallets, barrels and crates (resin cast details from the original kits), and all manner of building supply flotsam and jetsam.
The outbuilding is hardly worth describing; it's the Lineside Tool Shed kit from Micro-Trains, which, incidentally, is manufactured by Robert Ray, the same fellow responsible for Nail Brothers and Lew Skroo's. It was built using the same techniques as the main building; modifications include changing the doors, adding new corner molding, and using corrugated metal for the roof. It was mounted on a concrete slab foundation made from thick sheet styrene.
Behind the business is a coal trestle, which is a common circumstance in real life; Part 4 shows how I scratchbuilt it.
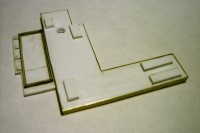
The styrene foundation is edged with leftover etched brass brick.
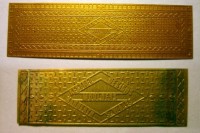
This N scale weigh plate (before, top) is cut down for use in Z (after, bottom).
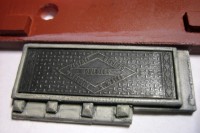
The finished weigh plate is installed in the pit on the foundation.
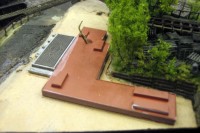
The completed foundation is installed on the layout.
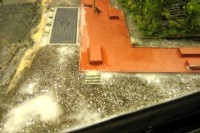
Steps for the doorways are installed just before adding and bonding ballast.
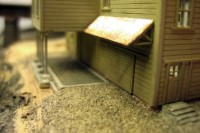
Powdered chalk is applied to the gravel to make it look older.
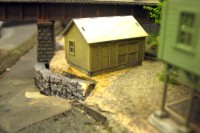
The Lineside Tool Shed from Micro-Trains serves as an outbuilding.
Copyright © 2007-2013 by David K. Smith. All Rights Reserved.