
Streets and Roads, Part 4 of 4: Dirt Roads
There's no one best way to make dirt roads; there are nearly as many different techniques as there are modelers building layouts. The procedure I use is governed mostly by the modeling scale: some tricks used by other modelers, such as applying real sifted dirt, produces a surface that's too coarse-looking for Z scale.
To be honest, I discovered my technique by accident. While applying a Scultpamold terrain surface to a layout some years ago, I started shaping the material with a wet finger, as the tools I had at hand weren't producing the desired shapes. It turned out that Scultpamold repeatedly smoothed with a wet finger produced a convincing dirt road surface.
I've since refined the technique. First, I add some cheap tan artist's acrylic paint to the Scultpamold and brown powdered concrete dye mixture, which extends the open time and allows more smoothing. After applying small globs along the roadway subsurface, I first shape the material using a small spatula, then my finger, until the road more or less assumes its final contour.
This marks the start of a long process of "surfacing," which consists of repeatedly stroking the road with my finger to smooth out irregularities. At some point the Scultpamold may become rubbery, and further shaping often makes it rougher instead of smoother; when this happens, it must be left alone to set some more before the smoothing process can resume. This cycle may need to be repeated a few times.
When the Scultpamold finally starts to set firm, I'll stroke it again, this time more firmly, to give the surface the final smoothing it needs; I may even use my fingernail to help improve the smoothing process. Remember, even a dirt road is nearly as smooth as glass at 1:220; the temptation to leave the Scultpamold in a rougher state must be avoided in order to achieve a realistic surface in the end. Any texture that's evident is usually a series of subtle streaks in the direction of stroking, which effectively simulates tire tracks. For certain areas, such as around the barn, I'll add tractor tire tracks by repeatedly rolling an N scale tractor around; because this effect is best when it's subtle, it's done when the surface is very nearly set.
Once the Scultpamold is fully dry—which can take 24-48 hours—I brush on Floquil Mud, thinned roughly 2:1 DioSol to paint. This corrects the color and seals the surface. The final step is to brush on various tan and brown shades of powdered chalk. This tones down the brightness of the Floquil Mud, adds some natural irregularities to the color, brings up some of the surface texture, and creates (quite literally) a fine layer of dust on the road and nearby surfaces. Note, too, that dirt roads are sometimes "oiled" (literally sprayed with oil) in order to keep dust down; this can be simulated using dark brown or even black powdered chalk, applied sparingly.
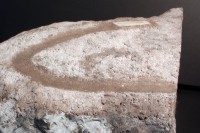
A dirt road can be made by shaping the fresh terrain with a wet finger.
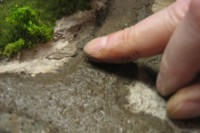
The surface is repeatedly stroked in order to make it smooth.
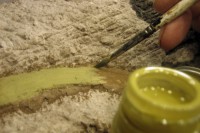
Thinned Floquil Mud is brushed onto the road surface after it's dry.
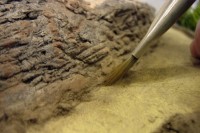
Powdered chalks are applied to adjust the color and add natural variations.
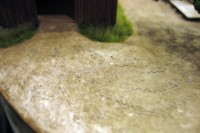
Tire tracks are made by rolling a model tractor over the nearly-set surface.
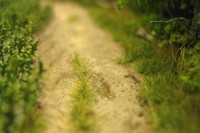
This road has ruts with mud puddles and a strip of weeds down the middle.
For roads that are not thoroughfares, such as driveways or areas around a plowed field, I'll add strips of weeds down the middle (tiny Silflor grass tufts), as well as mud puddles in the ruts here and there. Mud puddles are made with carpenter's glue for dark wood, applied with a toothpick.
Copyright © 2007-2013 by David K. Smith. All Rights Reserved.