
Sidewalks and Foundations
One of the most overlooked details on layouts also happens to be one that can add a great deal of realism: foundations. Virtually everything that's built in the real world has one, from a signal stanchion to a skyscraper, yet it's rarely seen as part of kits; it seems that only recently kits are beginning to include foundations, or at least hints of one.
All too often we see layouts with buildings resting directly on the ground, sometimes with visible gaps under them where the foundation belongs. Yet foundations are relatively easy to make; in most cases, a piece of thick styrene cut to the outline of the building is all you need, unless your structure is on a slope, in which case you have just a little more work to do.
Foundations not only add realism, they can add interest. Consider embellishing a plain poured concrete foundation with a surface treatment to make it cinderblock, cut stone or brick. You only need a few scraps of leftovers from other kits to accomplish this. To add yet more interest, consider adding a window or two, perhaps with window wells to drop them below ground level.
I've rolled sidewalks into this step because they are often integral with foundations in a city or town setting. In my case, I had to contend with sloping streets. At first I thought this would make things complicated, but in the end it wasn't as difficult as I'd feared.
For level areas, I started with a sheet of styrene that encompassed all of the buildings that shared the same level area, and cut it to fit flush against curbs which were already bonded to the edges of the streets. To ease the process of fitting the sidewalks to the curbs, I made templates by placing a piece of paper over the area and rubbing a pencil along the edges of the curbs. After cutting out the basic shape, I filed and sanded the edges until the piece fit precisely.
Since sidewalks usually obscure building foundations in level areas, I prepared the sidewalk surface with positioning blocks made from strip styrene to hold the buildings where they belonged. Then I scribed in sidewalk joints and maybe a few cracks here and there, painted the surface (light aircraft grey spray paint), weathered it with a light India ink wash, and then permanently bonded the piece in place.
Knowing full well it would be a modeling challenge, I placed the streets on a slope for two reasons: first, it's rare to find an eastern town that's dead flat end to end—thus, slopes add realism and visual interest. And second, the town must clear the helix hidden beneath it, and if it was flat, the town would tower high above the river, which would strain believability (the retaining walls at the end of town are already a bit too tall for my liking).
Creating the foundation/sidewalk sections for the sloped areas involved three steps: first, making the building foundation as a separate piece; then making the sidewalk, also as a separate piece; then carefully planning exactly where these two parts would meet. This third step was crucial to maintain realism—but it also simplified the process.
Ordinarily buildings have one entrance, so it was a simple matter of mating the sidewalk and foundation at the doorway. Some buildings have more than one door (e.g. the five and dime), and others have extra-wide entrances (e.g. the theater). In the former case, I'd align the sidewalk with the door at the high end of the slope, and add steps to the door at the low end (the opposite would not be plausible). In the latter case, I did a lot of sanding, filling, and more sanding to get the building side of the sidewalk to run level with the entrance while the opposite side matched the slope of the street. All that was really required for success was patience to make it through a long trial-and-error process.
I get a lot of compliments for my street scenes, and I'm often asked how I achieve such realism. The answer is that I mimic how things are built in real life: I model streets with fully-rendered storm drains and separately-applied curbs, separate sidewalks, and foundations for every structure. It's extra work—one could take many shortcuts—but the results speak for themselves.
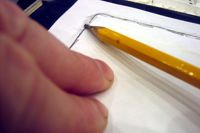
A paper template for a sidewalk piece is made by rubbing a pencil along curbs.
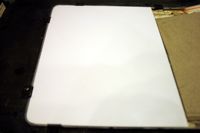
A piece of sheet styrene is cut to fit precisely against the curb.
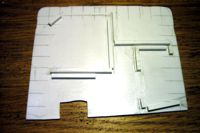
Positioning blocks made from strip styrene hold the building in place.
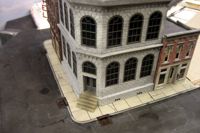
The sidewalk is painted and weathered before permanently bonding it in place.
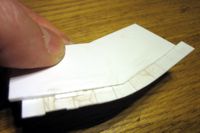
This sloped sidewalk meets the high door; steps are added for the low door.
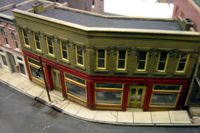
The foundation is visible above the curb on the left end of this building.
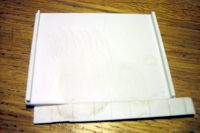
The sidewalk at the theater entrance requires careful filling and sanding.
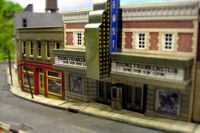
Patience is the key ingredient for success at creating this kind of scene.
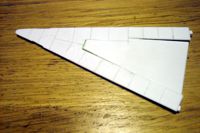
The foundation of the corner bar is aligned with the sloped sidewalk part.
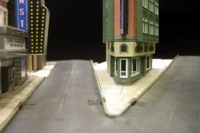
The sidewalk meets the bar foundation at the main entrance on the right.
Copyright © 2007-2013 by David K. Smith. All Rights Reserved.