
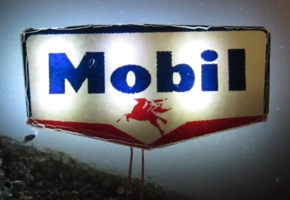
Rotating Lighted Sign
First Generation
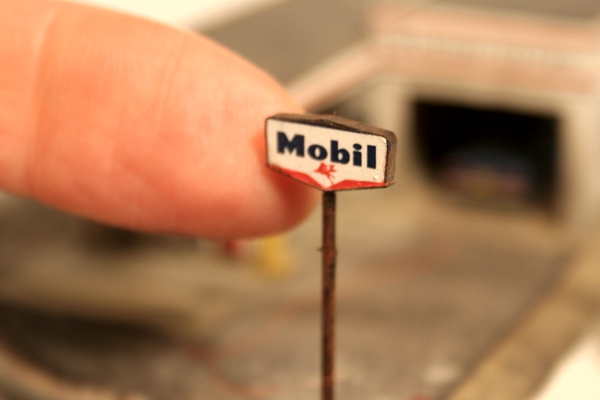
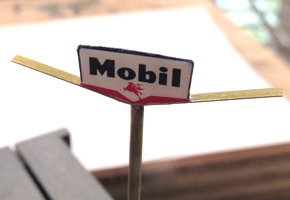
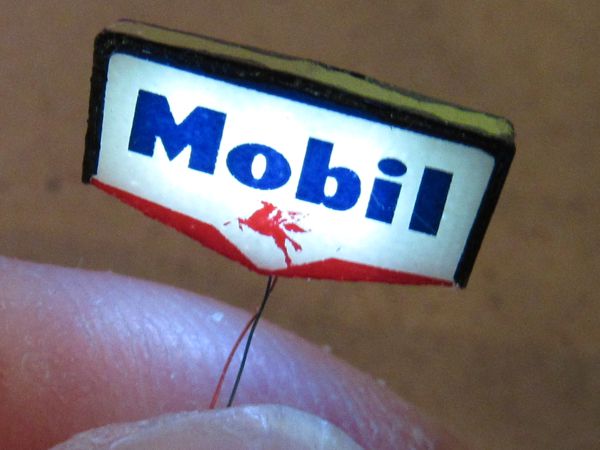
This was far more challenging than one might expect just looking at it, mostly because of its size: my goal was to make it as small as practical to keep it in the realm of believability. It wound up mighty small—almost too small to make.

The sign started with a piece of clear plastic cut to match the size and shape of a Mobil logo decal. I drilled this piece edgewise vertically to accept four axial lead microbulbs. I then made two trim pieces from strips of brass, one for the top and sides, and the other for the bottom. I drilled these to accept the wires from the microbulbs, which I carefully soldered to the strips and filed smooth. This had to be done while the strips were bonded in place on the clear plastic, which made for a very tricky operation. Once I succeeded at that, I then applied the decals to both sides of the plastic. It took about a dozen tries to reach this point!
Next, I soldered the bottom trim strip to a length of thin-walled brass microtube—another tricky solder job—through which I threaded a piece of fine solenoid wire I soldered to the top trim strip—yet one more hairy solder job. The microtube slid into a telescoping brass tube that served as the main post for the sign. To the bottom of the tube I attached a brass contact ring with an insulator inside, and soldered the wire from the top of the sign to it. Wipers riding the ring supplied one leg of power to the lights; the other leg was provided by the sign post itself. Finally, I fitted a plastic pulley to the bottom of the microtube assembly, and connected it to a low-RPM motor with a rubber belt. The same motor also powered the working car lift inside the station.
There were times when I didn't think I'd succeed, and I'd walk away from the project. But I kept returning to it, and eventually got it working. Today it resides on Rick Spano's layout, although most of the bulbs have burned out and the belt keeps breaking.
|
|
Second Generation
Once I'd finished the new excavator, I was hot for another trip down nostalgia lane doing the things I'd dreamt about redoing for the last twenty years. This was one of them. However, it was good that I waited: this would not have been possible 10 or maybe even 5 years ago; technology had to catch up with my dreams. The first challenge was to devise an LED substitute for the axial lead microbulbs of the first generation sign. I spent a day and a half experimenting with various SMD LEDs, which was frustrating to the point that I nearly gave up. But, it all was reminiscent of what I went through the first time, so I powered through the failures, taking away those things that worked from each iteration. Ultimately I arrived at a design using a dozen prewired cool white 0603 SMD LEDs assembled in pairs, three pairs assembled into a group, one group for each side of the sign. (One may wonder why I didn't use discreet LEDs—not prewired. Well, the wires actually made the LEDs much easier to handle; plus, it's what I had on hand!)
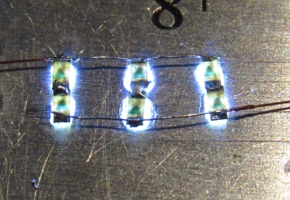
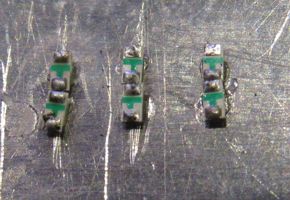
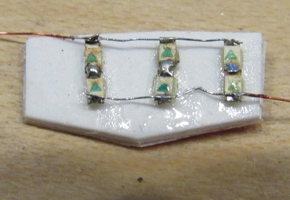
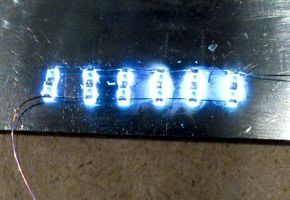
First, for each of the two sides of the sign, I bonded one LED to a steel ruler with CA, and removed the leads. Next, I bonded a second LED right underneath the first, and removed the leads. I repeated the process twice more, positioning the LED pairs in parallel, evenly spaced columns (above, top left). After I soldered the LED pairs together and connected the three pairs with fine solenoid wire (above, top right), I tested the LEDs (above, bottom left). Then I gently sliced them free of the ruler with an X-Acto, bonded them in place on the back of the sign, (above, bottom right), and tested once more (below, top left). Notice how the LED set is mounted off-center; this is done so the sets will nest together when the two sides are sandwiched together.
As for the signs themselves, I went through almost as many iterations as the LEDs. Fortunately I had stockpiled quite a supply of the decals over the years, because I burned through several sets just on this little adventure. I applied the decals to 0.020" plain white sheet styrene, followed by a protective clear coat; then I trimmed the styrene around the decal with fine flush cutters. (Even with a protective coating, the edges of the delicate decals can become damaged when I trimmed the signs; a little touch-up with red and blue Sharpies corrected the worst of the flaws.)
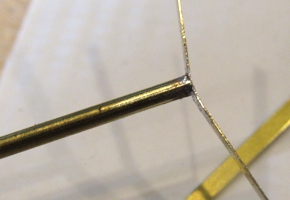
With the LEDs mounted and working, the rest of the project began a downward slope away from insanely difficult to comparatively simple. I soldered a length of thin-wall brass tubing to a strip of etched brass fret material, with a hole drilled in it, to make the lower trim strip (above, top left). After bonding the sign faces in place (top right), I clipped the bottom trim strip (bottom left), bent the top trim strip to shape, and bonded it in place (bottom right). Now the sign only needed motorization, painting and weathering, all trivial by comparison to what I'd done up to this point.
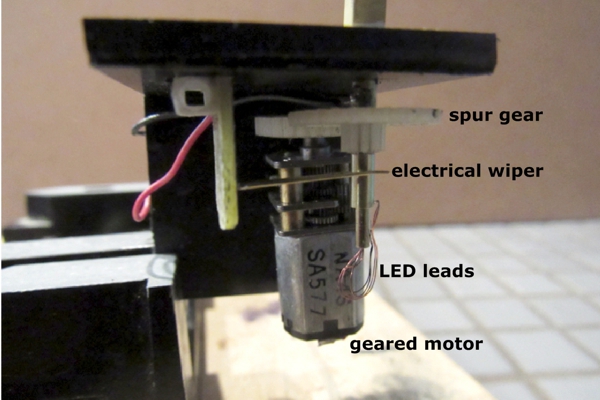
The mechanism couldn't be much simpler: a low-rpm geared motor drives a spur gear to turn the inner brass tube connected to the sign. One leg of the LED supply is attached to the outer tubing of the sign stanchion (just above the spur gear), while the other is connected to wipers that ride a ring of tubing electrically isolated from everything else. Really, the only difference between this mechanism and its predecessor is that the older one was belt-driven.
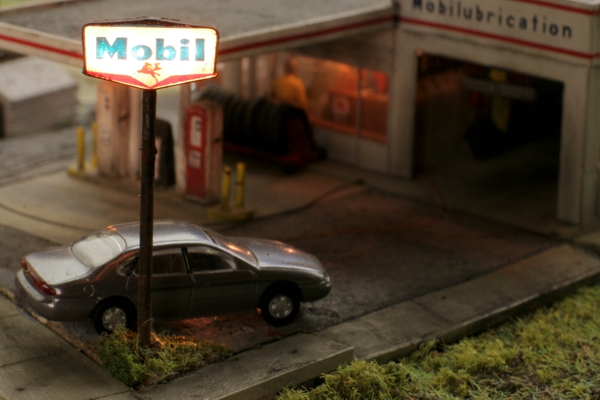
The sign is now featured on the Men at Work diorama.
|
|
Third Generation
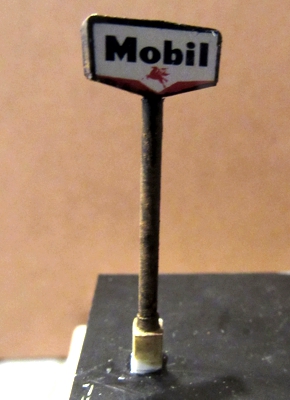
Wait, wasn't this all done, working and installed? Well, I've always had some problems with this project, problems that proved to be a serious challenge to address; as it is, I built the second-generation sign twice. The rebuild was necessary because I'd damaged the sign, but despite my best efforts to improve things, it was still unsatisfactory. Chief among the issues was the decals: no matter how carefully I handled them, they developed flaws due to their delicacy. Even an old, beat-up sign would not have the number and severity of the flaws my models have had so far. I really wanted to start with a perfect, pristine sign, and then gently age it. But it just wasn't happening. Then, on the afternoon of 16 August 2022—long after the sign was permanently installed on the diorama—I was suddenly struck with a possible solution, one that was promising enough to warrant attempting yet another rebuild. I only had a few decals left, so it had better work!
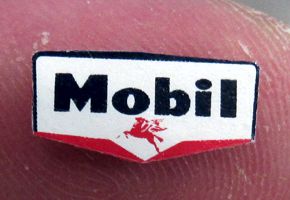
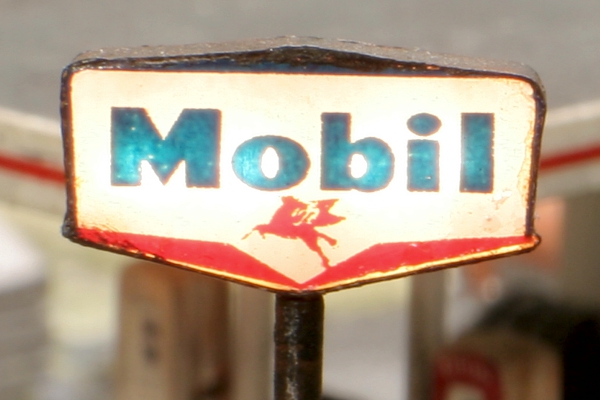
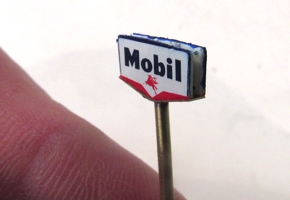
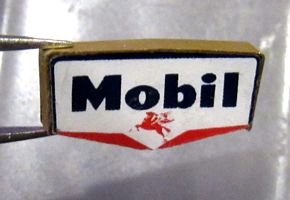
First, I soaked the decals in water for much longer than recommended—I wanted to dissolve away all of the adhesive. When the decals were nothing but artwork floating in the water, I very carefully fished them out with a small brush and laid them face-down on a piece of acetate. After they had completely dried, I applied a piece of white plastic label stock over the decals, and gently burnished it. This then fused the decals to the label stock, hopefully to remain that way forever. It appeared to work: I could see no flaws in them, and I was even brave enough to touch one, with no ill effect (above left). But the acid test was yet to come: when I trim the signs. Meanwhile, instead of applying the art to thin white styrene, I bulked it up the with three more layers of label stock, in the hopes that trimming would be a little easier and cleaner than with styrene—which, to my great relief, was the case. Compare the image above right to the one halfway up the page on the right, the one with all of the cracks and chips that I tried to fix with Sharpies that then became visible when the sign was lit (worse, the Sharpie ink bled into the decals over time).
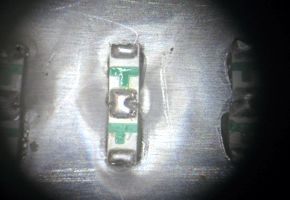
With extreme care, I bonded the signs to the outer frame strip (above left), which created an assembly I could simply drop down onto the bottom part of the frame, rather than build everything piece by piece from the bottom up. Of all the assembly changes I made, this was the most beneficial—particularly as I was working in situ on the diorama. As before, I wired the LEDs together in pairs on a stainless steel ruler, except this time I used a microscope to help me be more precise with the positioning and soldering (above right).

I also connected all six pairs together in parallel (above left), removed them from the ruler, and folded the assembly in half to get the twelve LEDs to face opposite directions (above right). After installing the LEDs in the sign (below), I painted and weathered it, and reinstalled it on the diorama.
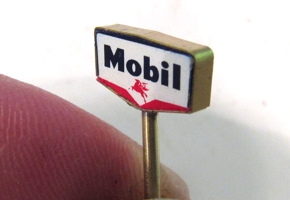
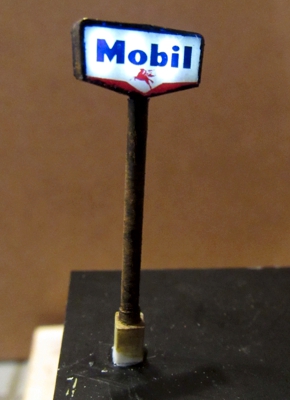
While I had things apart, I took the opportunity to reduce the size of the stanchion. I've no idea why I used the size of brass tubing I did; I lopped it off just above the footing, and installed the next size down.
This was worth doing. Not only is the sign art much cleaner, but the light diffusion of the label stock is more even than it was with styrene, which was an unexpected bonus. However, I must point out that the LED assembly process is not without its drawbacks. The mortality rate of the LEDs from all of the de- and re-soldering is quite high: roughly half of them die, and at 50 cents apiece, it added up.
Reference

To my knowledge, Mobil never made a rotating sign like this. In fact, they very rarely used this style for principal signage; I've only ever found a couple of examples. As for rotating signs, I believe they only made a few, all of which were their Pegasus flying horse, elaborately rendered in neon. So, although my sign may look plausible, it's a one-of-a-kind, non-prototypical "fantasy scheme"—not that this bothers me in the slightest. I do live in an alternate reality, after all!