
Front Street Bank, Part 2 of 4: Construction
As noted in Part 1, this project has seen more than its share of trial and error. It might have come out differently had I started it now instead of back when my skills weren't quite up to snuff. But that's water under the bridge; it is what it is because of its rocky history. Who knows, perhaps in my model world, the original bank was torn down and rebuilt!
The new Front Street Bank had but one unfortunate issue: cost. It required four Mid State Bank kits. I might have been able to get by with just three kits, but based on experience with the prior version, piecing together three individual windows to make the fourth row would probably have been more challenging than it was worth. When I finally worked up the gumption to plunk down the scratch for the kits, I placed the demand on myself that it had better be worth it. This also explained the extra care I took during construction.
The first step was to break out my big old paper cutter and start hacking up kit walls to extract the four sets of three windows, plus the entrance part and the single window over it. Then I doubled the parts count from six to twelve by slicing each of them in half and trimming them down so that the windows would fit. All of the parts were then sprayed with primer to act as a solder resist and keep the faces of the parts clean. I polished all of the edges to be soldered with a wire brush in a Dremel. It was then time to fire up the soldering iron.
The six wall part pairs were soldered back together, and the first floor parts were soldered to their corresponding second floor parts. These parts were placed in a smooth-jaw vice, and the edges were filed with a large flat file to get all of the mating edges smooth and true. The assembled wall parts were then taped to a jig to hold them at 45 degrees, and then carefully soldered, using brass rod for reinforcement. To give the building more substantial footing and stature, I added the foundation part from the aborted Logan Savings and Loan version; this was soldered directly to the bottom edge of the front walls. I was then able to precisely measure, cut and splice together the back wall parts, and assemble them to the front.
The completed assembly was subjected to an acetone bath to clean off the paint, followed by a heptane bath (rubber cement thinner) to clean off masking tape residue. I then sanded all of the exterior surfaces to give them some tooth for the paint to grip.
The cornice and other facade detailing was next. I made decorative parts by first bonding "piano key" parts saved from the kits to the middle and top of the walls; then I added styrene L-girder stock to the edges of the decorative strips; the tricky bit here was getting the angles right at the 45-degree corners. An extra piece of .100-in. square strip styrene was added to the top of the cornice to finish it off. One last item was a set of sheet styrene stairs for the entrance, with steel wire handrails.
Finally came the roof. This was simply a piece of sheet styrene cut to fit, and secured to styrene L-girder sections bonded along the top edges of the walls. After gluing a piece of 150-grit carbide sanding film in place, I added a chimney, vents, a roof access door, a skylight (N scale, but don't tell anyone), and a Micron Art water tank. The bank was then ready for finishing.
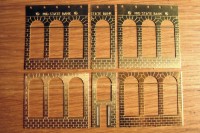
The six main wall parts are cut from four Mid State Bank kits.
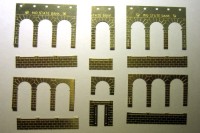
The six parts are then cut and trimmed to fit the windows.
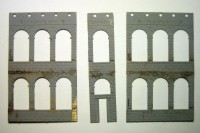
The wall parts are painted with primer and sections are soldered together.
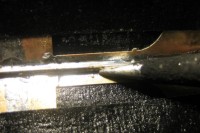
The sections are secured to a jig and soldered with brass rod reinforcements.
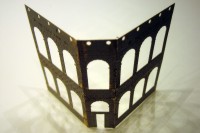
Here are the three main wall sections after being joined.
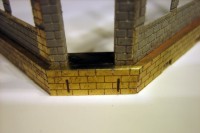
The foundation part from the Savings and Loan kit is added to the bottom.
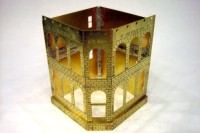
The assembled building is cleaned up in preparation for detailing.
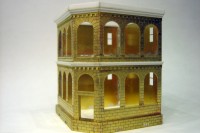
An ornate cornice and other detailing is added.
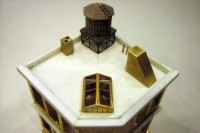
The roof gets an assortment of detail items, including a water tank.
Copyright © 2007-2013 by David K. Smith. All Rights Reserved.