
Front Street Bank, Part 3 of 4: Finishing
Just before painting, I give brass structures a vinegar bath; this helps to ensure that all surfaces are perfectly clean and receptive to paint. After a few minutes in vinegar, it's rinsed off in running water and allowed to thoroughly dry. I've not yet cracked the shrinkwrap on my airbrush, and projects such as this have not inspired me to do so; I've been satisfied with a "spraycan" finish, which starts with a coat of light grey automotive primer.
I wanted to give the building a whitewash effect similar to that of its real-life namesake, so I followed the primer with flat white. However, I only applied this to the two front walls; I left the two back walls pale primer grey. To provide the windows and main entrance doors with subtle contrast against the building, I sprayed them with a darker grey primer.
Next came weathering, which consisted of varying amounts of India ink wash, depending on the location—the whitewash areas got just a single application, while the back sides and roof received several. The steps and parts of the foundation were given a powdered chalk treatment to simulate old, worn concrete.
After priming all of the roof details, the parts received various finishes. The roof access and skylight were sprayed with the same darker grey as the windows. The chimney got ruddy brown, and the water tank was finished with roof brown. Then I applied India ink washes to everything except the chimney, which received a driftwood stain to highlight the mortar lines, followed by powdered chalk "soot."
The only thing left to do was assemble everything, which was just a matter of carefully bonding parts in place with CA. Glazing the windows was a bit of a pain given the very slender window frames, which had precious little surface area for bonding. A final touch was to lightly mist the whole building with Dull Cote; this made the windows appear slightly dirty.
One curious little faux pas turned up after everything was assembled: I'd forgotten to add the handrails to the front steps. I'd planned on drilling holes for them before painting the building. Oh, well. Presently they're still missing; they've become a "round tuit"—one of many.
The bank is located such that only one of the front sides is visible, so it's not convenient to peer within. Thus I'm not convinced I should go to the trouble of installing interior detailing, or even illuminating the building; I'll decide after it's been installed on a finished street, and I've lived with it for a while. For the time being, I added black cardboard dividers to prevent the see-through "empty building" effect. However, I did add one final finishing touch: an aircraft warning beacon.
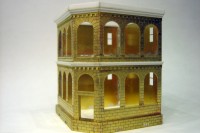
The assembled and detailed building is ready for finishing work.
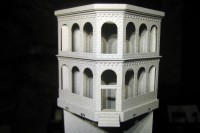
After a brief vinegar bath, the building gets primed, then "whitewashed."
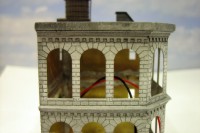
Weathering for the front of the building is relatively subtle.
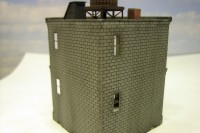
The back of the building receives several applications of India ink wash.
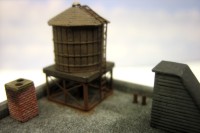
The roof and its details are weathered until they appear naturally grimy.
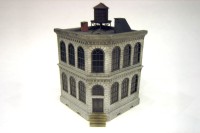
After glazing the windows, the bank is misted lightly with Dull Cote.
Copyright © 2007-2013 by David K. Smith. All Rights Reserved.