
Code 25 Turnout
Like many things in life, the hardest part was just getting started. Once the first stock rail was down, the rest flowed from there. I had the advantage of having previously handlaid many Code 40 N scale turnouts, plus a new one using my custom Code 25 rail. The only thing I didn't have was a rail gauge or any special jigs. I used a scrap of Micro-Trains flex track to establish the gauge, and all other positioning was done entirely by eye.
After both of the stock rails were soldered in place, I used the Micro-Trains flex track and a sharp knife to scribe where the rails would meet at the frog. I ground the end of the rail wire using a cutoff disc in a Dremel tool, once again eyeballing the proper angle.
Using the flex track to confirm where the toe of the frog would be, I tacked the first rail in position, then repeated the operation to complete the toe of the frog. I used the tiniest bit of Stay-Clean flux to ensure quick and clean solder joints.
The point rails were ground with the Dremel tool and checked against the stock rail until the shape was right. Holding the rail in place such that the point was located where it belonged, I used tweezers to make the bends at the frog end, then clipped it to length. I soldered it in place using no guides or jigs, only a hopper car to make sure the flangeways were sized appropriately.
The guardrails were shaped the same way, then tacked in position with just one solder joint so that it could be adjusted as needed after running the "guinea pig" hopper car through. The first guardrail needed a tweak before the car glided through properly, and once positioned, it was fully soldered in place. The process was repeated for the second guardrail.
The throwbar was fabricated from a scrap of tough Delrin-like plastic. It slides on top of a shim piece made of the same material which is installed under the throwbar after it is positioned; the shim holds the throwbar up against the undersides of the stock rails.
Obviously the throwbar is not soldered in place, as is the more common practice. The incredibly tiny points do not have enough metal to make reliable solder joints. Instead, the points are sprung away from the stock rails, keeping them pressed against the raised portion of the plastic throwbar.
Naturally one overarching concern is: What will run on this turnout? It's become a FAQ at some of the discussion boards I frequent. Micro-Trains stock wheelsets will run on Code 25 just fine as long as the solder joints are really clean. The flanges are approx. .020, so there's not much room to spare on rail that's .025 high. My test car, a Full Throttle hopper with stock Micro-Trains trucks, rolls through it as if it wasn't there.
AZL wheelsets also work OK. This comes as a relief since their fine GP7 will be my only locomotive. I have not yet tested the Micro-Trains F7, nor have I tried any Märklin rolling stock, although I have the feeling that the latter will not be an option (which is not a concern for me).
Since completing this turnout, I've accidentally discovered that Micro-Trains wheelsets have not held to the same dimensions over the years, and older wheelsets derailed. When I resumed tracklaying, I made adjustments to the turnout so that all wheelsets now work.
Incidentally, the American Z Scale and Micro-Trains Geeps both run through the turnout just fine.
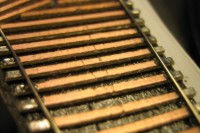
The knife marks define where the toe of the frog will be.

The rail is ground using a Dremel tool, and the angle is set by eye.
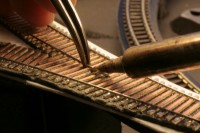
The first rail of the frog is held in place with tweezers and soldered.
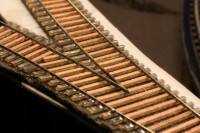
The second rail is soldered to the first to complete the frog toe.
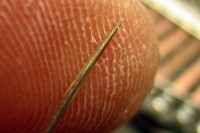
The point rail is carefully ground and positioned to check the taper.
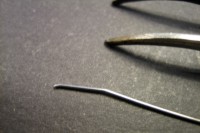
Tweezers are used to shape the frog end of the point rail.
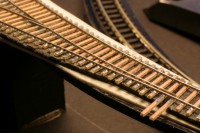
The first point rail is positioned by eye and soldered in place.
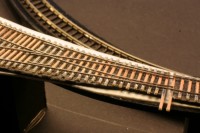
The rest of the rail parts are shaped, positioned and soldered.
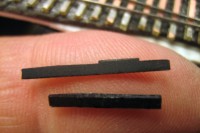
The throwbar is a plastic part that slides on top of a shim.
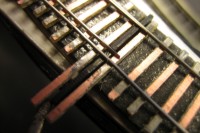
The raised part of the throwbar presses the points against the stock rails.
Copyright © 2007-2013 by David K. Smith. All Rights Reserved.