Bashing Brass Buildings, Part 2 of 3
Preparing to Solder
If you're relatively new to soldering, or at least to soldering structures, the first thing to do is practice. By now you ought to have plenty of scraps on hand for this purpose. Bear in mind that it's possible to render parts useless if the soldering is botched badly enough, although in most cases, with care, corrections can be made. But given that corrective action is often many times more difficult than any other process, it's best to do everything possible to avoid going "oops."
Aside from acquired skill, a key to successful soldering is having good tools on hand. A thermostatically-controlled iron with a fine tip is a must. Keeping the tip clean and tinned is vital. Using electronics-grade solder is helpful as it's very fine and easier to control than general-purpose solder.
Finally, the flux you use can make or break a soldering project. I'm a big believer in Stay Clean liquid soldering flux because it thoroughly cleans the metal instantly, and the solder flows like lightning. It's also water-based, making cleanup easy. Only a tiny amount is needed, which I apply with a small paint brush. Be sure to wear eye protection and make sure you have plenty of air ventilation while you work—you'll see why the moment you apply heat to the flux.
Soldering
Before I begin soldering, I'll spend a fair amount of time rehearsing the assembly process to determine the ideal order for soldering parts; this can be akin to a brain-teasing logic game.
After rehearsing the assembly a few times and then finally giving myself the green light, I'll spray the front surface of each part with enamel paint. The choice of paint is unimportant because it's being used solely to keep solder from creeping onto visible surfaces, and it will be removed later. I use Krylon primer, which dries very quickly.
When the paint is dry, I place a wire brush in a motor tool and thoroughly clean the back surfaces and edges where they will be soldered.
Next up are the soldering jigs. Jigs are an absolute necessity for getting joint angles correct. I make the jigs from Foamcore scraps glued together with white glue, plus a top layer made from heavy cardstock. Soldering does not damage the cardstock because the relatively small parts and joints are soldered quickly, before the heat has a chance to build up much.
Each part is positioned precisely on the jig and secured to it with masking tape; some parts may need to be taped quite close to the joint in order to hold them flat.
Butt joints obviously do not require jigs; I just tape them to a sheet of plain PC board. Usually I will reinforce butt joints with narrow scraps of etched brass (I never throw anything out, including the frets, which are perfect for this job).
After applying a little solder to the tip, place it at one end of the joint, ensuring good contact with both parts. Allow the joint to heat for a moment, then apply a small amount of solder at the point of contact. As the solder begins to flow, slide the tip along the joint and continue applying solder in small amounts. If necessary, go back and apply more solder if it has not flowed onto both parts and filled the joint.
When the joint has cooled enough to handle (usually after only a few seconds), remove the masking tape and inspect the joint. The masking tape often leaves melted residue behind; this will be removed along with the solder-resist paint after all of the soldering is done. Repeat this procedure for each of the joints until all of the parts are assembled.
If a pair of joints are relatively close to one another, place a metal object, such as a tool, against the existing joint before soldering the next one to prevent the first from de-soldering.
Long solder joints, such as those for the roof, take a slightly different approach. Before soldering the full length of a joint, I will "tack" it together at a few spots first, usually at the middle and each end. This keeps the joint from potentially distorting during a lengthy soldering process. I learned this the hard way—a couple of the joints in the roof were re-soldered two or three times!
Some parts may be too small to tape to a jig (an example would be the chimney). In these cases, it may be better to use CA; but if the assembly needs to be strong (the gutter is a good example here, with its miniscule points of contact), it's possible to make very small solder joints.
If the parts can't be taped to a flat surface, I'll use spring-loaded "reverse" tweezers, which grip the parts when released. I have several on hand, and will use one for each part. The tweezers are then taped to a work surface, mounted in an "extra hands" tool, or locked in a vice... basically, whatever works!
Soldering tiny joints is just a bit different from normal. After brushing flux onto the joint, I'll apply a small amount of solder to the iron tip, then simply touch the tip to one end of the joint. With practice, you can place just the right amount of solder on the tip such that the solder flows along the whole joint, with no excess. This process usually takes all of about one second.
Bonding
Most of the time bonding is necessary to join painted and finished subassemblies, or install windows and glazing. Occasionally there will also be subassemblies too delicate and complex to solder; an example from this project would be the door and window assembly for the back of the station. It is comprised of seven tiny parts: the door, three windows and three reinforcement parts to hold everything together. This beastie would have been virtually impossible to solder.
For these tasks I opt for thick ("gap-filling") cyanoacrylate. Sometimes CA seems to have a mind of its own: it will bond when you don't want it to, and refuse to bond when you do. One thing I do to help it along is wick off any excess with the edge of a paper towel.
Another trick I use is to apply the CA to the joint after the parts are positioned, rather than the other way around. For very small joints, I touch the tip of a sharp knife to a drop of CA sitting on a scrap of plastic, then touch the knife to the joint.
Disassembly of CA-bonded parts is no problem. Just dip them in acetone for a few second, and the CA will release. Scrub away the excess CA with a stiff brush, and you are ready to start all over. Thus bonding is a bit more forgiving than soldering.
Outliers
In a few rare instances, parts cannot even be fabricated until other assembles are completely finished. For example, I could not make the gutter assembly until the soffit was finished, because there was no way of knowing in advance the precise size and shape of the soffit—at least, not given my level of skill at making and soldering the parts.
Once the soffit assembly was completely finished, I then cut the gutter parts to exactly match the soffit. To ensure that the finished gutter assembly fit around the soffit precisely, I first taped the finished soffit to a work surface. I then positioned the gutter parts in place, and taped them down along the outer edge. Then I lifted the soffit out and more firmly taped the gutters down. Finally, I carefully soldered the corner joints; I also soldered the downspouts in place as well. The result was an assembly that was rugged enough to withstand the handling necessary for finishing.
Planning Ahead
Likely you will not want to solder or bond absolutely everything. Some things need to be left apart to facilitate painting and finishing; it's also a good idea to allow some things be be removable in order to permit access to the interior of the structure for maintenance or further work, such as illumination and detailing.
In the case of my little station, I determined that it would make life much easier if the chimney was not a permanent part of the roof until finishing work was done. To make such decisions, I try to imagine what it would be like to paint things, and the masking required to make the roof and chimney different colors—especially given that each would receive different washes as well—seemed like a needless pain.
To ease this pain, I built the chimney around a length of square telescoping tubing. This outer "shell" would fit over a smaller inner part that would be soldered to the roof. The inner tubing also served as the chimney liner detail, protruding out of the top by a fraction of an inch.
I also wanted to be able to remove the roof from the building. To make this possible without compromising the structure's appearance, I positioned the building precisely on the soffit assembly, taped it in place, then bonded the filigrees only to the soffit. Once all of the filigrees were attached, I simply slid the structure out of the soffit assembly.
This approach had the added benefits of making painting much easer, and avoiding any CA from being visible on the brick surface, especially as it would have a tendency to creep along the mortar lines.
Now you'll have a number of bright, shiny brass subassemblies that are ready for painting and final assembly.
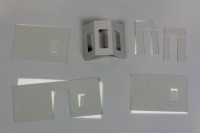
Prior to soldering, the fronts of all parts are sprayed with enamel paint.
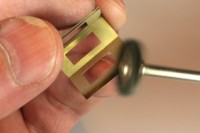
After the paint is dry, the back edges are cleaned with a wire brush.
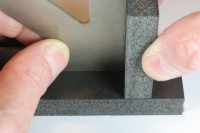
Jigs are carefully assembled to hold parts at precise angles.
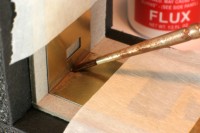
Liquid flux is applied to the joint with a small paint brush.
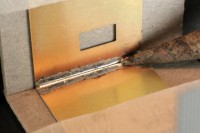
Solder is fed to the hot iron until it flows across the whole joint.
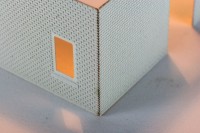
The paint successfully prevents solder from creeping onto the visible surfaces.
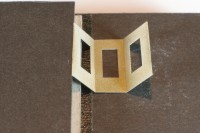
A special jig is prepared to hold these parts at different heights.
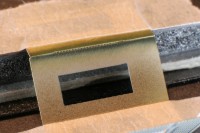
Parts are attached to the jig with masking tape.
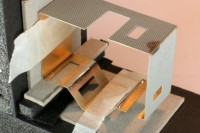
This inside front corner corner joint requires a complex jig.
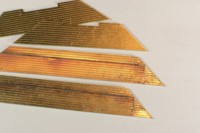
These soffit parts were assembled from scraps extended with butt joints.
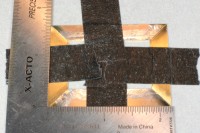
The four soffit parts are taped to a flat work surface and checked for accuracy.
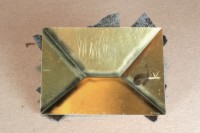
The four roof parts are firmly taped together and each joint is soldered.
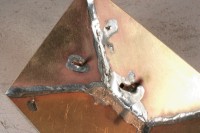
After soldering the roof, the chimney support is soldered in place.
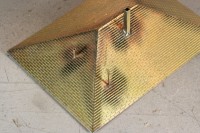
The visible portions of the solder joints are cleaned up with a wire brush.
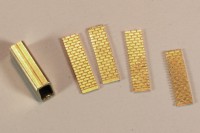
The chimney parts are bonded to square brass tubing with CA.
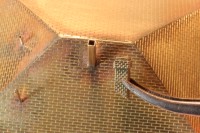
The assembled chimney is test-fit on the roof.
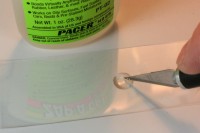
A knife tip is dipped in a drop of CA to deliver a small amount to a tiny joint.
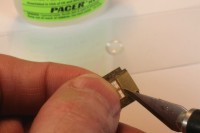
The knife tip is touched to the joint to apply the CA.
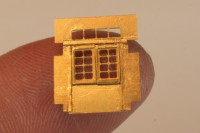
This complex door assembly could not have been soldered (at least by me!).
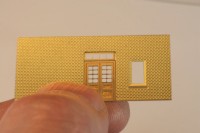
The door assembly is test-fit in the wall opening.
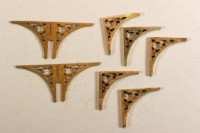
These brackets are cut and sandwiched together using CA to make filigrees.
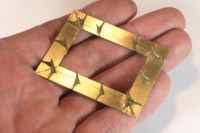
The filigrees are bonded only to the soffit to make the roof removable.
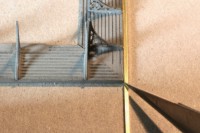
The gutter parts are cut to size after the soffit assembly is completely finished.
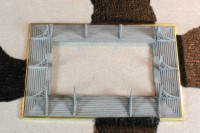
The gutter parts are positioned around the soffit assembly.
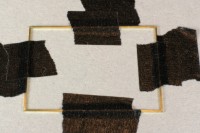
The delicate gutter assembly benefits greatly from being soldered.
Copyright © 2007-2013 by David K. Smith. All Rights Reserved.
