Bashing Brass Buildings, Part 3 of 3
Finishing
You will now have a number of parts and subassemblies ready for finishing and final assembly. The soldered subassemblies will be covered with paint, flux and tape residue. To remove all of this, pour some acetone in a ceramic or glass dish, place each assembly into the acetone, and scrub the part with a stiff brush until it's thoroughly clean. (Be sure to do this with adequate ventilation.)
Next, the parts need to be prepared for painting. I've found paint adheres to brass better if it's first given a vinegar bath. I simply place the parts in a covered plastic container full of vinegar (plain white vinegar used for cooking) for five or ten minutes, then rinse them off in clean water.
When the parts are thoroughly dry, you can paint them with the paints of your choice. My preference is to start with a light primer coat, followed by a few light coats of the finish color. (Often my choice of finish color happens to be a primer color, in which case I'm done after a couple light coats.) While airbrushing is recommended, I've had good luck with ordinary spray cans.
If you're using enamel, you have the option of baking it on for added durability—just pop the painted parts in an oven heated to around 250 degrees for about a half-hour. Do not attempt this for anything assembled with CA; it will produce hazardous fumes, and also melt the bonds.
Final Assembly
Most final assembly procedures involve simply positioning the parts and applying CA. Sometimes this simple procedure is not so simple, however. Consider, for example, windows. In kits, windows are usually designed with relief areas that fit snugly into the openings; however, when bashing structures, windows will be flat, with nothing to orient them to the opening. Given that these parts are much too small and delicate to be clamped or otherwise held in place, how does one keep them in position until they're bonded with CA?
My solution was to suspend the building over a mirror such that the window being installed was horizontal. This allowed me to see the orientation of the window to the opening. Once the window was properly aligned, gravity would hold the window in place until I applied CA. To keep the window from wandering, I "tacked" in place by applying the CA near the window frame, not on it, and allowed the CA to creep across to the joint. Once the window was relatively secure, I then applied the CA more liberally.
Compared to the rest of the steps leading up to this point, final assembly took seemingly no time at all, and the station was soon ready for details and installation on the layout.
Conclusion
Bashing brass buildings can be very satisfying. The precision and fine detail that's possible really shows when you take macro photos of your finished models. I hope that my experiences inspire some of you to give it a try.
For more information on this particular project, see the general construction article.
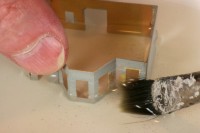
Soldered subassemblies are cleaned in acetone.
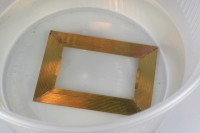
After cleaning, the parts take a short bath in vinegar to prepare for painting.
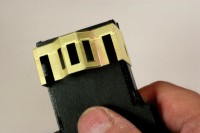
A foamcore block is used to hold the building during painting.
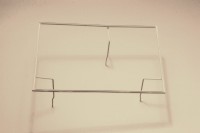
The gutter assembly is painted separately before bonding to the soffit.
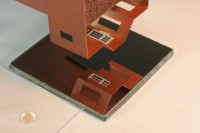
A mirror is used to help position windows as they're bonded to the walls.
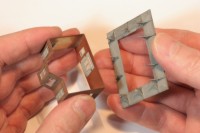
The building and soffit parts are test-fit before proceeding with final assembly.
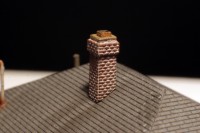
The chimney is bonded in place on the roof after painting and weathering.
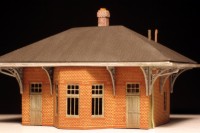
The completed station is ready for detailing and installation.
Copyright © 2007-2013 by David K. Smith. All Rights Reserved.
