
The Gift
One of the options I was strongly considering for the wooden truss bridge was to commission a laser shop to custom cut one for me. Well, I was literally a few keystrokes away from drafting an email to a shop, when out of the clear blue one of my readers was kind enough to offer up some time on his laser to cut this bridge. The only (entirely predictable) catch: I had to do the artwork.
While I've never designed a laser-cut structure before, I've assembled countless kits (and spent more than a few hours pondering how to improve the kits as I assembled them), so I've been exposed to the principles involved. Plus, I've been rendering computer illustrations for a couple of decades, so there were no new skills or software for me to learn. And finally, just to make life even easier—for a change!—the file type required was native to drawing software I've used since Version 1. Thus I was well prepared for the task in every way.
The offer provided me with two tremendous opportunities: a chance to learn how to design a laser-cut structure, and a chance to have John Allen's signature G&D truss bridge faithfully reproduced. But I had to act fast—the window of opportunity was open only for a short time. Which meant a couple of late nights spent studying the bridge from every angle possible (I have about 30 reference images on file), studying the laser-cut kits I had on hand, and conversing with the man with the laser.
Since this would be an invaluable learning experience, I asked him to please not make any adjustments to my artwork, unless there were obvious dire problems. This way I could learn from my mistakes, since I anticipate there will be a time in the not-too-distant future when I'd be commissioning laser shops to do custom work for me on an increasing basis.
One week later, the package arrived. To say that I was excited to open it is an understatement—I was literally shaking. What a thrill to see the lines that I'd rendered all now burned into wood. And what a way to start the project: the first part I cut out, I promptly broke! Fortunately I had plenty of spares, but it did point out the need for me to refrain from rushing. I had to force myself to slow down and take it easy.
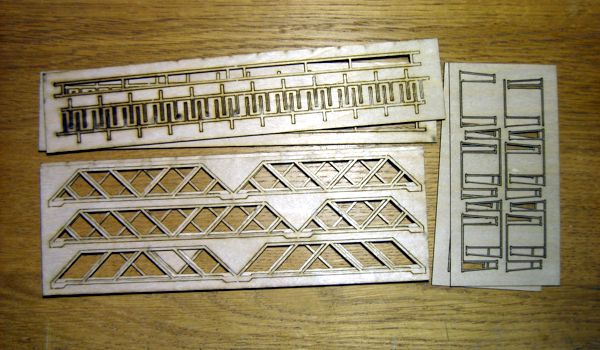
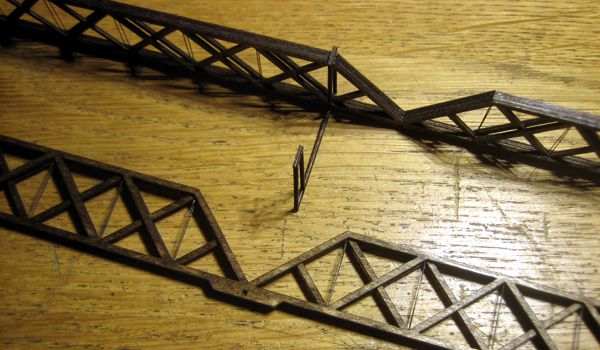
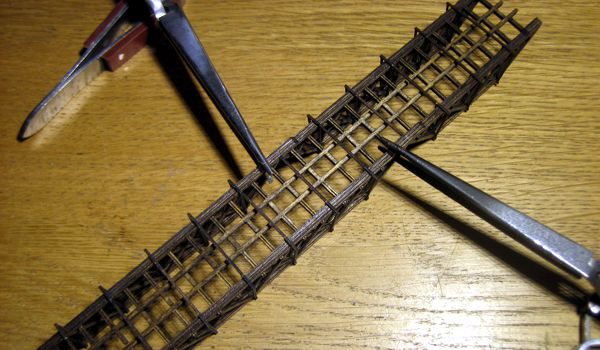
After cutting all of the parts free from the frets, I did a quick test-fit of a few key components—wow, they actually fit right! Then I stained them all with Minwax Dark Walnut stain. When this dried, I began assembly. Since I created it, I certainly knew how to build it! The first and most tedious assembly step was installing the 40 .008-inch chemically blackened phosphor bronze wire truss rods, while the last and equally tedious step was installing 48 nut-bolt-washer castings.
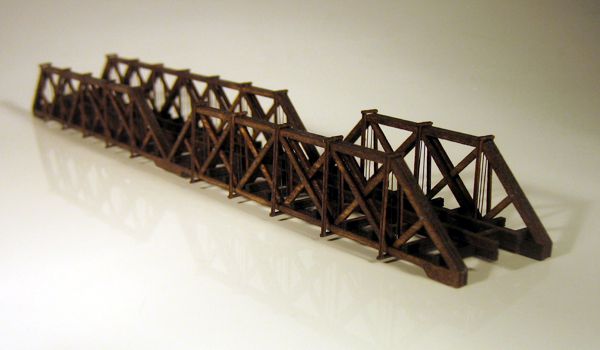
I experienced such a strange sensation as I worked: it went together like a kit, and yet it was my own design. I can't overstate how surprised, delighted and proud I was by how well—and how quickly—it all went together. Granted, it's not a seriously complicated structure to assemble, but it's also not all that simple, either, with over 100 parts. Since I designed it exclusively for me to build, I didn't bother with such niceties as alignment tabs and notches, so it wasn't an insert-tab-A-in-slot-B, peel-and-stick affair. All that's left to do are the abutments and the center piling.
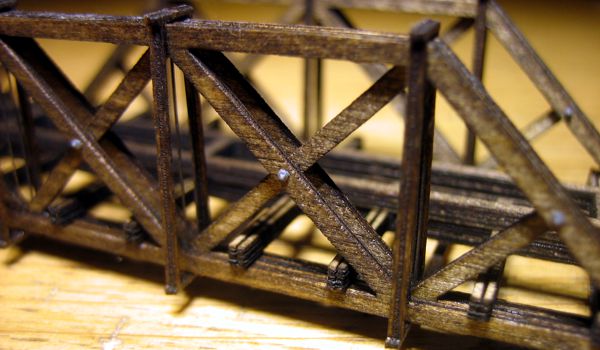
So, what were my lessons learned? What would I do differently? Amazingly, almost nothing. I might make the vertical sway brace pairs a little heftier, and the truss rod rastering a little deeper, but these would be subtle tweaks; there were no errors in the design, which I still can't get over—I feel like the guy who stepped up to bat for the first time in his life and hit a home run on the first pitch.
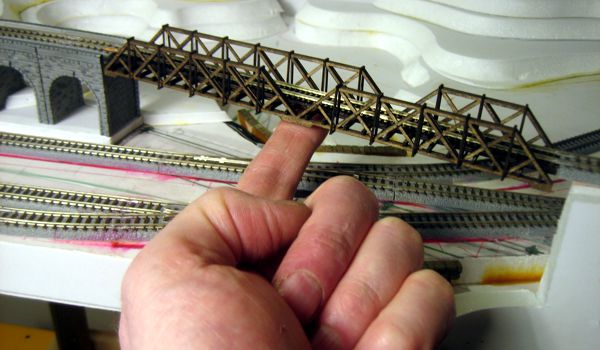
And so, between the Gift and my scratchbuilt stone viaduct, my Z Scale Gorre & Daphetid is becoming far more authentic-looking than I'd ever imagined.