
Canal Street Crossing Shanty
One of the first structures I'd completed, the Micron Art etched brass RR Crossing Shanty kit #1047 is small enough to fit in the 3/4-inch wide strip of real estate between the right of way and the edge of the layout at the Canal Street grade crossing, and detailed enough to make a great little foreground structure. As I'm wont to do, though, I made a few changes (naturally!)...
First, I modified the column to eliminate the braces on the bottom, and instead made it look as if it's anchored in a concrete footing (as it appears in the reference photo). This made it easier to design the structure to be removable from the layout in order to protect it against possible damage, owing to its location at the very edge of oblivion, as it were. To make the structure removable, I soldered the column to a length of square brass rod that fits into square brass tubing embedded in the footing.
I also made a whole new roof; the one supplied in the kit seemed to be a bit ornate; I wanted something more plain. The replacement was made from scraps of N scale etched brass brick (left over from the Passenger Station project) soldered together. The peak was drilled with a #55 drill to accept the smokestack.
As is my preference, I soldered most of the parts together. This is actually not as hard as it may seem given the tiny size of the structure; in fact, it's easier than working on larger kits because tiny parts solder much more quickly and evenly.
Naturally, some joints cannot be soldered, such as those between the main subassemblies of the column, shanty, and roof; soldering them would threaten to de-solder some of the many joints in the subassemblies. Not completely assembling the whole structure also makes painting much easier. As one might expect, the subassemblies were simply bonded with cyanoacrylate.
One thing I didn't do was use the kit's tabs and slots to attach the shanty to the column; I wanted to rotate the column 90 degrees relative to the shanty so that the fine latticework on the column faced the viewer. So, I cut off the tabs, and sanded the bottom of the shanty and the top of the column smooth.
The ladder is not the one supplied; instead, I used a slightly finer one from the Micron Art Z Scratch ladder kit #91401, plus some .010-inch brass wire for handrails soldered on, to produce a different design. After painting, the railings were fit into #80 holes drilled in the shanty walls, and then bonded in place with CA. Then came an iterative process of trimming the bottom of the ladder until it exactly fit when the shanty was dropped into the footing.
The biggest challenge of the whole project was ironically the smallest part: the kit's smokestack cap. This is the sort of part for which there should be spares... but there was only one in the kit. To say that it was difficult to form is an understatement. Wrapping it around a drill bit helped with the bending challenge, but in the process, one of the mounting tabs broke off. This turned out to be a blessing in disguise, as the tabs would not have fit either inside or outside the smokestack, and so I wound up just sanding both tabs clear off and gluing the cap to the top of the tubing with CA.
As usual, painting began with a vinegar bath, followed by light gray primer for the shanty building, dark gray primer for the roof, windows and door, and ruddy primer for the column and ladder. From there, the subassemblies received India ink and Rustall washes to simulate the aged wood and rusted steel of a disused structure.
The shanty got moved around a bit before finally settling back down where it started. I'd originally installed it too close to the track to leave room for the planned crossing flasher, so it was relocated to the other grade crossing on River Road. Ultimately I didn't like it there, so I moved it back, reducing the size of the footing and shifting it closer to the edge of the layout so that everything would fit. This then had the effect of forcing me to move the token telephone pole elsewhere. It's always something...
Things met with sudden change while I was preparing for the 2012 National Z Scale Convention: as I was packing the layout for the trip, the crossing shanty was irreparably damaged. Fortunately I had one of Stony Smith's RP shanties on hand, so after a heptane bath, I upgraded it with an etched brass ladder, gave it a quick coat of paint, and glued it in place after the layout arrived in Denver.
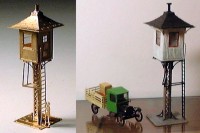
This is how the Micron Art watchman's shanty kit looks as-delivered.
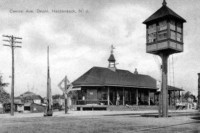
For reference, here's a watchman's shanty in Hackensack, New Jersey.*
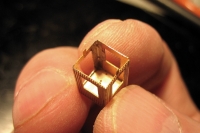
The walls of the shanty are soldered together.
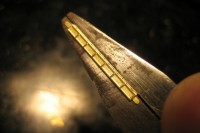
The column parts are bent using a flat-jaw pliers.
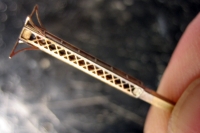
The assembled column is soldered to a piece of square brass stock.
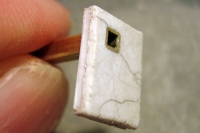
A piece of square brass tubing is embedded in a styrene footing.
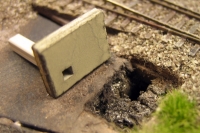
A hole is cut in the layout to accept the footing.
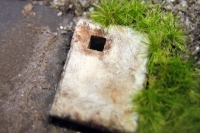
The footing is stained with rust and dirt, and surrounded by weeds.
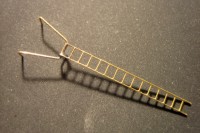
The new ladder is made from a detailing kit part and some wire.
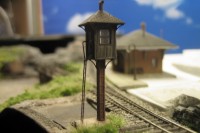
After installation, the ladder is carefully trimmed until it exactly fits.
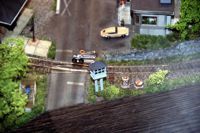
When the brass shanty was destroyed, it was replaced with an RP model.
Copyright © 2007-2013 by David K. Smith. All Rights Reserved.
Micron Art product photos used with permission.
*Reference photo courtesy of the Maywood Station Historical Committee.