
Rock, Part 2 of 3: Casting
Rock-making is messy. This is not to suggest it's not fun; it simply requires an easily-cleaned location with plenty of space and light. So, it sure wasn't going to happen on the bookshelf where the layout normally resides. Kitchens are good places for this process, and so I commandeered mine for an afternoon of messy fun.
Before getting down to it, I lined the first few inches of the two tunnel portals with pieces of crumpled heavy-duty aluminum foil to simulate blasted rock. With the foil in place, I arranged the rock molds in the order they would be cast, then mixed up the first batch of Hydrocal. Using powdered black pigment (the kind made to dye concrete, available from some building supply centers), I deliberately made this first batch a little darker and thinner than normal so that it could be poured over the aluminum foil tunnel liners.
Things always look darker when wet, so the Hydrocal mix gets much darker than you'd expect; however, when the Hydrocal is fully dry in a couple of days, it will be a nice medium grey. I ladle the Hydrocal into molds that have been rinsed in "wet" water (water with a few drops of liquid detergent). As I dribble the mix into the mold, I tap it with the spatula to help release air bubbles.
The filled molds are allowed to sit until the Hydrocal becomes thick enough to crinkle a little when the mold is flexed. The molds are then placed in position on the layout, and squished until mixture emerges from all sides. Because the supporting structure was made to match the contours of the molds, most of the time the filled molds remain in place on their own, but sometimes they need a little help; this is where your skin starts to acquire a seemingly permanent grey patina.
The molds are applied in the order that produces the tightest possible joints between castings. Usually there will be some degree of hand-carving required to blend the castings, as well as to correct clearance issues that invariably crop up at the tunnels; I use a chisel-blade knife to do the carving. I simply jab at the rock at different angles, allowing it to break away in small pieces, which produces a natural-looking texture. I also use this technique to disguise larger air bubbles (smaller ones will get filled in with vegetation later).
When casting and carving was done, there was quite an accumulation of debris. This is where having an ultra-portable layout is very handy: I just walked outside with the layout, flipped it upside-down, and rapped on the base a few times. I also used a dry two-inch paint brush to remove the finer bits of material.
With the layout back in its home on the shelf in my office, I fine-tuned the carving and clearance issues, using some rolling stock to make sure everything checked out. This process produced a fair amount of fine debris, which I carefully swept up with a brush and kept to use as talus: this will assure that the talus is a match for the rockwork, which is difficult using commercial talus products.
While I was at it, I noticed something unexpected: the foreground mass of rock looked much too interesting and dramatic to disturb with an additional casting to create a short bore, as I'd planned from the outset, and so I decided to leave the rock face as-is, and create a peek-a-boo effect using trees instead.
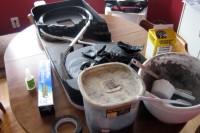
All of the materials and supplies are gathered for a rock-making session.
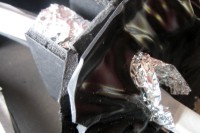
The tunnel portals are lined with crumpled aluminum foil.
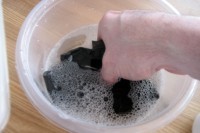
The molds are rinsed in water with a dash of liquid detergent.
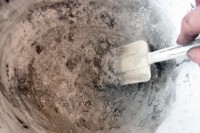
The Hydrocal and powdered black pigment are mixed with water.
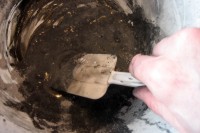
The mixture gets much darker than you might expect.
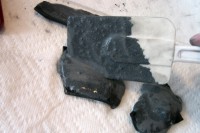
As they are filled, the molds are tapped to help remove bubbles.
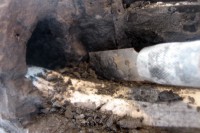
Joints between castings are blended by hand carving with a chisel blade.
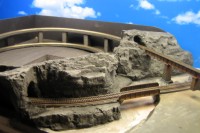
All of the permanent rockwork is cast in one session.
Copyright © 2007-2013 by David K. Smith. All Rights Reserved.