
Rock, Part 1 of 3: Molds
For me, scenery-making is one of the most enjoyable aspects of layout construction. Part of this joy comes from the unexpected outcomes of the process, the little surprises that give rise to new ideas. I will go into scenery-making with plans that paradoxically are both comprehensive yet open-ended. I know, for instance, that I'll want a waterfall right here, and a cliff with a tunnel portal over there, as part of a fairly well-formed mental picture of the visual effects I'm after. But the specifics are hazy at best, and I revel in the joy of discovery as the actual forms begin to take shape.
I start with rockwork because it is, just as in nature, the least fluid of the land shapes, and forms a foundation for the rest of the scenery. It is also fairly difficult to control the precise outcome of rock-making, unless, of course, I carved all rockwork by hand. I prefer rubber molds for their superior realism, and I prefer to cast them in place because it facilitates blending a series of separate castings into a seamless, contiguous mass. So the process begins with mold selection.
To get some idea of the rock forms required, I built a basic armature out of foamcore that would establish the dividing line between permanent "bedrock" and the portions that would be part of a removable access panel. This single foamcore piece defined both the approximate perimeter of the panel and the lowest possible height that would clear the trains.
With a large cardboard box full of rubber molds from which to choose, I placed molds all over the layout to look for candidates for key locations, such as the cliffs surrounding a tunnel portal. I tried to find molds that would cover the largest areas possible at once, yet at the same time maintain consistent overall textures—strata direction, facet density, and so on—across all of the rockwork.
Once I found some possible molds, I held them in position to make sure they'd work before I dared cut them down to fit the locations. When I was certain I'd found the best ones, I trimmed them to size, then began a lengthy trial-and-error process of building up the areas behind them with bits of foamcore to follow the gross contours of the molds. This was done in order to keep the layout's weight down as well as provide good support to prevent the possibility of mold distortion (which produces unnatural-looking "wavy" rock formations). The supports were intentionally "sloppy" in order to provide places for the casting material to form a solid grip on the layout.
One of the trickiest areas to design was the cliff in the foreground. Because of its "in your face" location, I wanted it to be as detailed and dramatic as possible. From the outset I'd intended to have a rocky outcrop through which the line would bore before reaching the main tunnel. It posed quite a casting challenge.
At first I'd thought of having all of the rock surrounding the track lift off. But making that much scenery "portable" gave rise to numerous logistics issues. As I was positioning candidate molds in place, it struck me that I might actually be better off casting the tunnel in place using two molds to encase the track. The two molds were actually identical, just cut and fit in different ways. This would provide the consistency needed in a rock formation that would be subject to considerable scrutiny given its location.
Gradually, over time, the various molds were selected, trimmed to shape, and fit together like jigsaw puzzle pieces. With all of the supporting structures in place, I performed dry-run rehearsals of mold placement to be sure I knew which molds to cast first. Then, just before mixing the first batch of casting material, I carefully protected all of the track and bridges with masking tape.
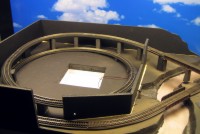
This angled vertical foamcore piece forms the the scenery starting point.
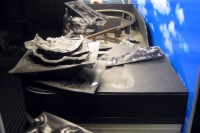
Loads of rock molds are brought out and evaluated.
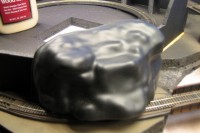
The first mold candidate is placed in position.
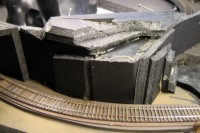
Support for the mold is fashioned from many foamcore scraps glued together.
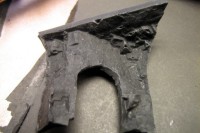
This mold is modified to become one of the tunnel portals.
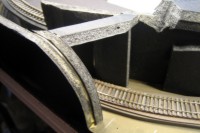
A foamcore support is built to fit the modified mold.
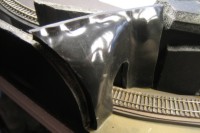
Fitting requires many iterations of modification and testing.
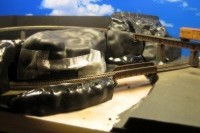
All molds are positioned to determine the order in which they will be cast.
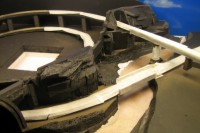
Track and bridges are protected with masking tape prior to casting.
Copyright © 2007-2013 by David K. Smith. All Rights Reserved.