
Utilities
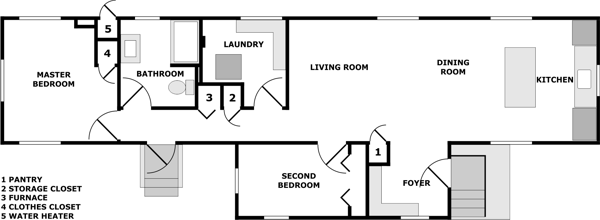
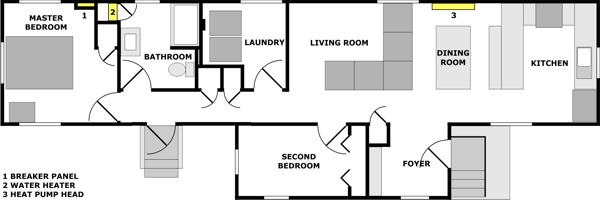
The floorplan above is how it was when I purchased it; below is the "after" version following all of my renovations.
The prior owner did a fine job updating the cosmetics. However, evidently he never popped the hood to take a serious look at things like the electric, heat, air conditioning, and so on. So it was left to me to take care of such matters, and unfortunately what I found far exceeded what I'd anticipated having to address. Speaking briefly with the prior owner after I'd moved in, I learned he was of the "if it ain't broke" mentality. That's all well and good, but that doesn't mean there isn't room for improvement, especially when you're dealing with half-century-old technology.
I wanted to start with the water heater principally because my first shower in my new home ended prematurely. However, a new on-demand water heater required improvements to the electrical system, as well as a lot of replumbing, so multiple tasks took place concurrently.
Water Heater
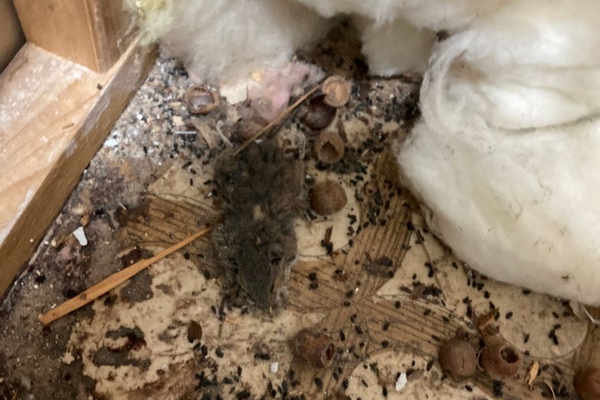
On 28 October 2022, curiosity got the best of me, and I found out why I could only get half a shower's worth of hot water: the circa 2007-vintage tank was only 30 gallons. Worse, after removing it, I made a most unpleasant discovery: underneath the tank were the remains of untold generations of mice, including... a recently deceased resident (below). It all made for a gross, gruesome cleanup project, followed by the repair of a chewed-up, rotting-out sub-floor.
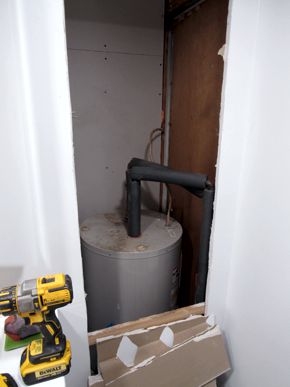
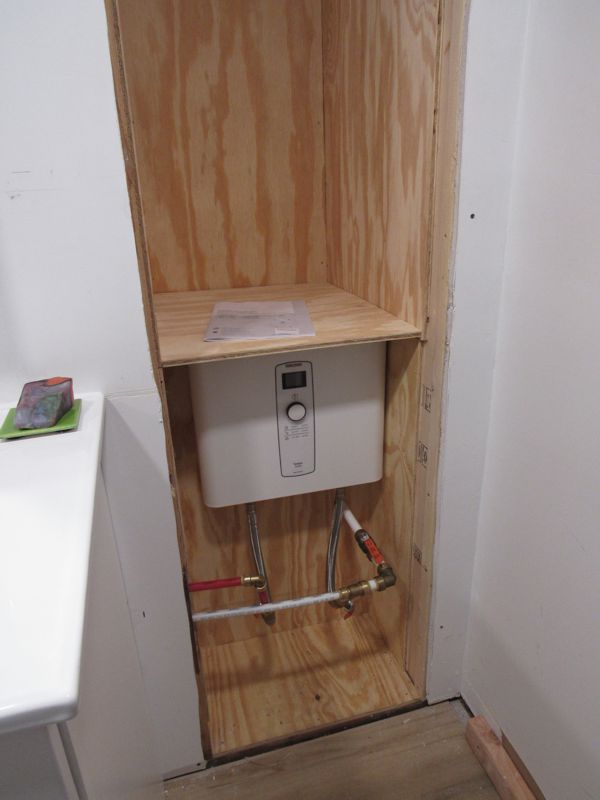
With the water heater gone, I rebuilt the space to accommodate the tiny new on-demand water heater, leaving the remaining area for a linen closet (below). I also totally replumbed everything: compare the neat new arrangement with the original copper/PEX mess.
7 November 2022 marked the first time hot water flowed through the trailer since 28 October. Damn that shower felt good! There's something to be said for a virtually unlimited supply of hot water. Meanwhile, I sealed the original water heater access door shut: I removed the door latch, plugged the hole, then screwed the door into the frame. If I had ready access to matching siding, I would have covered the door with it, but at that point I didn't think it was worth the effort.
Water Main
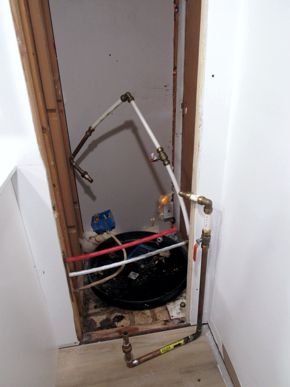
One thing leads to another, and the process of replacing the water heater revealed a water main that was in desperate need of repair, and according to the park rules and regulations, the homeowner is responsible for the line from the ground up. This was actually a good thing, because it meant I had total control over the job, and only needed to pay for materials. The original water line was a patchwork quilt of copper, PVC and PEX pipe, with no less than two leaks, and covered by two layers of the wrong size of pipe insulation held in place by copious amounts of old electrical tape. (Sorry I never stopped to take a photo of that mess—I was on a mission!)
Meanwhile, the heater strip was plugged into an ancient outlet that was falling out of the rotted floor beneath the water heater. The dangling fixture was powered via nightmarish kludge of wiring that connected to a single kitchen fixture through a GFCI outlet located in a nearly inaccessible spot behind the water heater—just try to explain that one to me. Then, the ground wire from the breaker box was connected to an old, seized-up brass stop valve that had plastic pipe on either side, rendering the ground connection useless. And, as the pièce de résistance, the water line was wire-tied to the electric supply conduit—a serious no-no. You can't make this shit up.
I began by ripping out the whole length of water supply line, as well as the heat strip outlet and all of its wiring. I cut the water supply pipe back to just a few inches past the main inlet shutoff valve, and started over from there with brand new PEX and premium brass fittings. I also ran the supply line up into the trailer immediately adjacent to the inlet, rather than several feet away, greatly reducing the amount of pipe exposed to the cold (above). After reinstalling the heating tape, I wrapped everything up with the correct size of pipe insulation (below). Finally, I installed a new electrical box with a GFCI outlet adjacent to the pipe, powered by a dedicated line straight from the brand new breaker box. It was all buttoned up by 7 November.
I had to wonder how many other units in the park had similar problems: sub-par or improper plumbing and electric work, leaks, mouse infestations, etcetera. Sad to think that it's probably more than a few. I also had to wonder how many other units had this level of remediation work done—probably very few.
Electric Service
Back in the 1960s, electrical code was quite different, even kind of wacky. The main breaker box for mobile homes was typically outside, where the power was split between the air conditioner, which received 40 amps, and the rest of the home, which got a measly 60 amps. Since I was planning to upgrade the HVAC to a mini-split heat pump (which required only 25 amps), the hulking air conditioner would go, and the new heat pump would become part of the trailer's internal electrical system, which meant my home could receive the full 100 amps it deserved.
The instant I opened the panel (below left), I was faced with multiple issues, some so bizarre that I had no inkling how to address them, and I happen to know my way around household wiring. Not to mention the panel was cramped and jam-packed with a messy rat's nest of wires and crap. So I called in a professional.
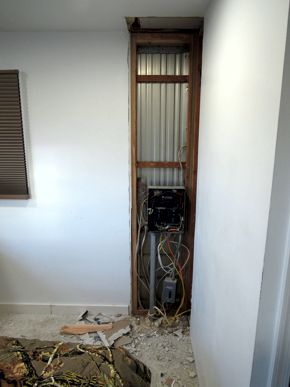

The contractor came to the same conclusion as I had: tear it all out and start over with a brand new panel and breakers. That his estimate for the job was almost exactly what I thought it would be sealed the deal. And I had the big, unsightly blue enclosure torn out (above right) before he'd even gotten back home. Note the aluminum material above the box: that is the original exterior of the trailer (since covered with vinyl). That you can see the aluminum means there was no insulation there, which also suggests there might not be any insulation anywhere else. Oh, great!
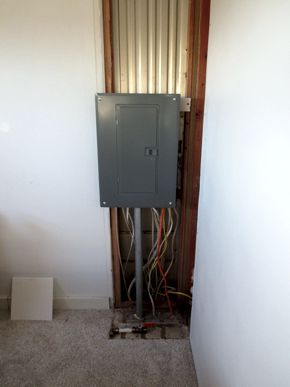

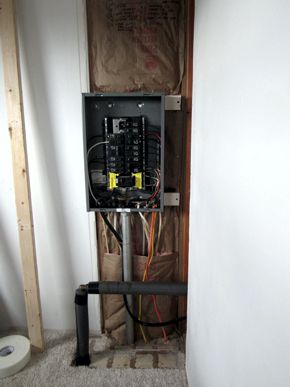
In four hours on the morning of 3 November 2022, the electrician completed the job. And it was good. All I had to do was build a new enclosure for the breaker box. Work on this began 13 December 2022. I started by properly insulating the wall (below left); then I rocked the space above the box flush with the original walls (below right).

It wasn't until 12 March 2023 that I finally got around to framing the bump-out (below left). The lower, larger portion of the bump-out might seem odd, but it solved two problems. First, it enclosed the water line: I'd relocated the point of entry for the line to reduce the amount of exposed pipe as much as possible. The other problem I had to address was the carpet: I had no practical way of patching it to fit the smaller enclosure, so I framed the lower part to match the size of the original enclosure. The tops of the two bump-out steps will be capped with shelves.
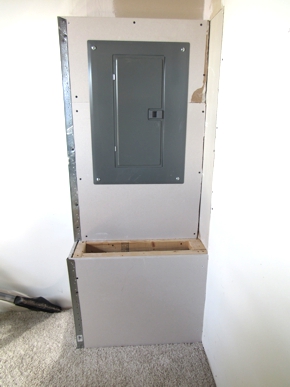
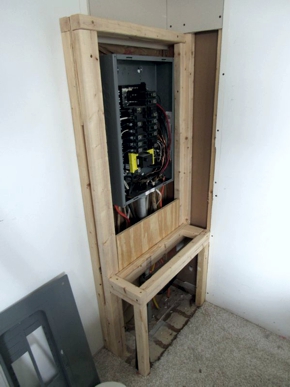
Fast-forward all the way to 17 October 2023, when I finally got around to rocking the bump-out (above right). Still to come are the finish work and the shelves. As for the breaker box cover being exposed, I imagine most people would find that unsightly. However, I'd toured many mobile homes, and most of the newer ones had exposed breaker box covers, usually in the master bedroom, so what I'd done wasn't unusual.
Heat Pump
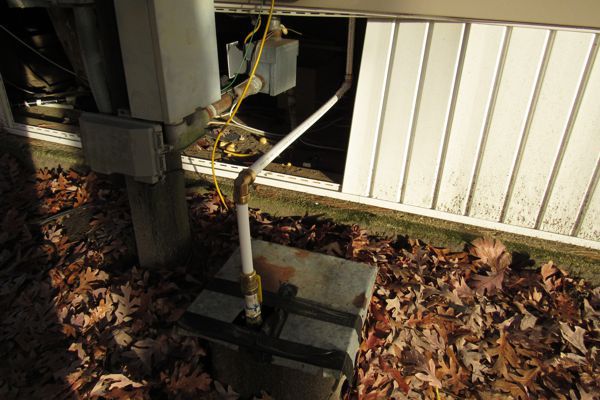
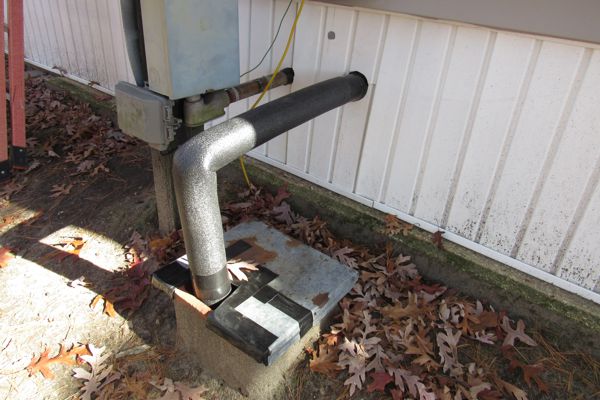
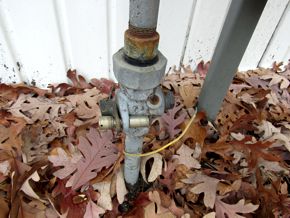
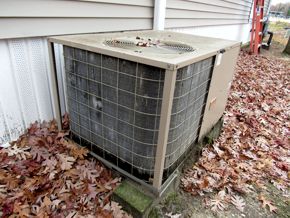
The need to address the HVAC grew more urgent as the weather turned colder, so I got a bid for a new heat pump on 4 November 2022. I was pleasantly surprised by the bid: it was in line with my expectation, but it also included removing the old air conditioner and sealing off the ductwork, which I had not expected. That settled it for me—it would be so good to see that dinosaur gone (below left). I also had the gas service shut off (below right), that pale yellow cylinder being the company-installed valve lock.
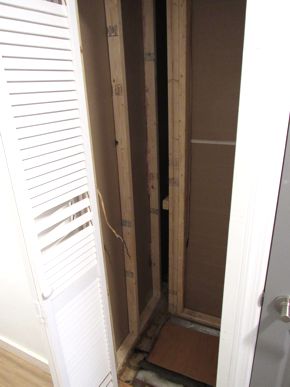

However, the HVAC crew would not be removing the furnace, so to save a few bucks, I tore it out myself. The only way for me to get it out was to completely dismantle it, which was actually kind of fun. The pieces got moved outside for later disposal (above left), while the space it occupied (above right) was destined to become another always-useful closet.
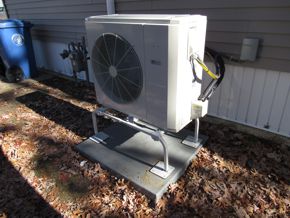
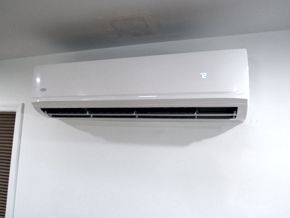
On the morning of 14 November 2022, the new heat pump was installed. Good timing, as it had turned quite cold after being unseasonably warm for the prior couple of weeks. Work was completed in about four hours. And with that, all of the utilities for my humble abode were brought up to 21st Century standards.
Cost Savings
My October 2022 gas bill was $170, plus an electric bill of $50, or $220 to get me through a fairly chilly month. But December was much colder, and I had no gas bill, just an electric bill for $130. Which meant I'd already saved quite a bit. Nowadays I'm on an averaged billing plan, and pay around $55 per month year-round. I can definitely live with that.
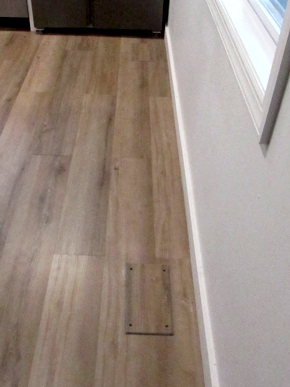
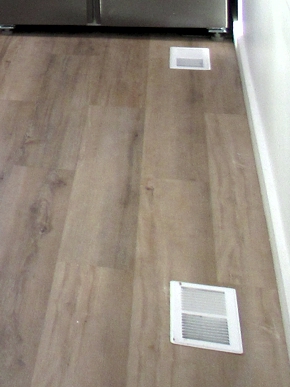
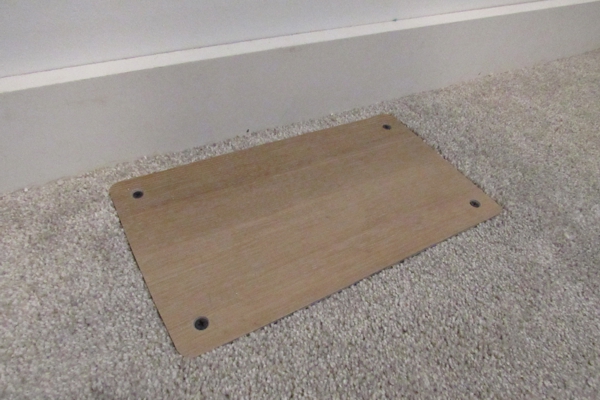
Plugging Holes
An unfortunate legacy of the old forced-air heating/cooling system was a glut of now-disused floor registers (15 in all, to be precise). Given that they were all bright white fixtures, most of them installed in woodgrain flooring (below left), they practically screamed to be eliminated somehow. But the solution had an overriding constraint: it had to be zero-cost. Fortunately I had some scraps of flooring left over, and so I took the direct approach: I cut register-sized pieces of flooring, beveled the edges so as to both improve aesthetics and reduce the chances of creating a trip hazard, and simply screwed the panels to the floor with black countersunk screws. I wouldn't call the results ideal (below right), but they're inoffensive, and cost me nothing, which is the best I could hope for.
I took a slightly different approach for the four holes in the carpeted rooms. Originally I'd wanted to replace the carpet in the master bedroom clothes closet with vinyl flooring, so that I could plug the holes with scraps of matching carpet. Some quick measurements revealed that, while I wouldn't have enough of the vinyl flooring to do the closet, I'd have just enough to fill the holes. So I made plugs much like the others, except that I left the edges plain (not beveled) and also rounded the corners to give them a more finished appearance. Then I screwed them in place like the rest.
My stupid old trailer is hardly a House Beautiful contender, so I had to be realistic about how far to take things such as this. As it was, I'd spent over a year mulling over how to deal with it, finally wrapping it up in early December 2023.