
Dot's Diner, Part 2 of 3: Interior Construction
With its big windows and strong character, this is the kind of structure that demands loads of interior details, and the Miller Engineering lighting and interior detailing kit provided just enough details to create the familiar flavor of a classic diner. I used the kit pretty much as-is, and just added some cosmetic touches.
One of the things that really screams "classic diner" is a checkerboard tile floor. Using an inkjet printer, I printed a black checkerboard pattern on white decal paper, and protected the image with clear fixative. I also used this technique to make the small sign over the door, the menu on the back wall, and other sundry details. I generated multiple copies of several variations of the artwork so that I could pick and choose the best-looking versions, plus have backups in case I messed up a decal (which I did, a few times).
From there it was a matter of finishing and installing the furniture. The seats and stools were painted red, the tables and counter painted white, and most everything else was left stainless. The two interior doors were replaced with more interesting-looking ones left over from the Pink Elephant Car Wash kit (even though, in reality, they're barely visible). With all of the stock props in place, I populated the establishment with staff and patrons, then added random bits of styrene strip and rod stock, some colored with Sharpies, to create visual clutter.
By the way, there's a total of 14 people inside the diner, and except for Wanda the waitress, who is a Preiser figure, all of them are from Merten. The seated figures are also nearly all women and children (with their feet cut off), as the men tended to be too large to fit in the booths. Of course, it's virtually impossible to notice this by looking in the windows. Merten figures were also chosen for economy; I wasn't about to put expensive Preisers where they can barely be seen.
There was one last interior design problem to address: the gap at each end of the interior part between the end of the floor and the outer wall next to the rounded windows. I understood why these areas could not be filled by the kit interior as designed, and there was no way I was going to extend the floor and move tables around. So, I filled in the spaces with large, tacky planters. To simulate plastic plants, I used N scale etched brass foliage from Scale Link (SN-F032), painted dark glossy green, and stuck into small blocks of dense foam colored with a brown Sharpie.
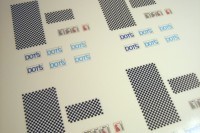
Artwork for the floor, menus and signs is printed on white decal sheet.
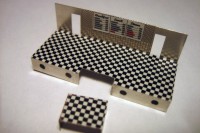
The checkerboard decals are applied to the floor parts.
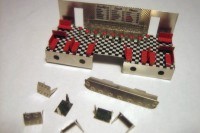
Seats and stools are painted red and installed on the floor.
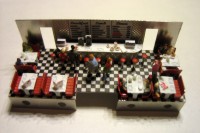
Figures and random bits of styrene give the interior visual clutter.
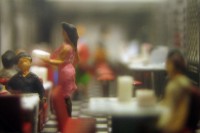
The view through the window is the test for a believable scene.
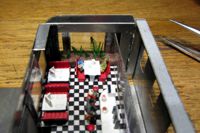
Planters full of plastic plants fill the awkward spaces at each end.
Copyright © 2007-2013 by David K. Smith. All Rights Reserved.