
The "Two Beer" Modeling Challenge
It all started innocently enough at the Railwire: regular Richie Dost posted a photograph of an unusual, home-made loading ramp built upon an old freight truck (from an equally unusual source). Not long afterward, another regular, Lee Weldon, suggested that it be used as the basis of a modeling challenge: to scratchbuild one by the weekend.
Although the challenge intrigued me, it so happened that it was presented at just the wrong time: I was in the midst of madly preparing for an open house, when my layout would be on display for visitors to Rick Spano's Sceniced and Undecided. But it lurked at the back of my mind for a while: the challenge was time-sensitive in that it should in theory only take one evening. And so, after due consideration, with the open house a little more than a week away, I figured that I could spare one night for a bit of fun—even though I don't drink beer!
Before getting started, I had to decide on the materials to use. After considering brass, I chose styrene instead, even though I imagined the model might look much better rendered in brass. The spirit of the challenge as I perceived it was to have some fun building something over the course of an evening (or "a couple of beers"), and I saw styrene as the speedier alternative. Besides, this wasn't a challenge to build a contest-level model.
The first step was to chop up a truck. I chose the new Full Throttle truck as the starting point, given it has the best proportions of all available Bettendorf-type trucks. After clipping the sideframes off the bolster, I drilled out the bolster end and spring area with a #70 drill, then carefully carved out the opening with an Xacto. Then I trimmed off the brake shoes.
Given the way the little beastie was designed, I reasoned that the truck sideframes would not be rigidly aligned if I relied on the platform assembly for strength, so I took advantage of the barely-visible lower brace that ran between the spring pans at the bottoms of the sideframes, and made a robust part that would provide strength without compromising appearance. I laminated two bits of strip styrene together to maximize the surface contact area at the ends, and bonded the sideframes in place. After trimming the brace to length, I shaped the ends of the visible parts to look like steel channel. I messed up slightly with the length of the brace, and the original wheels wouldn't stay in place, so I switched to AZL wheels, which have slightly longer axles.
Next came the vertical support parts that are welded to the tops of the sideframes. I started with Evergreen channel stock to make the shapes, thinking I'd save a little work by having one edge of the horizontal channel shape already done; however, this didn't work because it wound up too tall, and I had to trim off the top flange and make a new one from strip stock. The hardest part was shaping the edges that contacted the sideframes—they had to be shaped precisely to match, then bonded to the sideframes with CA. This took a few tries to get right.
The main platform was relatively easy to make: it's just a rectangle of thin sheet styrene. I attached the hinges to the edges by bonding styrene rod stock while the parts sat on a steel ruler—this placed the hinge flush with the top surface, where it belonged. Five pieces of strip stock formed the support ribs on the underside, and two more topside. This assembly was placed on the supports attached to the truck and bonded in place. The last major parts to fabricate were the movable platforms on either side; they were made much like the main platform, and bonded to the hinges.
Next came painting and finishing the completed model. I started by spraying it with Floquil Refer Yellow, turning the wheels to get even coverage. However, all of the tiny nooks and crannies of this beastie required some additional painting by brush. I then started the weathering process with an India ink wash, followed by a dousing of Rustall and various powdered chalks. Finally, the scrape and damage effects were done by hand with a fine brush and some custom mixes of Doctor Ben's rust.
The last hurdle was to give the top surfaces the effect of worn diamond plate (sheet metal textured with a raised pattern for traction and safety). There was no way I could have actually modeled the texture, so I decided to simulate it with decals. I printed an image of real diamond plate on clear waterslide decal material, so that underlying colors could show through. After painting the platforms to suggest wear patterns, I applied the decals, then blended everything together with some additional weathering. The effect is subtle, but it is noticeable. The final touch was adding the chain on the raised platform; I made it from a piece of a fine beading needle, which has a texture that makes it look a bit like chain. A final misting of Dull Cote wrapped up my contribution to the challenge!
My only regret with the whole project was not being able to figure out how to simulate old rib-backed wheels. I considered making decals to fake them, but these would only work if the wheels remained in one position—the instant they were rotated, the illusion would be broken owing to how the ribs cast shadows. Under the circumstances, I don't think I lost a whole lot of points as a result—not that anyone was even counting points; it was a modeling challenge, after all, not a competition.
I'd like to thank Richie Dost and Lee Weldon of the Railwire for creating this challenge, however "accidentally" it may have come about. For me, it posed some unique new modeling challenges, and I not only got to add some new tricks to my toolkit as a consequence, I also enjoyed myself immensely doing it... in spite of the fact that there's no place for me to use the thing on the layout!
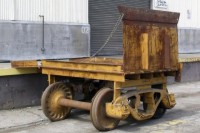
This unique little homemade movable loading ramp started the challenge.
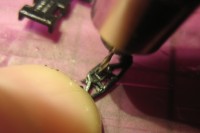
After cutting the sideframes off the bolster, holes are drilled in the springs.
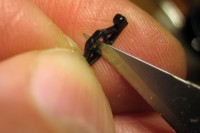
The bolster ends and spring details are carefully trimmed away with a knife.
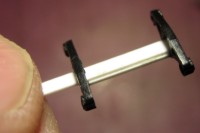
The sideframes are bonded to a thick lower brace part for strength.
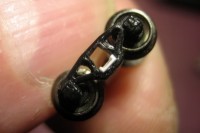
The ends of the brace are shaped with a knife to look like channel stock.
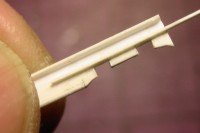
The vertical supports are cut out of styrene channel stock and detailed.
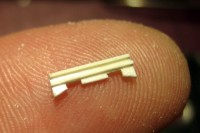
The finished supports are modified to correct their height.
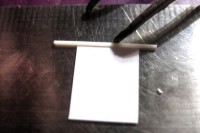
Styrene rod is bonded to the main platform to make hinges.
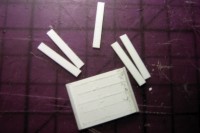
The platform is marked for the supports made from strip stock.
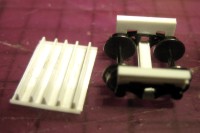
The finished platform is ready to be bonded to the assembled truck.
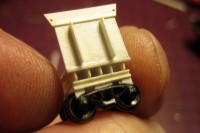
After adding the movable platforms, the model is ready for painting.
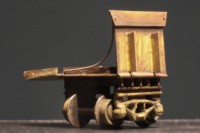
After painting, the model receives washes and detail weathering effects.
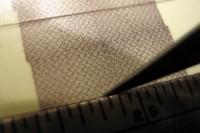
An image of diamond plate pattern is printed on decal stock.
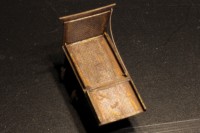
The diamond plate effect is subtle but it is evident from certain angles.
Copyright © 2007-2013 by David K. Smith. All Rights Reserved.
Prototype photo Copyright © 2009 by DPD Productions. Used by permission.