
The River Goes 'Round the Bend
After considerable consideration, I decided to add a mirror to the layout to extended the river 'round the bend. Of course, all of this meant another round of changes for the layout, which includes altering the far end of Front Street with an intersection, revising some of the finished scenery on the other side of the river, and building a road bridge to disguise the top edge of the mirror. It's an old tried-and-true trick.
Random modeling tip: The specific type of mirror I'm using for this effect is called a "first-surface" mirror. All mirrors have "silvering," which is a thin, fragile coat of aluminum. For ordinary mirrors, this is applied to the back of the glass to protect it. But on a first-surface mirror, the silvering is exposed. This makes the mirror very delicate and prone to damage, but it also makes it ideal for modeling because an ordinary mirror will be obvious by its telltale signs: first, it will have two reflections, the primary reflection from the silvering, plus a faint secondary one from the surface of the glass; and second, because of the glass, there's always a gap between real objects and their reflections. A first-surface mirror eliminates these problems and creates a perfect illusion. They are available from stained glass suppliers.
After evaluating the locale with a spare scrap of mirror, I determined where the scenery would need to be cut back in order to create room for it. This is necessary so that the reflection of the areas under the bridge looks right: if the mirror was simply placed behind the completed bridge, the shadowed area beneath the bridge would be doubled in width and thus look odd. So the idea is to model the road and bridge in full, and locate the mirror along the centerline of the road.
After completing the bridge enough to use for measurements, I positioned it at the back of the layout and determined the size of the mirror required. Once I cut the piece, I test-fit it in the opening. Then I set about finishing the scenery up to the surface of the mirror.
The part that I had to get right was the road, because it had to end exactly at the mirror surface. So, I first made a paper template, and used it to cut a piece of thin black sheet styrene, leaving it just slightly long. Then I performed a series of trial-and-error adjustments to get the mirror end just right.
Meanwhile, I built up the scenery around the road. Pressed for time, I elected to not use Sculptamold, my preferred scenery material, and instead used Crayola's Model Magic, a very odd "clay" that's more like Silly Putty. On this occasion, its rubbery quality made it idea for getting it flush with the mirror.
When everything was finished and aligned, I installed the bridge, followed by the mirror. To secure it, I applied a bead of adhesive caulk, then held the mirror in position with a series of T-pins. Since the whole area would be covered over with wood veneer trim, I just left the T-pins in place.
The very last step was to complete the river surface, which I did right up to the mirror. With some strategically-arranged trees, shrubs and waves, the mirror essentially "disappeared," and the river successfully went 'round the bend.
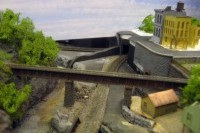
A scrap of mirror is temporarily placed in position across the end of the river.
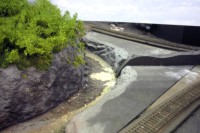
This view shows how the river will be extended perfectly by the mirror.
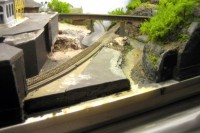
The scenery is cut back so the mirror can be centered under the bridge.
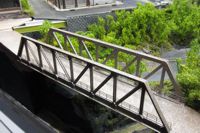
The bridge is positioned on the layout to measure the mirror opening.
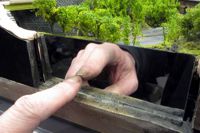
The mirror is cut to size and test-fit in the opening.
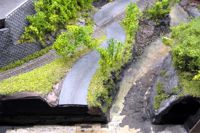
The road and scenery are completed up to the edge of the mirror opening.
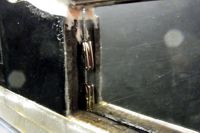
T-pins hold the mirror in position while the caulk adhesive dries.
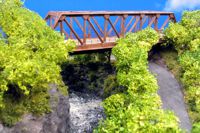
The river surface is applied right up to the mirror surface to finish the effect.
Copyright © 2007-2013 by David K. Smith. All Rights Reserved.