
Weller Fuel Oil Company, Part 2 of 3: The Office
The timing of this project was perfect, as I'd accumulated a healthy supply of etched brass kit scraps. It also helped that one project in particular—Front Street Bank—was "rebooted," because the original Logan Savings and Loan back walls provided a surprisingly accurate rendition of the small windows along the side of Queen City Fuel Oil building. The simple front wall could be carved out of almost any brick wall scrap.
The only significant deviation I made from the real building design was to make it rectangular, instead of slightly wedge-shaped; the building did not need to be oddly-shaped for my purposes, and I felt that it might also look like a modeling error. After extracting the side walls from the bank wall parts, I had to add one short course of cinder blocks to create the stepped profile. Other than that, I only had to convert one window opening into a door, and three of the walls were done.
The only real chore to complete was the brick front wall, with its wrap-around windows on either side of the entrance. I began with a scrap that already had a door opening, which helped get the cutting started. Because of the part's diminutive size, the cutting had to be done with a jeweler's saw. I marked the brick with a sharp knife, clamped the part in a vice with smooth plastic jaws, and slowly cut just inside the line. After the cutting was done, I carefully filed the opening to its final shape with a jeweler's file.
After soldering the four walls together, I made the wall caps from strip styrene cut to produce the roof slope. Then I cut a piece of sheet styrene for the roof, which was bonded to the cap pieces from beneath. The last bit of assembly prior to painting was to cut and bond the brick parts that wrapped around under the entrance windows toward the door.
I decided to keep the color scheme of white and natural brick, but elected to make the building a bit more aged to add interest. After priming the entire building with grey primer, I used the "Tom Mann" salt trick to produce chipped and flaked paint: after misting the cinderblock walls with water, I sprinkled on a little bit of sea salt, and allowed it to dry. Then I sprayed it with white paint, and when that was dry, I brushed away the salt with a small, stiff brush to create flecks of grey peeking out from the white. When subjected to macro photography, the details are oversized, but from normal viewing distances they produce the desired effect.
The brick front received a coat of ruddy primer; since this was actually a faux brick facade—which can have "odd" coloration, such a dark mortar—I applied an India ink wash, and touched a few random bricks with a little extra ink wash to give them some variation in tone. The roof received a layer of masking tape for texture, which was brush-painted with Floquil Weathered Black plus some straight flat black "patchwork" details. Inspired by the Queen City Fuel Oil signs, I rendered my own signs with software and printed them on blank decal paper. Curiously the front of the building has no sign—so I followed suit.
The front entrance wasn't quite as hard to make as I'd anticipated. I started with some strip styrene cut to fit the opening; these bits were bonded together while positioned within the opening so that the assembly was guaranteed to fit. An etched brass door from the leftovers box that just happened to fit was bonded to the styrene frame with CA. After removing the assembly from the building, everything was primed and painted.
The entrance windows took a bit of fiddling, since they're mounted flush all around. To get a perfect fit required cutting several strips of thin acetate until I came up with ones that exactly matched the opening height. Several pieces had to be cut from the strips, each scribed and bent, until I had two L-shaped parts that slipped into place with just enough friction to hold them securely, until I could apply the tiniest dabs of CA to the edges along the underside of the entrance, where any excess cement would go unnoticed. After this challenging exercise, I thought twice about installing window blinds, and settled for some generic objects in the display areas. The blind for the window in the door is a bit of pre-printed paper from an old N scale plastic kit, although it's not even visible under normal viewing, so it's one of those "I know it's there" little details.
Since I'd not planned on illuminating or detailing the interior, I just installed some pieces of plain cardstock inside to prevent the "empty building" effect. Now it's time to move on to the tanks and all of their associated details—in other words, the fun stuff.
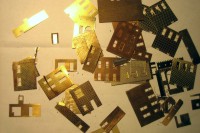
It's a good thing I don't throw away any etched brass scraps...
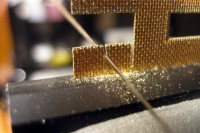
The entrance opening is first cut using a jeweler's saw.
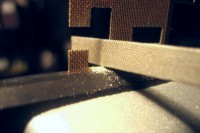
After cutting, the opening is carefully filed to its final shape.
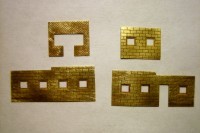
The four walls of the Weller Fuel Oil building are ready for assembly.
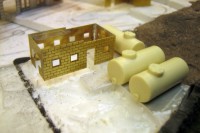
The building shell is dropped into place on the layout for evaluation.
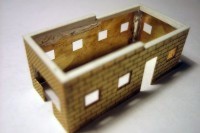
Strip styrene caps are added to the wall tops prior to installing the roof.
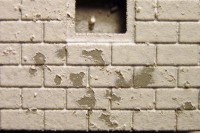
The "salt technique" produces the effect of chipped and peeling paint.
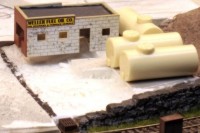
The painted building is returned to the layout again for evaluation.
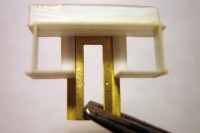
The entrance is made from styrene parts cut to exactly fit the opening.
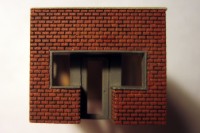
The entrance is painted, then test-fit in the building before glazing and detailing.
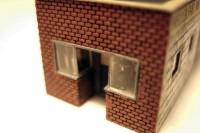
Glazing is cut to fit the window openings precisely and installed.
Copyright © 2007-2013 by David K. Smith. All Rights Reserved.