Rexall Pharmacy, Part 1 of 2: Exterior Construction
The pharmacy was originally a generic space-filler for Second Street. Since it would face the back of the layout, the particulars were not all that important. Originally it was to occupy a kit from Shire Scenes. But after numerous revisions to the town of Naughtright, it finally wound up in a Miller Engineering K.C.'s Hardware kit that had been intended for a smaller version of Franklin Five and Dime.
Fortunately I'd not yet started assembling that last Franklin building, as it was best suited for its new location with a minor modification. At one spot Second Street has a curve, and the buildings that lined it followed the curve. Thus the pharmacy sat between two other buildings that sat at slightly different angles to one another. Although I could have gotten by with the pharmacy as a rectangle, there would have been an awkward little wedge of space between it and the library.
It was a simple matter to fill in the wedge by inserting a narrow strip of brick in the corner of the kit with the connecting tab (a fortuitous coincidence!) to push the end wall out on an angle. Having built the Franklin building multiple times already, I had plenty of spare matching brick on hand.
Aside from this one little exception, the kit was assembled in a straightforward fashion following my usual techniques. After spraying the outside surfaces with primer to prevent solder creep, I cleaned the inner corners and joints, folded it up, and started soldering. I always solder all of the corners—including the ones that are folded—both for added strength and to prevent light leaks. In this case, the kit spent a little too much time in the etcher, and the fold lines were quite deep; as a consequence, the folded corners were extra flimsy, and absolutely had to be soldered or else they'd literally fall apart.
With the building shell assembled, it was ready for a new roof. This required the addition of styrene strips around the top edges of the walls to hold a sheet styrene roof in position. The strips were attached after soldering the chimneys in place, and the roof part was covered with masking tape for texture.
After installing the new roof, I added a new cornice. Since the building faces the back of the layout, I didn't invest much effort in making anything fancy; it's just a pair of styrene strips. The corner where the brick extension strip was installed, however, faces the front of the layout, and it's a bit obvious. But it ought to be easily disguised with a strategically-positioned scupper and downspout.
Finishing work and the lighted sign are covered in Part 2.
This Shire Scenes kit was originally intended for the pharmacy.
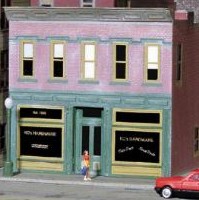
A Micro Structures K.C.'s Hardware kit is now the pharmacy's new home.

The building is assembled by soldering all of the joints and folds.

The left end of the shell is modified to fit a slightly angled space.

This corner of the building has a thin strip of brick inserted to angle the wall.

The new roof is installed and a new cornice applied.

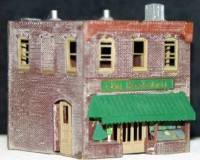
The completed structure assembly is painted and weathered.
![]()
![]()
![]()
![]()
Copyright © 2007-2013 by
David K. Smith. All Rights Reserved.
Miller Engineering product photo used with permission.