
Plate Girder Deck Bridge, Part 2 of 2: The Piers
This is partially a cautionary tale. I prefer cast resin stone materials over styrene because the detail has more fidelity and character. I chose the N scale Pre-Size cast resin stone wall material because it seemed to have the most appropriate stone size. I've also worked extensively with cast resin in the past, and knew what to expect.
Well, almost. Previously I'd worked alone...
Cutting and sanding cast resin releases an obnoxious odor. While it isn't exactly pleasant, it doesn't bother me. But it can bother others, and within minutes of starting on the piers, I received complaints from other household members that the smell was making them sick, as the forced-air heating system quickly and efficiently distributed the stench throughout the entire home.
Working outdoors would have been the best option, but as it was a chilly January at the time, pier fabrication had to be temporarily suspended altogether until a 70-degree day in mid-March. In any case, a filter mask is strongly recommended at a minimum.
Construction began by cutting strips of stone material to the pier height. The strips were then cut up into the angled pieces required to make the four pier sides; I eyeballed the angle based on some reference photos.
Cutting cast resin sheet is easily done by scoring it with a model knife held backwards several times until the score is about a third to halfway through the sheet. It's also much easier working on the smooth back of the casting. Then it just snaps apart.
The straight-edges of the parts were angled to roughly 45 degrees using the scoring technique, except cutting all the way through the material. This step simply reduced the amount of sanding to be done—which is considerable.
Each piece was then carefully sanded until all of the joints met properly. Once this was accomplished, the parts were thoroughly cleaned with rubbing alcohol to remove all of the fine, insidious resin dust.
The parts were bonded with thick CA, making certain that the mortar lines aligned. After the CA set, I carefully inspected the corners and trimmed the odd-looking stones as needed with a knife.
Handmade, however, translates to error-prone, and getting the mortar lines to align on the last joint was a virtual impossibility, so wherever you see clumps of creeping vines or a strategically-placed tree, there will be a bad joint in hiding.
After trimming and sanding the pier tops (making sure that sanding stopped on a mortar line), I cut a cap from thick sheet styrene to fit, sanded and distressed the styrene to give it some character, and bonded it to the stone parts with CA.
Abutments were similarly fabricated; they were carefully made to fit the two ends of the bridge, which are quite different as well as asymmetrical. This required several iterations of of cutting, sanding and fitting.
Finishing started with a base coat of gray primer spray, followed by several India ink washes, heavy streaks of Rustall, and some green chalk dust for moss and lichen. They were then ready for installation.
The abutments were carefully installed such that the ties on the bridge were exactly flush with the ties on the layout itself. The piers were bonded to the bridge bearing plates with CA before installing the bridge on the layout.
I happen to think all of the hard work was worth the effort: the piers and abutments do not look commercial or prefabricated, since they were made to suit the location, rather than the other way around.
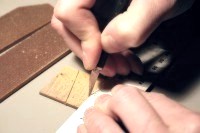
Resin stone sheet is scored with a knife and then snapped.

The straight edges of the parts are cut on an angle to save sanding.
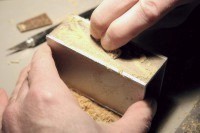
Each part is sanded to fit, which often requires a lot of sanding and fitting.
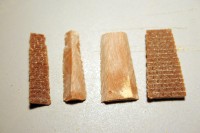
After sanding, the parts are cleaned with alcohol to remove resin dust.
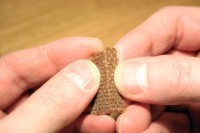
The mortar lines are carefully aligned as the parts are bonded with thick CA.
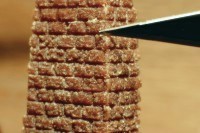
Stones along the joints are inspected and trimmed as needed.
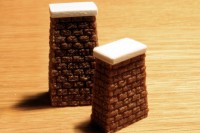
Styrene caps finish construction of the two piers.
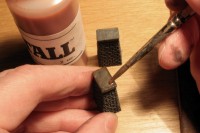
After spraying with gray primer, the piers are heavily weathered.
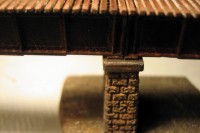
The piers are attached to the bridge before installation on the layout.
Copyright © 2007-2013 by David K. Smith. All Rights Reserved.