Water, Part 1 of 3: Peaceful Ponds
Because model water is easily damaged and a magnet for dirt, it's usually the last thing to add to a layout. Consequently, the water on the James River Branch had to wait literally years to be completed.
Water can be modeled in a variety of ways, using a great many different materials and techniques. Since the layout has a peaceful pond, a rushing river, and a few wild waterfalls, I used several different methods to model them.
For the pond I used a clear potting epoxy from Smooth-On. Several different products can be used for bodies of water with depth; I chose this one mostly because I had it on hand, but based on the experience, I'd use it again over other products such as EZ-Water from Woodland Scenics, which has well-documented issues. I might have gone with the technique I used to rescue Taylor Lake, except that this little farm pond was planned to be calm, which meant one should be able to see below the surface.
The potting epoxy I used is a classic two-part product that's mixed, poured, and allowed to set. Thus the pond was poured in a few minutes. By contrast, Auger Creek, which leads from the pond to the James River, flows and tumbles down a series of rapids and falls; once poured, it would quickly drain itself, leaving behind very little in the way of "water."
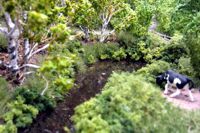
To give Auger Creek depth, I placed the lift-off panel in a large disposable aluminum tray to catch the runoff, and squirted epoxy in the head of the creek. A little while later, I returned and repeated the process. This continued until the epoxy barely flowed, at which point I allowed it to set.

The Merrill Farm pond started out as a "mud basin" made from Sculptamold.

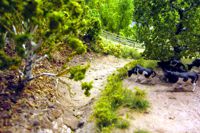
After a single pour of clear epoxy, the pond is finished.

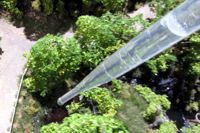
Repeatedly squirting epoxy into the head of Auger Creek builds depth.
Copyright © 2007-2013 by David K. Smith. All Rights Reserved.