
Stephen A. Greene & Sons Building Supply, Part 2 of 6: Main Building Assembly
The bashing procedure was reasonably straightforward, although aspects of construction were more like scratchbuilding in that the wall parts were all reinforced with stripwood. This was necessary because I would not be using the bases provided in the kits—they projected out from the edges of the walls, preventing me from modeling a proper foundation. Also, I'd be making a new roof from scratch owing to its complex configuration.
The first order of business was trimming away all of the tabs on the tops and bottoms of the walls. Then, since all walls, doors and windows would be painted the same color, I attached all of these parts to the walls before assembling them. The two sets of freight doors on the front were filled in to suggest changes over the years. Next, I applied the reinforcing strips to the backs.
Because the Nail Brothers kit would be grafted onto the side of Lew Skroo's, the rear main wall was omitted. I also widened the long, slender extension to give it some more mass by replacing the end parts with those from the unused addition on the other side of the building—thankfully the siding matched and the dimensions were such that I only had to shave off a sliver from the top of the extension's back wall.
Little was done to Lew Skroo's other than to omit the brick foundation and fill in both sets of freight doors. The wall where Nail Brothers would be attached was cut away so that I had some spare wall material to use for patching elsewhere as needed.
Both kits received the same subtle cosmetic revisions: the shards of siding that were "lasered out" to represent aging were carefully replaced—I didn't want the building to appear as run-down as the kit-maker had intended. So, I simply clipped these bits away from the frets, and bonded them back in place with CA. Finally, the holes for wall tabs that wouldn't be used were filled in with wood putty.
Additional cosmetic adjustments were made to the door and window frames on the Nail Brothers kit, which were inverted or modified as needed to look more like those on Lew Skroo's. Also, I very carefully sanded the window and door frames slightly thinner to reduce their bulkiness. After assembling all of the main walls, I installed cardstock dividers inside to prevent the "empty building" syndrome that occurs when one can see through a window across to an opposing window.
Final architectural touches included trim boards at the corners of the building. I also added a new set of freight doors to the large, nearly-blank side wall on the Nail Brothers part of the building. This was done to add interest to an otherwise boring wall, the justification being that it was the main freight entrance, since most all of the others were filled in.
Random modeling tip: Recently I've started using a new type of cyanoacrylate adhesive: Krazy Glue is now available in brush-on form, which makes it easy to control application, and it bonds wood and cardstock parts very well. The bottle has a screw-on cap with a built-in brush. I discovered this new product while trolling the aisles of Lowes. Highly recommended.
With all of the walls assembled, I began painting and finishing. First, I sprayed the exterior with light primer grey; then I brushed on powdered chalk to simulate faded paint, plus some more for general weathering and grunge. Next, I glazed the windows. Since I'd decided not to illuminate the building interior, I didn't bother with the black paper liner; I did, however, install cardstock baffles to prevent the empty-building effect when one sees across from one window through another.
The roof posed something of a problem, until I realized that I was operating under a faulty assumption: although the peaks were the same height, the pitches weren't. As a consequence, the roof was a long time in coming, and only after several embarrassing failures. Once I learned the error of my ways, I was able to make a new roof in short order. I used laser-etched siding so that the eaves had board texture; this may seem like overkill, but this building is located at the very edge of the layout, making such minutiae apparent. The micro-ply roof was covered with N Scale Builders-In-Scale corrugated metal material, plus ridge caps made from heavy-duty aluminum foil.
A single detail completed the roof: a chimney. This was cobbled together from scraps left over from another kit, plus a bit of styrene tubing. I attached it to the roof in a location where the lack of flashing won't be evident.
Lastly I applied the sign, which was a decal I created using drawing software and white inkjet decal material. Part 3 covers the foundation, weigh scale and storage shed.
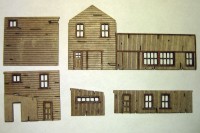
Doors, windows and trim are installed on the Nail Brothers kit wall parts.
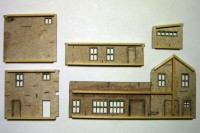
Reinforcing stripwood parts are added to the backs of the walls.
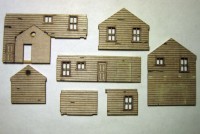
Doors, windows and trim are installed on the Lew Skroo's kit wall parts.
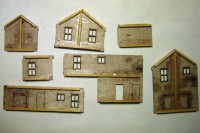
Again, the backs of the walls are reinforced with stripwood.
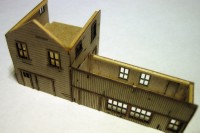
The Nail Brothers kit is assembled, with the back wall omitted.
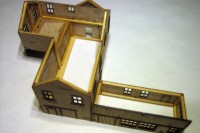
The Nail Brothers assembly is grafted onto the Lew Skroo's assembly.
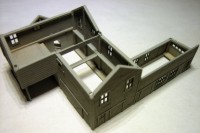
The completed building assembly is sprayed with light grey primer.
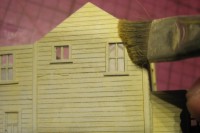
Powdered chalk is brushed onto the primer to create the look of faded paint.
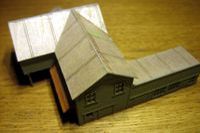
The troublesome new roof finally takes shape.
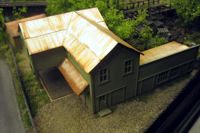
The roof is covered with corrugated metal and weathered with Rustall.
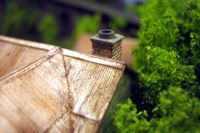
A chimney is made from leftover kit scraps and a bit of styrene tubing.
![]()
Copyright © 2007-2013 by David K. Smith. All Rights Reserved.