
Reading GP7
Whilst roaming 'round the internet looking for reference photos of GP7s, I stumbled across a whole page of Reading locomotive photos, and that's when it struck me: the paint scheme of Reading's earlier GP7s was nearly identical to that of Pennsylvania's GP7, which I already owned. (This discovery actually contributed to the notion of switching they layout itself from PRR to RDG back in July 2007.)
The availability of Reading dry transfers for an N scale switcher (CDS #N-718a)—which I hoped just might be undersized enough to come close to the lettering needed for a Z scale GP7—cinched it. And not long after the lettering sets arrived, I made a print of the best reference photo of the bunch and got to work.
The first step was to dismantle the loco. This was just slightly hair-raising, given that the handrails twist and bend practically by just looking at them cross-eyed. With some very slow, very gentle pulling, the shell finally lifted from the chassis (and sure enough, despite being careful to the point of near paranoia, the railing was slightly bent).
Next was the antenna. This came off quite easily by simply prying it up out of the holes drilled in the shell (thankfully it was not glued in place). Alas, it meant having to fill all of those darned holes, but that was the least of my worries at that point.
Removing the lettering without damaging the paint seemed like a daunting challenge. I still recall my attempts to remove the lettering from an N scale Key brass steam engine years ago—I tried everything short of a blowtorch, with no success. My greatest concern was leaving the paint intact on the shell sides, portions of which are etched brass (these areas form recesses for the motor so that the shell can remain the proper width). Paint often adheres much better to plastic than brass, and I feared the worst.
To my surprise and relief, the frequently-recommended 70% alcohol and soft pencil eraser combination worked like a charm. I started with the cab lettering, with my reasoning that, should disaster strike, it wouldn't be all that hard to refinish the area under the cab windows. Success, however, led to a slightly different dilemma: how to get at the lettering that was hazardously close to the ever-so-touchy railing? The solution was to chop the eraser into a shape that would safely stay out of the railing's way.
After extracting the desired section out of the dry transfer sheet with a sharp knife, I attached the slice to the shell with small bits of tape, using the railing as an alignment reference. It was at this point that, as I compared things to the reference photo, I discovered that I had guessed right for once: the lettering for an N scale Alco switcher was only several scale inches longer than it was supposed to be for a Z scale GP7—a discrepancy with which I could very easily live! I applied the lettering with the other end of the same pencil I used to remove the original lettering.
At this point I was glad I'd ordered two lettering sets: there were problems with the initial application on both sides (broken letters, misalignment, etc.), and I removed the first attempt by applying clear tape to the lettering and peeling it off. Fortunately the second time was a charm in both cases. The numbering was comparatively easier, even though it was all done by eye, one numeral at a time, because I didn't have to work in a recessed area near the railing. Using the slip sheet from a lettering set and the same pencil, I burnished the lettering in place.
Although the reference photo showed the locomotive bearing numbers on both sides of both ends of the hood just above the running boards, I noticed that this was not done on all of the GP7s in the Reading roster, so I elected not to go there. It would have meant cutting a dozen tiny slivers of transfer sheet and burnishing them in place behind those touchy railings...
The reference photos did however show that the handrails on both sides of the steps should be painted yellow, along with the step edges, so I duly reproduced this with some Testors flat yellow and a #10/0 Taklon brush. I also applied red to the fuel fills. The next step was to fill in the antenna holes, and follow this by some weathering.
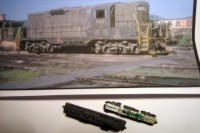
This reference photo gave me the idea to convert the AZL PRR GP7.
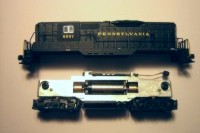
With the shell removed from the chassis, the antenna is pulled off.
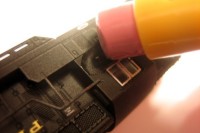
The number is removed from the cab with 70% alcohol and a soft eraser.
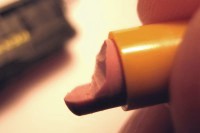
The eraser is carved into a shape that will safely work around the railing.
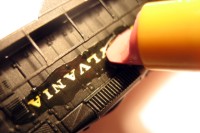
The road name comes off with ease, even with different shell materials.
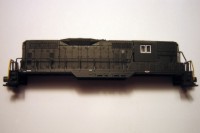
The shell is stripped of the old road name and is ready for dry transfers.
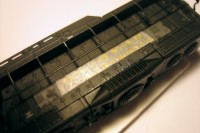
The dry transfer sheet is cut into a strip and attached to the body with tape.
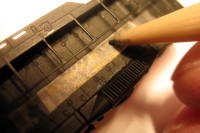
Lettering is transferred by gently rubbing it with a soft pencil tip.
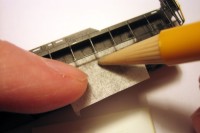
Lettering is burnished to the body using the slip sheet and the same pencil.
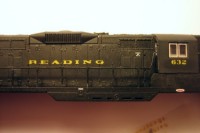
The re-lettered shell is ready for detail painting.
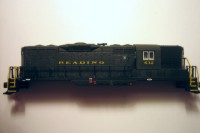
The handrails, steps and fuel fills are painted.
Copyright © 2007-2013 by David K. Smith. All Rights Reserved.