
Greenery, Part 2 of 3: Materials and Techniques
My choices of materials and techniques have changed over the years as my skills improve and as new commercial products have become available. Lately I've been experimenting with some new scenery materials; in particular, I've become very fond of Silflor prairie tufts (available from Scenic Express). Used in larger scales for very different effects, they are an ideal replacement for static grass in smaller scales. While I've always liked the effects that static grass can create, I've never liked the mess it produces.
When I started working with prairie tufts, I discovered that packing them tightly together can produce the same look as static grass—actually much better, because the fibers all permanently stand upright. I can also apply the tiniest clumps of weeds and grass precisely where I want, something impractical to accomplish with static grass.
This would not be a viable technique for larger layouts, because the cost—both in terms of capital and time—would be prohibitive. But for tiny layouts like the James River Branch, it's ideal. Prairie tufts are available in a variety of colors and heights, allowing one to create wonderfully diverse plant life.
Bear in mind that static grass—or, in this case, its substitute—is not being used to simulate grass per se, but weeds and clumps of tall, slender plants. Topped with fine ground foam, the same grasses become small, leafy plants—what I refer to as "micro-shrubbery."
Applying prairie tufts could not be easier. They come on clear plastic sheets in a broad array of sizes, from just a dozen fibers in a pinpoint to blobs the size of a lima bean. Just pluck a tuft off of the sheet with tweezers, dip it in glue (I use carpenter's glue for dark wood), and press it onto the layout.
I use mostly short late summer prairie tufts; for variety I'll add some short spring prairie tufts here and there for light green highlights, and short autumn prairie tufts for dead or dying plants. In larger areas I'll also use summer buffalo grass, which has long tan fibers mixed in with shorter green ones; these can create some striking effects.
After an area is covered in tufts, depending on the look I'm after, I may go back and add any number of other items. Sparse areas just get Woodland Scenics clump foliage pulled into tiny bits. Wild briars and undergrowth starts with small, stretched-out chunks of Scotch Bright scrubbing pad, sprayed with Floquil Roof Brown and spray adhesive, and lightly sprinkled with fine ground foam. Then I'll go back again and perhaps add shrubs (bits of Woodland Scenics foliage clumps) or trees. Forest areas first receive a layer of groundcover from Driftwood Scenery Company, ground tea leaves, small clumps of ground foam in dull colors, and bits of broken twigs. Eventually I'll have an area built up to the level of growth I want.
Understandably, covering large areas iteratively with pieces of material on average about the size of a house fly may sound incredibly tedious. But for me, it's quite the opposite: no other modeling process is as relaxing. Plunking down weeds and plants one tiny bit at a time is wonderful therapy, as effective as any tranquilizer. I've no explanation for this, but it's always been this way for me. Go figure.
Next: Trees.
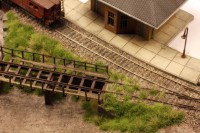
The first greenery on the layout are weeds surrounding the coal trestle.
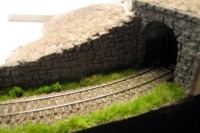
The weeds along the back of this track hide the edge of the access panel.
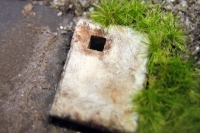
Tufts of grass can be applied with great precision, such as around this footing.
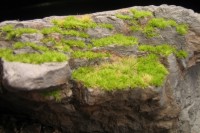
Tufts also form the basis of ground-cover in rugged areas.
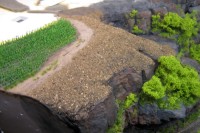
The ground in wooded areas receive a layer of forest floor texture.
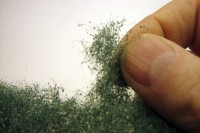
Briars and undergrowth start with torn-off chunks of scrubbing pad.
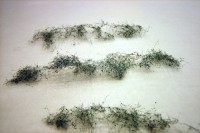
The chunks are stretched out until they are delicate, then sprayed dark brown.
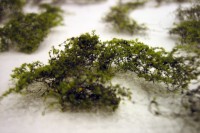
Ground foam is then lightly sprinkled over spray adhesive.
Copyright © 2007-2013 by David K. Smith. All Rights Reserved.