
Terrain
As I've stated many times, scenery-making is one of the most enjoyable aspects of layout construction. So it was quite a thrill to finally get to create some landforms other than the rockwork I'd already done.
A layout as small as the James River Branch requires that I work slightly differently than I do for "normal-sized" layouts. Ordinarily I'd carve rough land shapes from extruded polystyrene foam (sheet foam insulation material). Such a technique is entirely too crude for the compact spaces of a layout measuring only about one by three feet.
To achieve the control required for carefully shaping tiny scenic areas, I begin by building up layers of foamcore—this is rather like a scaled-down version of the foam insulation technique. I first make paper patterns to determine the shape of the pieces needed, then use them to cut foamcore parts, which I laminate together with carpenter's glue.
This process may be followed by—or interwoven with—the installation of permanent scenic structures, such as retaining walls. The foamcore pieces can be shaped to match such parts with great precision.
My preferred earth material is Sculptamold tinted with a combination of black and brown concrete dyes—heavy on the brown. I add water to make a thick paste, drop blobs of the mixture on the layout, and begin working it with a chisel blade. The open time is quite long, allowing me to poke and prod the material, teasing it into all of the nooks and crannies and getting its contours just right. For smoother areas, such as dirt roads, I wait until it begins to get good and firm, then rub it with my fingertip.
Sometimes I'll use a regular #11 blade to poke miniscule bits of wet Sculptamold into tiny corners and crevices; for example, I added an almost microscopic bit of earth to the top of the abutment under the deck girder to simulate dirt that had accumulated there over the years.
The earth material is brought right to the very edge of the layout, covering the top edge of the foamcore fascia. This is the same "ordinary" foamcore that warped so badly that I had to make a new access panel for the town; however, all of this foamcore is firmly glued to the warp-proof Gatorboard layout base, and even though it may swell a little, nothing goes badly awry.
When the Sculptamold is thoroughly dry (two to three days, depending on the thickness and humidity), it will be a perfect earth color and ready for greenery—after the ballasting is done, that is. I do the ballasting first to avoid possibly damaging vegetation by totally saturating it with alcohol, water and glue.
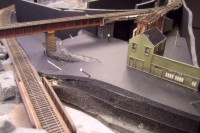
Layers of foamcore are built up to create the scenery contours.
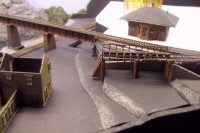
The foamcore parts are carefully cut to fit around items like the coal trestle.
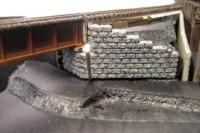
Before earth can be applied, abutments and retaining walls must be completed.
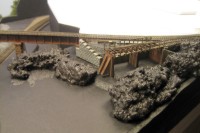
Blobs of Sculptamold mixture are dropped onto the layout.
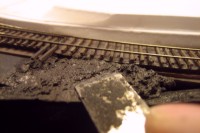
A chisel blade is used to shape the wet Sculptamold.
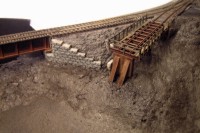
Sculptamold remains workable for a long time so it can be carefully shaped.
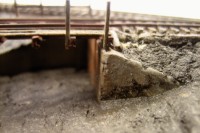
Shaping control can be extremely fine—this whole area is the size of a quarter.
Copyright © 2007-2013 by David K. Smith. All Rights Reserved.