Cable Guardrail Along River Road
Although increasingly being replaced, old cable guardrails can still be found, and in some places they're still being installed new. I've always wanted to model the occasional old cable guardrail as a contrast to the more common ribbed metal type. I did make a short section for my last N scale layout, and in doing so I learned that it's not the easiest thing to make, but the end effect was sure worth the effort.
One of the challenges in building cable guardrails is making the stanchions through which the cables are threaded. I got lucky and found some really old etched metal stanchions made for ship detailing. They're probably oversized for Z scale, but with so many possible variations in real life, I wasn't too worried about it.
What made the project go a little easier was the cast urethane stone wall from Chooch Enterprises I'd installed between the road and the river. I simply glued the stanchions to the edge of the stone, in a relief cut for the edge of the roadway; the space facing the road would later be filled in with pavement. After gluing the stanchions in place, I made a footing for the cable anchor at one end by drilling a #80 hole in the end of a piece of square styrene strip stock, and bonding an HO etched brass lift ring into the hole with CA.
The cables are made from neutral-colored, good-quality sewing thread. Cheap thread will have too many stray fibers, although even the good stuff has more than enough of these to drive you nuts. Threading the thread through the stanchions was not as hard as it may sound; magnification helped quite a lot. One end of the thread was glued to the bottom of the end stanchion with CA; the thread was run along to the anchor, around again twice more, and back to the anchor, where it was secured with CA.
The stanchions and cables were all painted with a base coat of flat grey, followed by a liberal application of Doctor Ben's Weathered Rust. When this was dry, I began the tedious process of picking off the stray fibers with a tweezers, a process that continues today, on and off.
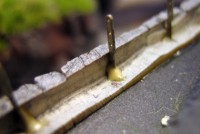
The brass stanchions are glued right to the stone wall.
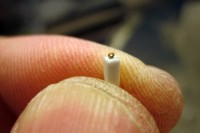
An HO lift ring becomes the anchor for the cables.
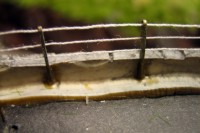
Thread is run through the stanchions, around to the anchor, and back again.
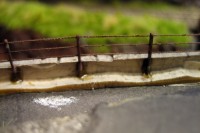
The thread and stanchions are painted and weathered.
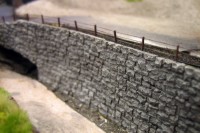
Stray fibers are still occasionally being picked off of the finished railing.
Random Modeling Tip: If I were to do this project again, I would not use regular sewing thread, but instead beading thread. This material is thermally bonded, so there's no fraying at all. Example product: Beadalon WildFire .006 inch (0.5mm) thick, in black, light grey and other colors. Available at Michael's and most craft stores.
Copyright © 2007-2013 by David K. Smith. All Rights Reserved.
