
Rock On
I must admit I'm having more fun with the Cripplebush Valley rubber rocks than I've had doing most any kind of scenery in a long time, and for a small layout, I probably won't go back to any other method. Just getting the rockwork in around the twin tunnel portals convinced me there's no better way to get highly realistic rock into tight, precise spaces.
Although I need to order more, I'm far enough along with the work that I'm finishing and installing some significant chunks. And here's where I depart from the instructions provided, because they don't tell you a few things about rubber rocks that greatly enhance their versatility and appearance. First, you can cut and splice pieces together with great precision and strength using CA. In fact, once rubber rocks are bonded with CA, you can't break the bond; it will tear elsewhere.
Yet sometimes even the best cutting and splicing still needs a little carving to help blend the joints. That's where rubber rocks pose a small problem: it's really hard to carve. But I found that you can use a cutoff disc in a Dremel with some startling results. Surprisingly, even though knife blades virtually bounce off the stuff, it grinds more like wood than rubber.
As for finishing, while the molds do come nicely pre-finished, they're all different colors, which creates problems when cutting and splicing from different pieces, as well as creating consistency across a single layout. The manufacturer cautions against the use of solvent-based paints; however, as a friend of mine found out, ordinary spray paints don't seem to cause any adverse effects.
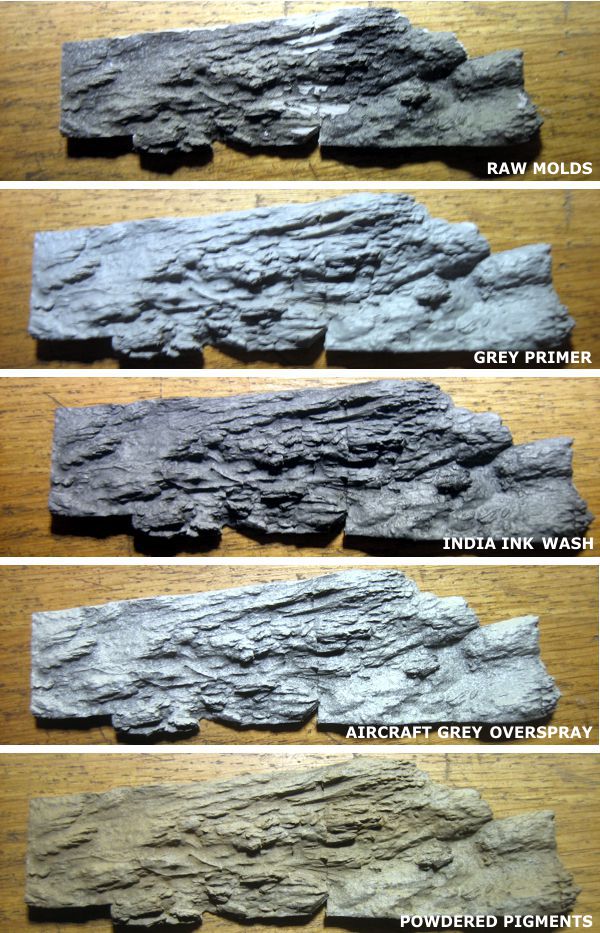
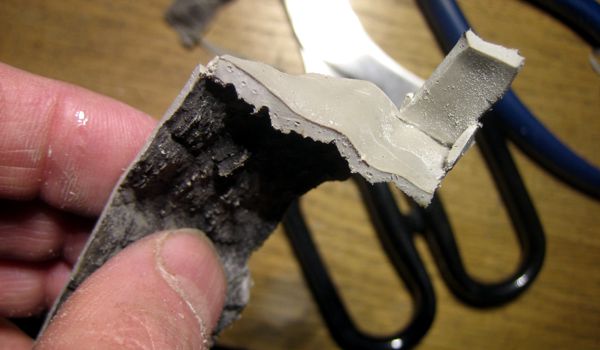
My finishing process began with some experimentation—I'm so used to modeling northeastern scenery that I had to recalibrate my eye for John Allen's southwestern palette. The process I settled on (image sequence above) begins with two or three light coats of grey primer to kill the original coloration. This is followed by a liberal India ink wash. Next, I give it a few light mistings from upward angles with Pactra Light Aircraft Gray. Finally, I apply various tan powdered chalks to blend everything together while adding subtle hue variations.
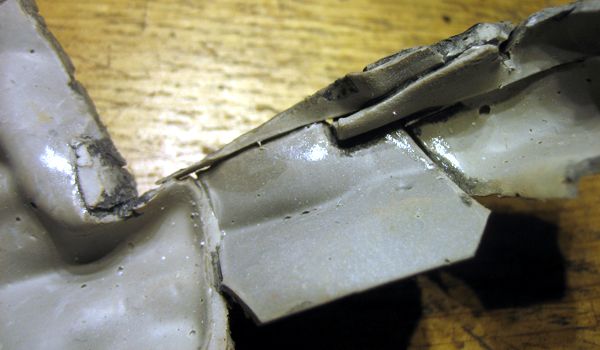
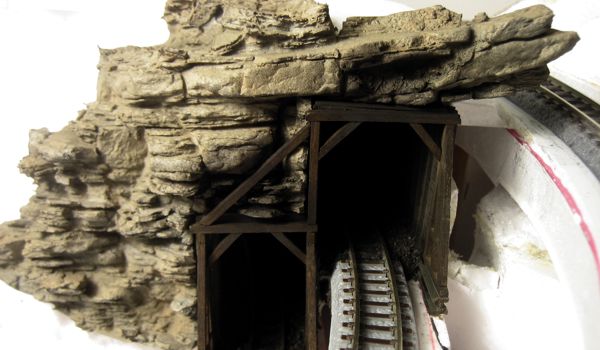
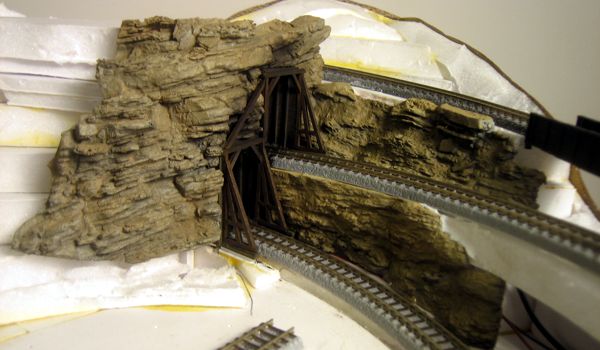
The first piece of rock to be installed on the layout was the main part around the twin tunnels. While it's mostly one large single piece, a view of the back (first image above) reveals about a dozen tiny bits added around the tunnel portal openings to create a seamless joint between rock and portals. The assembly was bonded in place on the layout with Loctite PowerGrab, plus some CA around the tunnel walls to keep the fit good and tight.
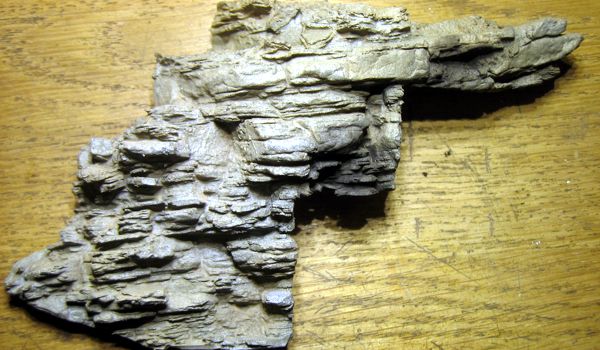
The second and third pieces installed were the rock faces leading into the sides of the portals. Here again the level of precision required for the fit was very high, considering that one had rock surfaces that faced three different directions (above), and the other was sandwiched into a 1/16-inch space between the upper track roadbed and the lower track portal.
Obviously all of this marks the official start of scenery-making, which is one of my greatest modeling pleasures. It also perhaps marks the biggest departure between the original Gorre & Daphetid and my Z Scale adaptation: I'd always intended to feature much more rock on my version, solely because I like it. The rubber rocks are such a great innovation that the results have exceeded my expectations.