
Final Trestle Assembly, Part 2
Having assembled the laser-cut bents, the project entered the "scratchbuilding" phase, as I set about cutting and installing the girts and the side cross braces individually by hand. To compare what I did with John Allen's original, here's a good reference image:
It's clear that I'm definitely not going for accuracy, since there are thirteen bents on John Allen's bridge, whereas mine has only nine (reason being that the Rokuhan switch is longer than John's handlaid switch, forcing the bridge to be shorter). Other more subtle differences include the detailing of the bridge over the dirt road on John's version, which I omitted, and the fact that he positioned the outermost girts on the insides of the bents, instead of the outsides, which is how I did it. And, John's bridge has a walkway, whereas mine doesn't. As I've said many times, I'm striving to capture only the flavor.
Before getting down to it, I first needed to correct the alignment of the bents. Because the bridge is on a slight grade, the bents must be angled relative to the stringers in order to get them vertical. With the bridge positioned on the layout, I carefully broke each glue joint, adjusted the bent, and re-bonded it. If any of them still look a little wonky, that's likely because my eye is a little wonky.
As an aside, it occurred to me that it's just as well I didn't attempt to laser the whole bridge, as my original drawings did not take the grade into account, and I'd have had to toss all of the cross brace parts—a sad waste of materials and laser time.
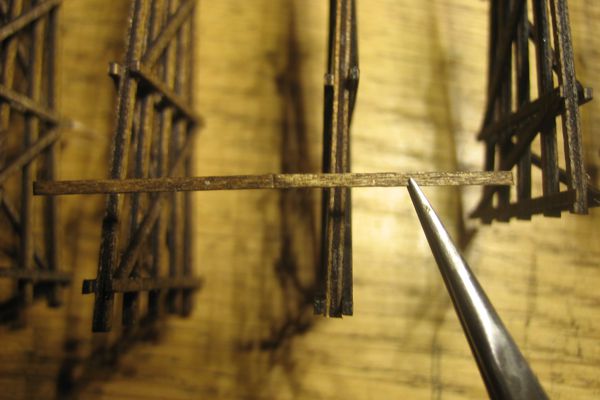
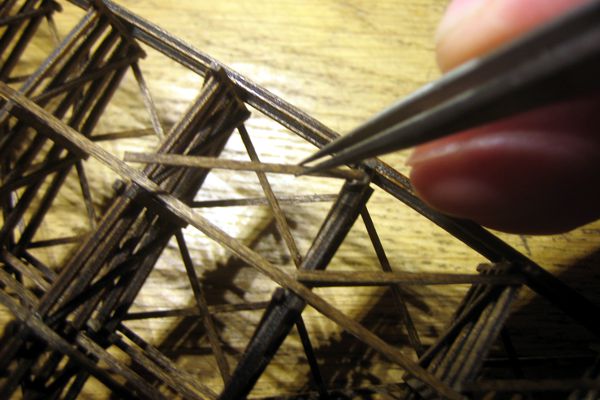
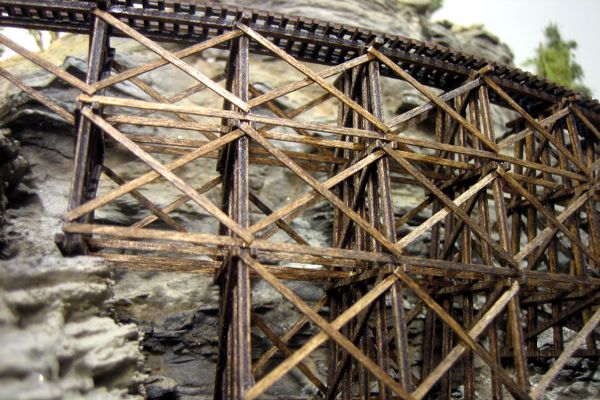
Back at the workbench, I cut, stained and installed the girts, which kept the bents securely aligned. To simplify assembly as well as add strength, I made the girts out of single lengths of wood which I crimped with a flush cutter and gently bent (upper image). Then I cut and installed the rest of the cross braces (lower image).
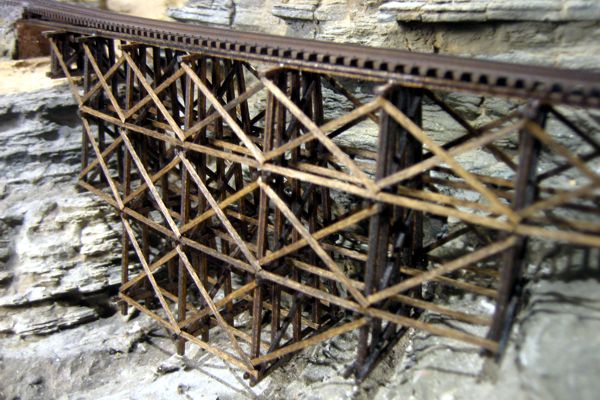
Returning to the layout, I found during the test fitting that I needed to remove some rockwork and terrain to clear the bracing on the back of the bridge. Once in place, I photographed it from a variety of angles, including some that John Allen never could. Ah, the wonders of modern digital pocket cameras!

The next steps are to make the footings and abutments, then install the bridge, fill in the terrain, and add final details such as fire barrels. Until next time...
Original Gorre & Daphetid image courtesy of Peter T. Prunka.