
The Little Switch, Part 3
The next major component of the switch to make was the points set. Like the frog, I knew how I was going to make this going in. It's fabricated from a single piece of .010-inch thick sheet nickel. The challenge was getting the geometry right, and I knew in advance that I'd probably be making more than one. As it happens, I made three.
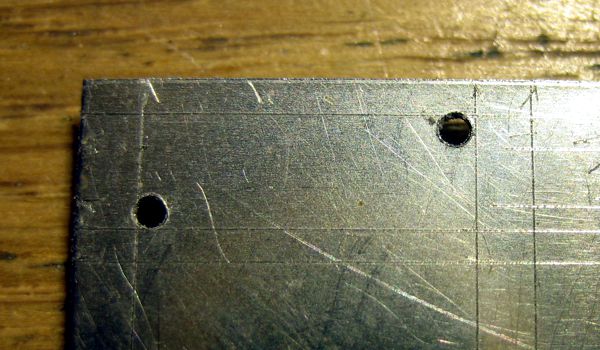
The shape is similar to the points made by Rokuhan, except theirs are stamped. I had to cut mine by hand, obviously, and the only tricky part was the rectangular opening in the middle. This was made by drilling the corners to insert a jeweler's saw blade. With the part clamped in a vice, I simply cut from one hole to the next.
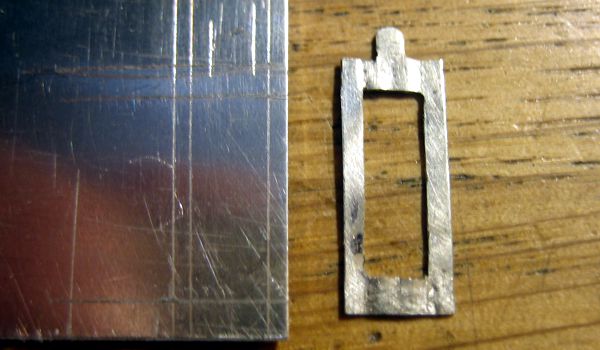
The straight cuts along the sides were made with a big old paper cutter. This produces very clean straight cuts where the part needs it the most. Then I folded the sides by placing the part in a vice and pressing it over hard with the side of a pliers.

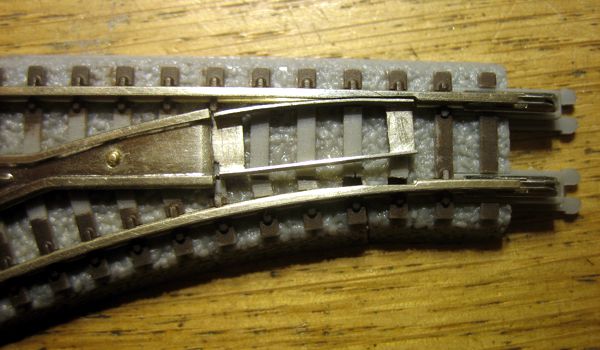
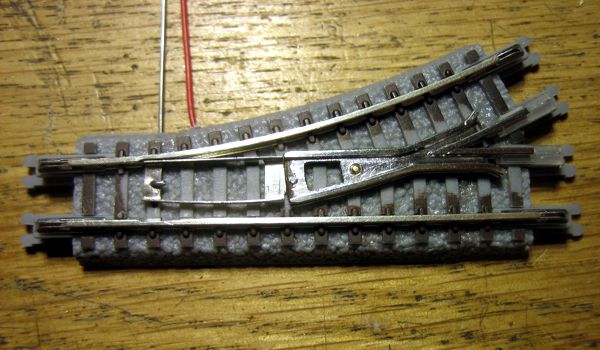
After bending the first part, I determined where adjustments needed to be made; then I flattened it and used it as the pattern for the second. Subsequent adjustments were required, and the process was repeated once more. Here's the third and final part being test-fit in the switch:
Next, I drilled the moving end of the point part for an actuating rod. To make the slot in the roadbed under it, I aligned the points in one position, and drilled all the way through the plastic roadbed; then I aligned it in the other position and drilled a second hole. Using the drill like a coping saw, I formed a slot between the two holes. My plan was to use the actuating rod to hold the ends of the points down, so I bent a .025-inch thick steel rod into a twisted Z shape.
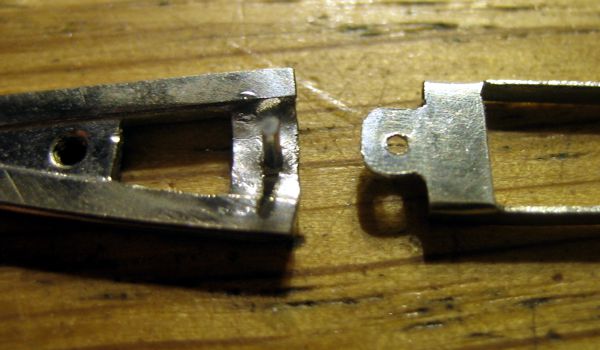
The pivoting end of the point had to be drilled as well for a fulcrum. After drilling this hole, I aligned the points with the frog, and drilled a hole in the heel end. Then I positioned the frog on the switch, and drilled a hole down through the plastic roadbed. Finally, I soldered a steel pin into the hole in the frog heel, and cut it to length.
A note about cosmetics: I could have made this switch much more "realistic" than I did, but I think this would have been something of a wasted effort, as the switch would then be inconsistent with the rest of the track on the layout. I've made a conscious effort all along to design and fabricate a switch that was stylistically as close to a Rokuhan product as I could make it, by hand with hand tools.
The next and final step will be making the guardrails. Then it will be time to run some trains!