
The Extra Mile
I wasn't going to do it, honestly. I wasn't going to model a faithful rendition of the stone viaduct. My plan was to choose the most time-efficient option and make something that was in the ballpark—most likely with only three arches. But I quickly hit the wall of compromise, which starkly highlighted the difference between building something original and adapting something that already exists.
John Allen had very few constraints; they essentially boiled down to the space he had and what he wanted to achieve within that space. If something didn't fit or meet his expectations, he could simply revise it—indeed, he did this quite often, as it happens. My constraints include the same space (relatively speaking) and what can be accomplished within that space given the products used, all strictly governed by what John had already done, with no real wiggle room. If something didn't fit, I needed to find a compromise that at least retained the spirit of John's work.
The viaduct has by far been the toughest element to adapt. I've started the project three times—once even reaching the point of being ready to paint—and abandoned it twice. Curiously, with each failure I inched my way closer to a more faithful rendition of the original. I'm not going to detail the failed attempts—I'd be writing a condensed version of War and Peace. Instead, I'll skim the highlights from the one that worked.
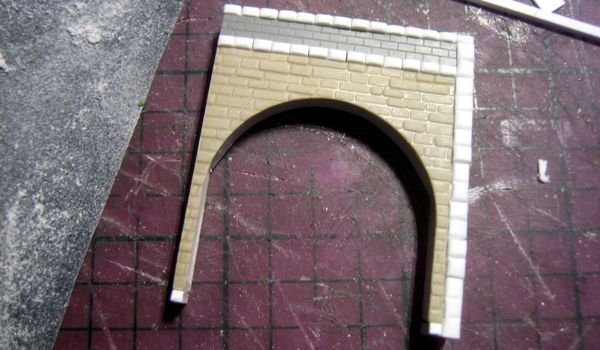
I know I once remarked that I'd have rendered the viaduct in a more rustic style to better suit how I perceived the bedraggled little Gorre & Daphetid, and I started out by making an attempt at doing so; but after two failures, the print of John's viaduct sitting on the layout (above) eventually led me to accept the wisdom of adhering as faithfully to his design as I could, and go the extra mile.
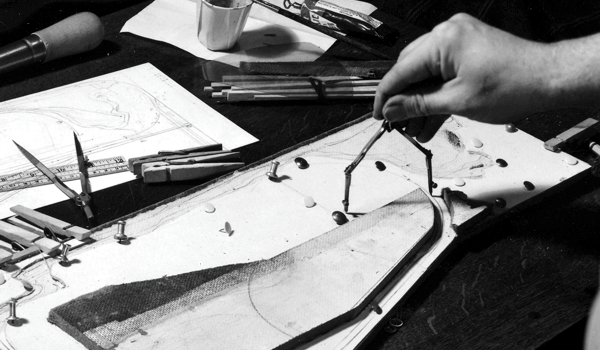
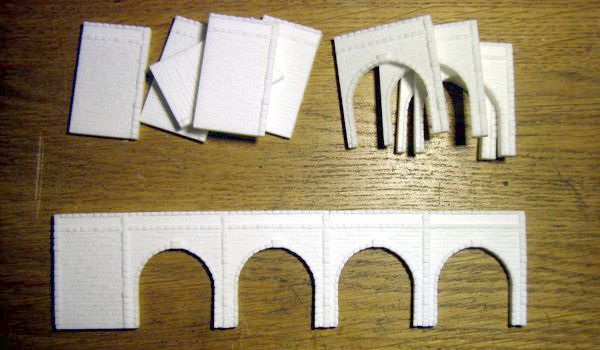
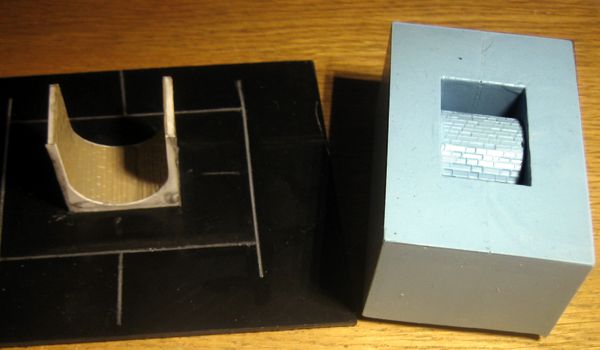
Thus the third attempt began with a styrene master of one arch (below). My failed attempts had utilized other materials, which among other things didn't afford the precision I needed; styrene not only offered the required precision, but it's the medium with which I have the most experience. The master is a mix of vacuum-formed stone textures and stones cut individually from strip stock, and stylistically is quite close to John Allen's version, with only the specific type of stonework being subtly different.

In addition to the one arch, I also made one solid section for the ends (above, left); this part also provided a vertical strip of stones for corner details. I made a mold of these two parts, and from it I pulled eight castings. Precise master-making paid off: the castings required no cleanup to mate perfectly. I soon had all the components I needed, and within minutes I had the sides of the viaduct assembled.
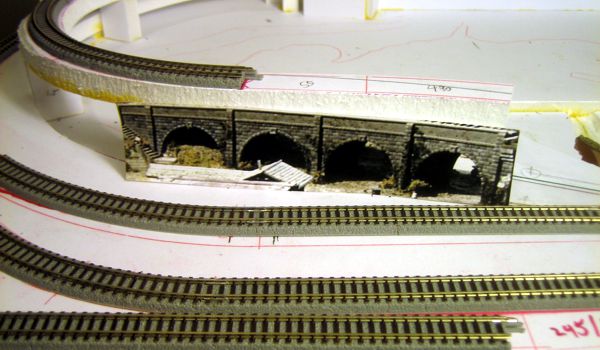
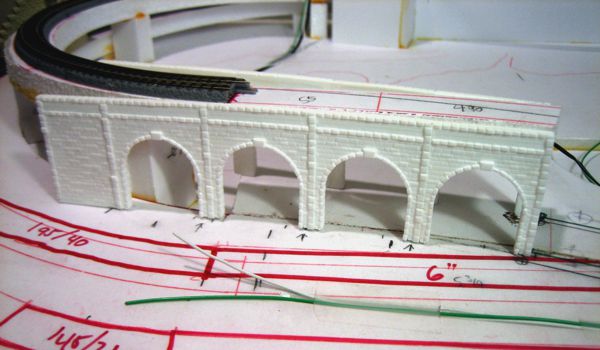
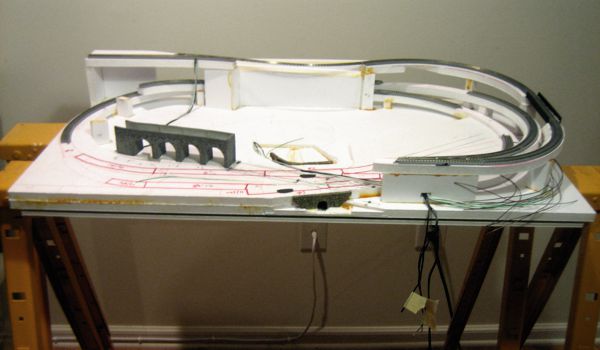
With such a faithful adaptation of the viaduct in hand, I quickly came to the unsettling realization that I'd spoken too soon a few days ago about the track plan being done. The problem with the four-arch version—even with its selective compression—is that it ran deeply into the curve leading up to it (below), and all attempts to accommodate this sharp curve came to a dire end. I had a hard reality to face: I had to re-engineer the curve... if possible.
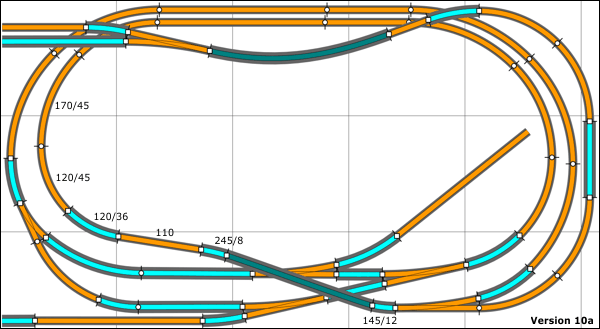
And so to AnyRail I turned for help. It's really a good thing Rokuhan makes so many curve radii, because the solution was at hand: I just needed to rearrange some of the curve parts to stretch the straight portion at the viaduct out about an inch and a half. The sections of track captioned in the plan below (note: Version 10a!) constitute the revisions.
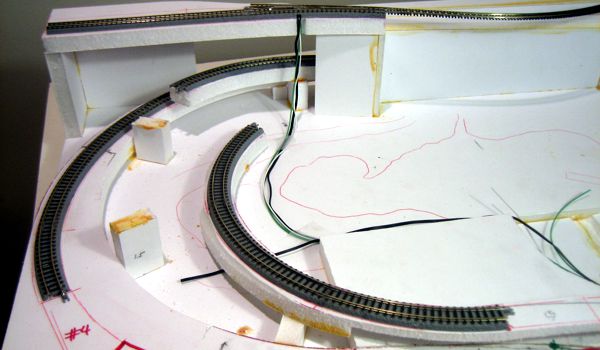
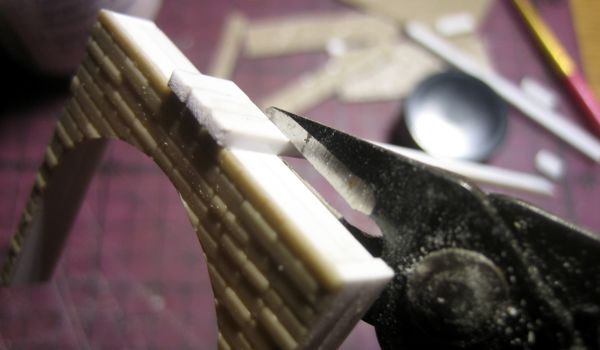
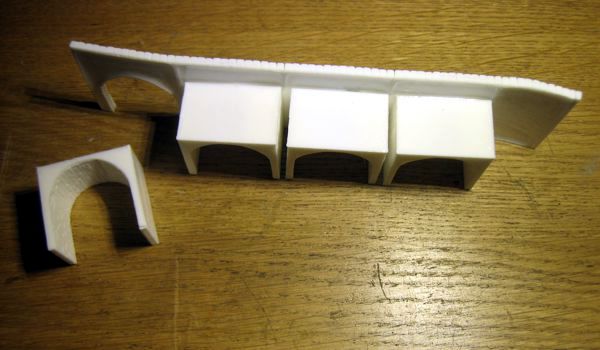
Alas, it meant tearing up track that was already laid (and soldered together!), cutting new subroadbed for the revised curve geometry, cutting three new track parts, and casting a new tunnel portal (boy, was I ever glad I made a mold for it!). But the end result was worth all of the grief, because the new track geometry allowed me to make the viaduct exactly the way the original was built—mostly straight but with a slight curve at the last arch on the truss bridge end (save for the bends in the short solid walls at the opposite end, an unavoidable necessity that fortunately doesn't impact the arches).
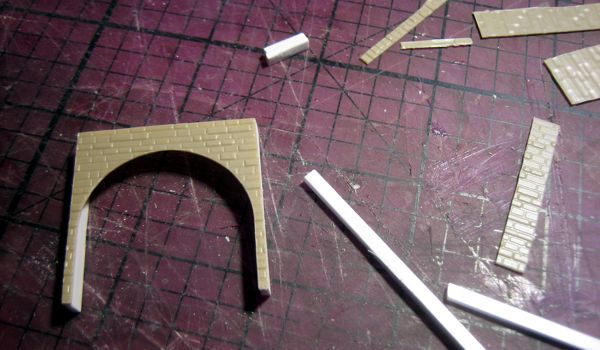
The final construction hurdle was the stonework under each arch. Once again I fabricated a precise styrene master, and created an unusually deep mold of the one arch. The viaduct sides simply attach to the sides of the cast arch parts.
Finishing was perfectly straightforward: after a few light coats of grey primer, I spot-painted random stones with a variety of greys and tans, then wrapped it up with a light India ink wash. What remains to be done are applying some vines, and then perhaps adding handrails—while the original didn't have any, I think they'd make a nice final touch. And of course there's the "staircase to nowhere" yet to be built.
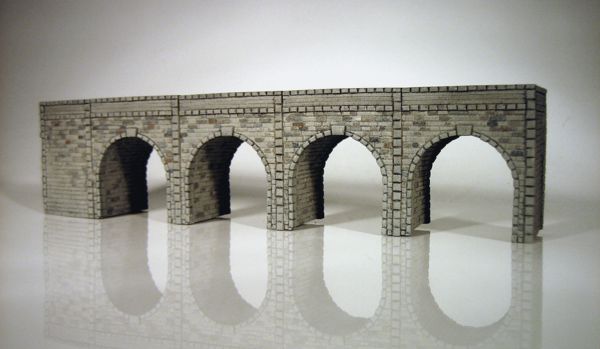
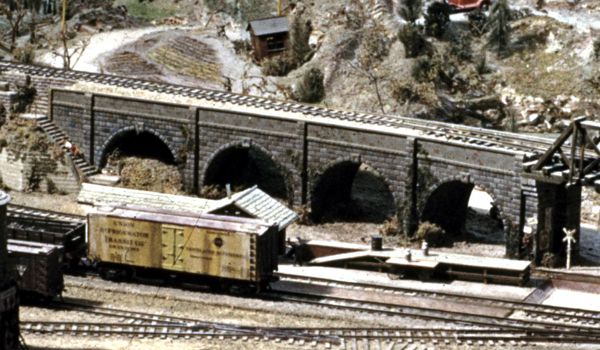
When all of the dust settled (and there was a lot of it, believe me), I had a four-arch stone viaduct that was unexpectedly very close to the original. The effect was startling. Up to this point, the layout was a small rectangle of white stuff with a jumble of smaller bits of white stuff glued on top, plus some snippets of roadbed track scattered about, and it didn't look like much of anything. Now all of a sudden I had the Gorre & Daphetid sitting there—even without the two iconic wooden bridges, it's clearly identifiable. I'm psyched.
Original Gorre & Daphetid images courtesy of Peter T. Prunka.