
Second Structure
Ever since I'd chosen Paw of a Bear's Curtis Bros. Plumbing Supply kit for the industrial spur, I've been hankering to build it. This is a kit to really sink your teeth into; it's laser-cut with craftsman-style elements, having items you must actually make yourself—essentially, the best of both kit worlds. I'd vowed to do a straight build, eschewing my tendency for modifications, but that was a short-lived vow. No matter; Paw of a Bear's Michael Duggan encourages his kit builders to make modifications, and even designed it with possible variations.
Despite my best intentions to stick to the straight and narrow, things went awry on the first step, which was to distress and paint the loading dock parts. Perhaps it was foretelling that I wasn't loving the effect produced by distressing micro-ply, especially as most of the boards ran against the grain. The clincher came when I went to stain the wood with India ink wash: it had been so long since I'd used my ink wash mix, much of the alcohol had evaporated, and it was now a highly-concentrated mixture. When I applied it with a brush, the wood turned jet black—permanently. I'd need to take drastic corrective measures: make a new loading dock board-by-board. But now I'm getting ahead of myself...
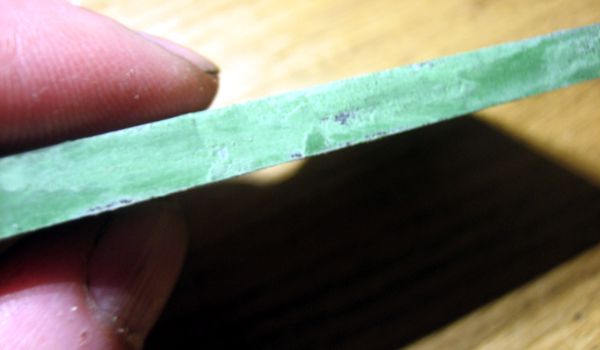
After that inauspicious start, things improved somewhat as I moved on to the foundation. Once laminated, I started painting it—and immediately realized the laminations were going to show no matter how many coats of paint it got (above). So, I applied a thin layer of Squadron Putty to the edges of the foundation, and shaped it with a knife, allowing natural irregularities to form (below). I sprayed it several times with Tamiya Light Aircraft Grey, then weathered the concrete with powdered chalks.
Next came the windows and doors; these were a test of patience. The instructions advised sanding the parts if the fit was too snug. The fit was beyond snug, and sanding these tiny, delicate pieces would not be wise, in my opinion. Instead, I shaved off some of the wood around the openings with a sharp knife; this was made easier by the fact that the wall material is solid wood, as opposed to micro-ply. Eventually I prevailed and got all of the windows and doors together, with only one casualty—an upper sash. Thankfully there were plenty of spares.
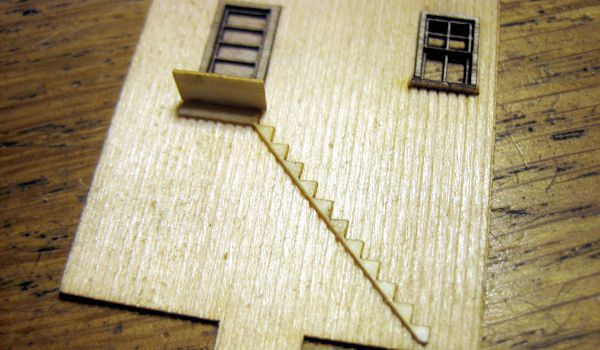
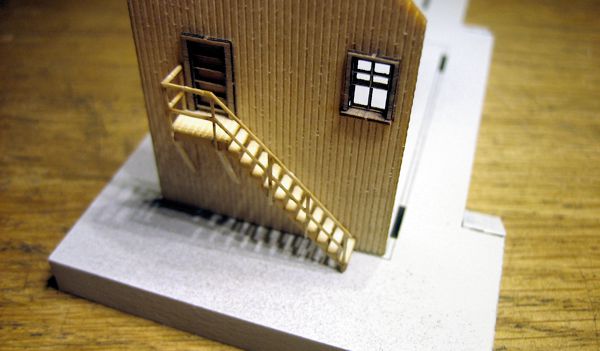
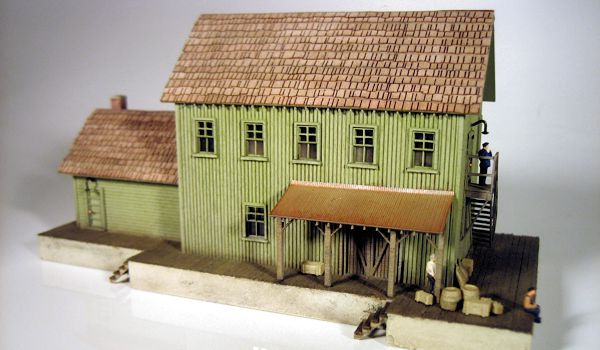
However, when I came around to the last wall—the one with the enclosed staircase—I succumbed to the urge to modify. While the staircase was an interesting architectural touch, I had an image in the back of my mind of a building that appeared for a while on the G&D, which had an exposed staircase in about the same spot. Having an RSLaserKit staircase kit (#4059) on hand, I cut a new door into the wall—again, grateful there were plenty of extras—and grafted a staircase to the wall.
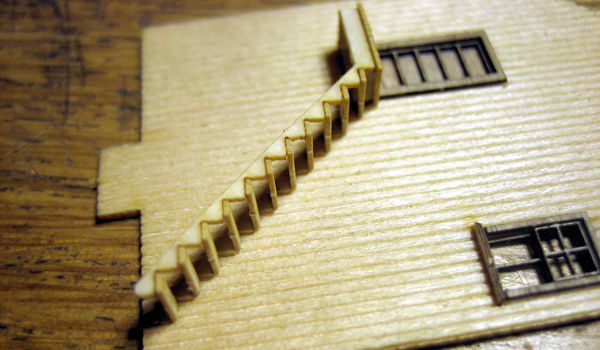
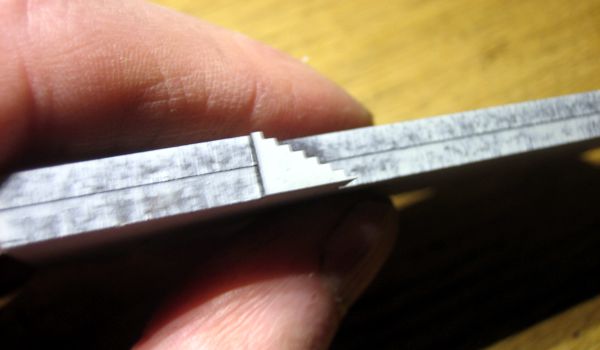
Incidentally, I didn't assemble the staircase kit per recommendations, either. Since the stairs wouldn't be freestanding, I bonded one stringer right to the wall, bonded the bottom step and top landing in place, then bonded the second stringer to the landing and step. Once this was set, I installed the remaining steps, attached the (cut down) railing, and then made a pair of braces for the landing from the kit's spare stripwood.
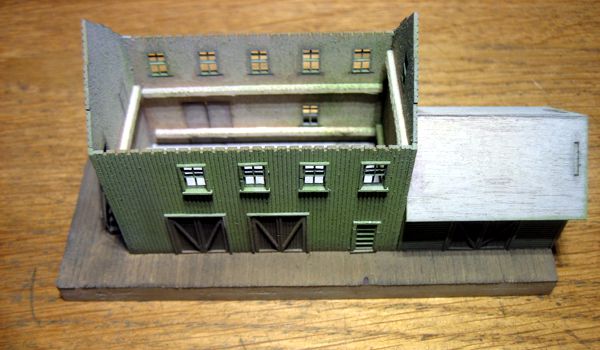
Things continued to progress quite nicely, all according to plan—that is, until I reached the point of assembling the walls. That's when I had a radical thought... I'd mirror the whole building! Actually, it was something of an accident: I was popping the wall parts into the foundation for a quick look at things in 3D, when I noticed the foundation was upside down. In one of those ah-hah! moments, I quickly posed it on the layout, and confirmed it was a good idea; the mirrored shape suited the space better, and it also put the exposed stairs front and center. Plus, it meant the finished structure would be that much more unique, even though I was fine about building it as designed.
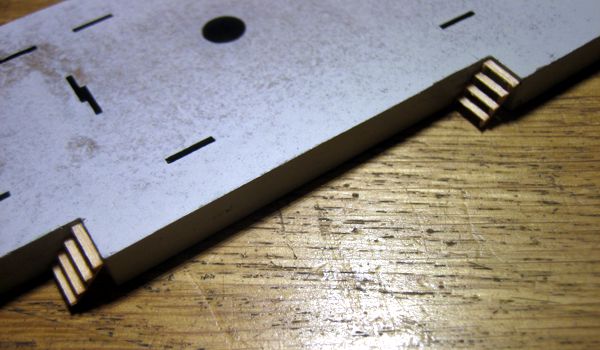
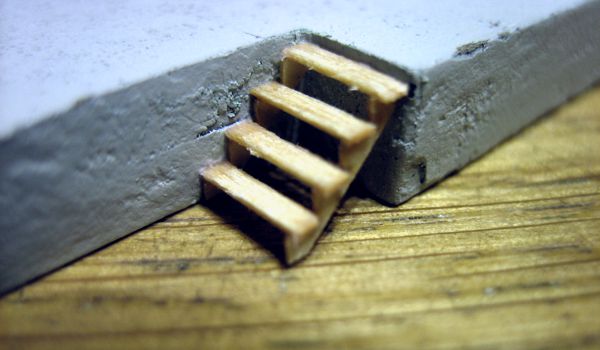
Mirroring the kit turned out to be no effort at all, given way the foundation and walls were cleverly designed. (Indeed, I'm surprised it wasn't recommended as an option in the instructions.) The only hitch was that the foundation was already done, and the stairs didn't just pop off—in fact, they pretty much disintegrated. So, I decided to use more RSLaserKit staircase kit parts to make new open steps. Some putty and paint repaired the foundation where the steps were gouged out. Of considerably lesser concern was the slightly awkward location of the small roof over the freight door, being as it was then adjacent to a set of stairs; since this was essentially the back of the building, I elected not to go to the trouble of relocating the freight door.
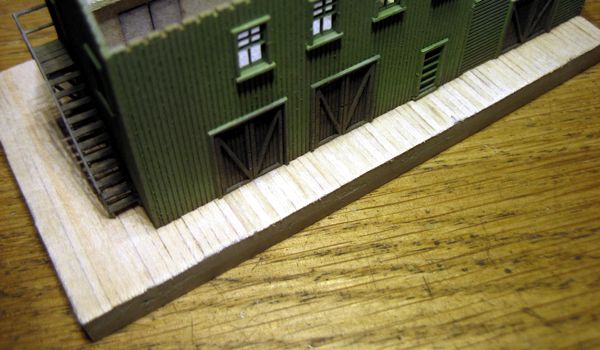
Contrary to the order of things in the instructions, I began finish work on the nearly-completed building, which followed my usual procedure of spraying on several light coats of flat grey primer, followed by powdered chalk dust for color. In this case, I used pale green for everything but the freight doors, which I made weathered brown. Completing the walls brought me to the point of attaching them to the foundation, which in turn brought me to the point of making new loading dock decking.

As I'd hinted at the outset, I made the replacement board-by-board—which I was actually looking forward to doing. It wasn't as tedious as it sounds, either; it was a simple process: brush on CA, position a piece of stripwood, trim it to length, and repeat. It was literally non-stop, as the CA set as fast as I could work. It took less than an hour, and the final effect—after distressing, staining and weathering—was perfect.
When it came time for the roof, I used RSLaserKits shake shingles, as the ones provided made the structure look more Northeastern. Before installing the roof, I had to think about lighting. The foundation has provision for lights, but the wooden walls are translucent, so if I was to add lighting, I'd have to mask off all of the walls from inside. In the end, I opted not to light the building, as the windows weren't in locations I felt would be aesthetically pleasing if illuminated.
One other subtle little change came as I wrapped up construction. The brick chimney part included with the kit was quite long—considerably longer, in fact, than what was needed, if one used it according to the instructions. I really liked the impressive brick effect, so I decided to relocate the chimney to the end wall on the extension, in the nook of the foundation next to the door. This not only preserved much more of the brick, but moved it to the viewing side (back, actually) of the building. Although I installed it after having completed the roof, it was a fairly simple matter of notching the roof with a razor saw.
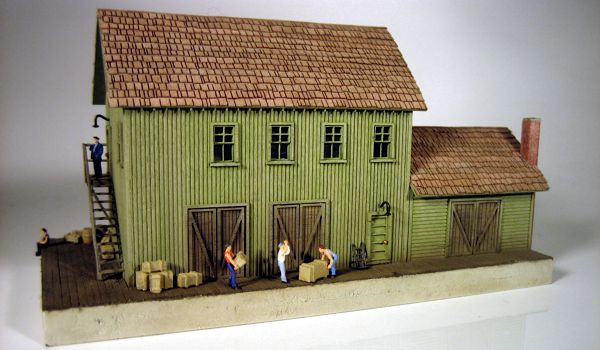
Detailing on mine did not include the elaborate roof sign—I'm not certain what the business will be, but it's not a plumbing supply (a new sign may come at a later date). At any rate, some bent-pin lamps over the doors, and some crates, barrels and workmen for the loading dock, brought the project to a satisfying close. Oh, I almost forgot—the doorknobs included with the kit added a really fine touch!
At the end of the day, it's an excellent kit—not to mention hefty, what with its solid, quarter-inch-thick foundation. (Now I know why we have occasional power shortages on the grid: Michael is cutting 1/8-inch thick Masonite with his laser!) Aside from the overly-tight window fit, there were no assembly issues. I'd recommend it to any modeler with moderate skills in search of something with loads of character, and not generic-looking, that'll keep him/her busy for a few evenings. As a bonus, it's refreshing to not have to make a foundation for once.