
First Structure
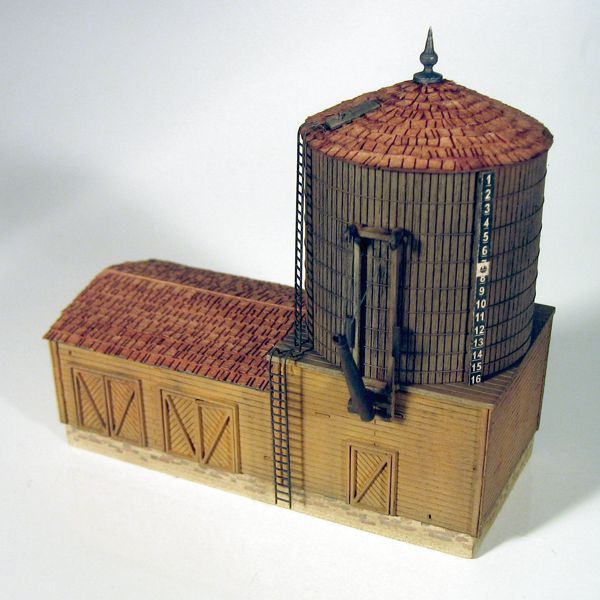
One of the things that keeps me going strong on a project and preventing burnout is variety. That's why I recently did the culverts before even laying all of the track. And now I've built the layout's first structure. Since order made no difference, I simply made a random pick: the winner was the water tower in Gorre, seen below. For this I'd planned to use the Micro-Trains wooden water tower kit, #799 90 909.
Although it's a good solid kit, with superbly-fitting parts and some clever solutions to tricky assembly procedures, I'm thankful I had two kits on hand so that I could make one that was perfect, as it does have a few shortcomings. In particular, the tank wrapper tends to crack and split as it's wound around the cardstock form (although this may have been due to the lack of humidity in my environment, as opposed to a flaw in kit design). At any rate, I found that wetting the tank wrapper with water first allows it to assume the proper shape without splitting apart.
There are some other aspects about the tank that could use a little improvement. It helps to not follow the instructions to the letter when installing the wire tank bands. Making the bends at the ends of the wires acute—say, about 130 degrees, instead of 90 as instructed—holds the wires in place better as they're wrapped. Cutting access holes in the top and bottom parts of the cardstock form (before assembling the form) allows one to grab the end of a wire with a fine tweezers, pull it taught, and bend it back to lock it tightly in place.

Yet another improvement would be to mark the edge of the drum where to start the wrapper. If one just applies it randomly, some of the turnbuckles holes wind up aligning with the vertical form parts, which complicates the process of installing the wires; if one starts the wrapper at the right spot, the turnbuckles will miss the vertical parts, and align with the access holes. And finally, it would have been nice to locate the turnbuckles where they'd be more visible when the wrapper seam is oriented for the water level gauge position; as it is, they wind up on the back.
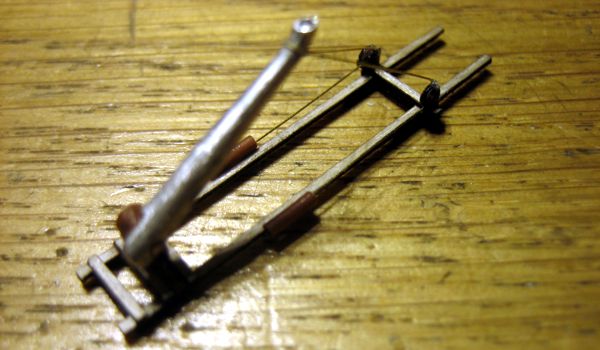
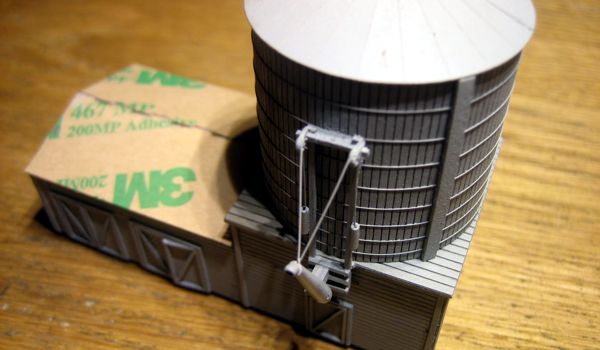
There are a number of other aspects I might have done differently if I was the kit designer, particularly with respect to the spout assembly. There was more than enough tank band wire left over to use for the spout instead of the outrageously clunky-looking laser-cut wood parts—nothing like using four-by-six timbers to hold up the spout! It was easy enough to attach a piece of the brass wire to the end of the spout by wrapping it around the bottom, and then twisting it at the top once like a plastic baggie wire tie; the wires can then be secured to the tops of the pulleys. I also replaced the vertical parts with wire, using wire insulation for the counterweights instead of the stumpy wooden blobs provided. It would take a modeler just a little more time to do what I did, but it wouldn't take any more skill than what's required for the tank bands.
Perhaps not surprisingly, I made some other modifications as well. I rotated the tank support base 90 degrees so I could use the chunky ladder bracket for the spout support instead. This allowed me to separate the finished spout assembly from the tank, which is more in keeping with how most real water tanks are built. I also shortened the assembly top and bottom, and rearranged some of the parts to accommodate the new mounting location.
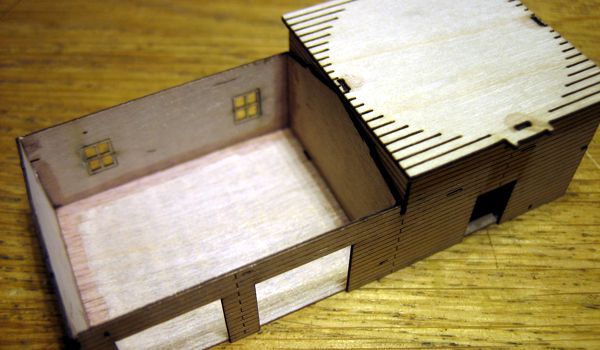
And there was more. I didn't like the odd-looking horizontal window on the back, so I filled it in with a piece of siding material rescued from one of the door openings. I also swapped some of the doors and frames with those from the spare kit for a more consistent appearance. And I applied stripwood molding to all of the building's corners to hide the butt joints.
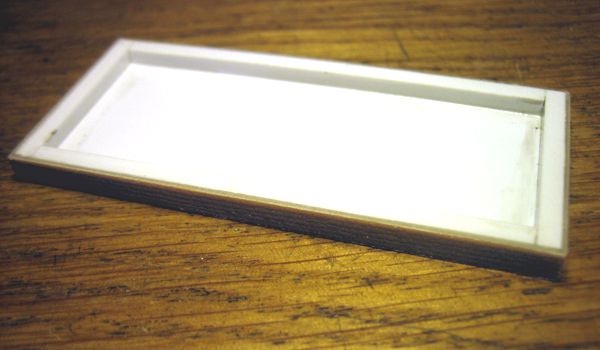
Readers familiar with my other modeling ventures will recognize the remainder of the modifications I did as "standard operating procedure" for me. If built unmodified, the structure sits on a base, which doesn't look realistic, so as I'm wont to do, I sliced the slots off of the base, and the tabs off of the walls, and bonded the wall parts to the edges of the modified base (the two internal wall parts had to be shorted to fit). Then I fabricated a foundation from some sheet and strip styrene, and applied strips of Kibri plastic stone wall sheet to the edges.
For final touches, I cut a piece of stripwood for the water level gauge—I was rather surprised there wasn't one, as it's quite awkward mounting the paper print neatly to the tank with all of the bands in the way. A strip of wood, laser-etched with slots to clear the bands, would be ideal and easy enough to make. I added a finial from a Micron Art kit (which, if I build at all, will be heavily modified), and I replaced the clunky wooden ladder with an etched brass one from Micron Art, which I split into two sections—the way it is on John Allen's. And, not that anyone would notice, I drilled two #80 holes in the tank access hatch, and added a little loop of the tank band wire to make a handle.
Finishing the model began with a base coat of flat grey primer, applied in several light coats. All of the coloration was done with powdered chalks for the look of lightly weathered wood and slightly faded paint. So, other than the primer, the only paint on the model was applied to the spout parts, ladder and finial! The foundation began with a base coat of tan Krylon Suede; random individual stones were highlighted with Floquil Roof Brown, Oxide Red and Rust; then it was all blended and muted with a wash of Doctor Ben's Driftwood Stain, followed by some powdered chalk weathering.
Aside from some of the changes in construction procedures noted earlier, there are a couple of final observations I'll make about this kit. First, the tank roof was wholly inadequate—a plain paper cone just doesn't cut it. I applied shake shingles from RSLaserKits, cut into roughly 100 pieces to form short arcs (this would have been trivial to design on a computer and laser cut). I also replaced the tarpaper on the tool shed with more shake shingles.
Lastly, I really wish the kit designer (Robert Ray, I believe) wouldn't distress the building for us. In their heyday, railroads meticulously maintained their lineside structures, and unless one is modeling an abandoned line or one nearing the end of its life, there wouldn't be split and broken boards everywhere. If I'd wanted a run-down, decrepit-looking structure, I'd distress and age it myself; but with the kit as it is, I have no choice! I was tempted to painstakingly fill in all of the laser holes (which aren't even realistic) with wood putty, but the time investment would have been onerous.
Bottom line: it's a nice kit, in spite of all of the nitpicking and modifications I've done. It's not a beginner-level project by any means, but moderately-skilled modelers doing a straight as-is build should find it satisfying. (Trivia question: anyone know why it's often listed as the "separate ladder water tower kit"? I have no idea, and it makes no sense...)
Original Gorre & Daphetid image courtesy of Peter T. Prunka.