
The Lake, Part 3
The lake is done. But not without bringing me to the brink of madness; I think the Universe just doesn't want me to get the water right. After so much careful testing and painstaking work, a completely new and unexpected disaster has occurred: beneath the final layers of gloss medium, the EZ-Water cracked. And not just in one place, but all over. There's a myriad of them, as if someone had taken a hammer to glass—in one area, it practically shattered.
For a while I considered tearing out the lake and starting over. It would be a long, really gruesome job, but it could be done. I'd use the heat gun to peel away the wave layer, then melt down the EZ-Water, which I'd scoop out as much as possible. Then I'd start again with a new terrain surface, just as I had for the stream by the old mill.
But, you know what? I'm just going to leave it the way it is. The cracks aren't seriously unsightly, the way the creeping Magic Water was. They're only visible when the lighting and viewing angle are just right. My bet is that most people wouldn't notice them unless you pointed them out. Maybe I'll pose a couple of small boats on the lake as a distraction.
Anyway, for what it's worth, here's the finished lake. The first thing I noticed is that, for effective photography, correct lighting is absolutely critical, something the builder of the original HO layout learned as well. He even devised a lighting system that made the waves appear to move when the lake was viewed in person. I may try that same effect when I start shooting videos of the layout.
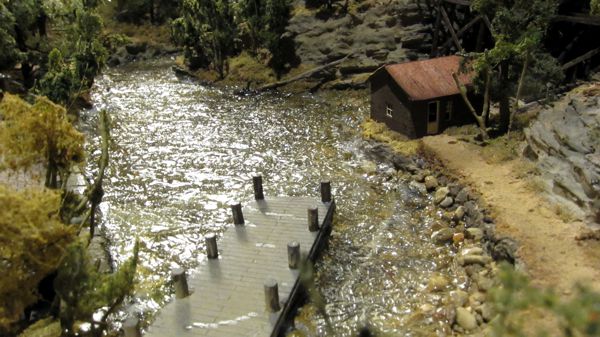
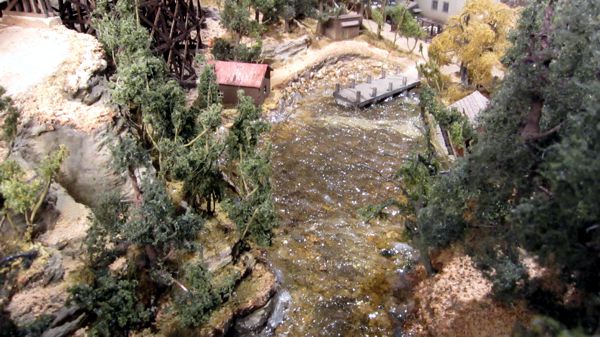
The above is what I'd refer to as a "beauty shot." The lighting was carefully arranged to heighten the surface effects. Compare the image above to the one below, which shows how the lake looks under "normal" (non-optimized) room lighting conditions. You will notice right away the worst of the cracks: the lighter-colored streak running straight from the cabin at the back to the dam at the front.

Here it is again in the view from the upper cabin, below. Fortunately, even under non-optimized lighting, most of the cracks don't show up in photographs; trust me, when you see the lake in person, it looks like a shattered window.
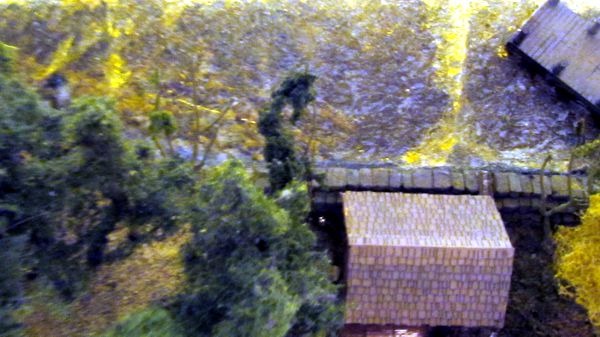
Here I've deliberately adjusted the lighting to highlight the cracks. You can see how many of them there are—dozens, in all different directions.
Naturally I wonder why this happened. I thought perhaps it was the application of the waves, but why would a thin layer of acrylic paint cause something to fracture like that? Acrylics are pretty benign, so I can't imagine it was chemical. The EZ-Water was completely cooled before I began applying the waves, so it's not thermal. The base is very rigid—two layers of half-inch Gatorfoam with a thick layer of Sculptamold over it, so it can't be structural.
Well, who knows. At this point, I'm done guessing. Let's have another beauty shot—it makes me feel better!

And here's how the whole layout looks right now.
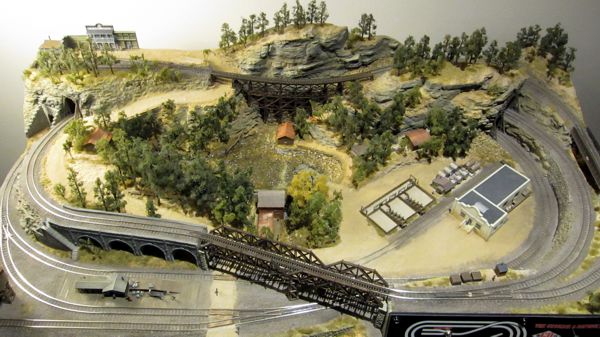
Not much left to do. Repair the Daphne freight station, install the Daphne water tower, add some more figures, and build a bunch of Micron Art vintage vehicles—these will surely take my mind off of things, and for a good long chunk of time, too.