
Order of Execution
A question often posed by beginning modelers faced with the eventuality of ballasting their track is, when to ballast? Answers from veterans will vary according to personal preferences. For myself, the time to ballast is firmly fixed: after basic scenery terrain, but before any scenery work.
Ballasting before adding basic terrain can be problematic. In some areas, there may not be enough surrounding material to hold the loose ballast in place—the ballast just flows off into empty space. Also, the shape of the terrain can affect the shape of the final ballasting—sometimes there will be areas that need to get filled in. Then, ballasting before doing any scenery work avoids potential damage to scenery-making materials, especially ground cover and flocking. This is because the areas around the track will be saturated with alcohol, water and bonding agents.
Which is all to say that it was time to start ballasting the Z Scale Gorre & Daphetid. 99% of the basic terrain is in place, with plenty of areas adjacent to track that's fully set. But wait, I used roadbed track, right? Correct, but I'd never intended to settle for the molded plastic look; I'd always planned to paint and ballast the track for improved appearance. But I'd never ballasted roadbed track before, so it was time for experimenting to commence.
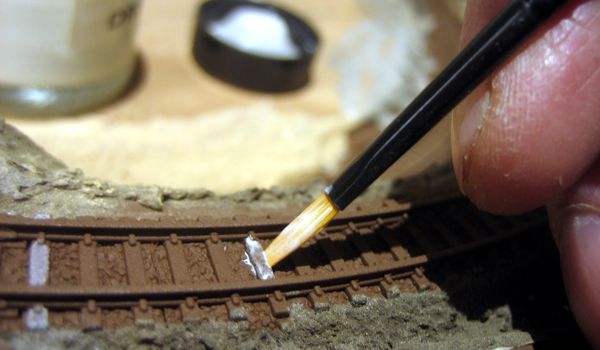
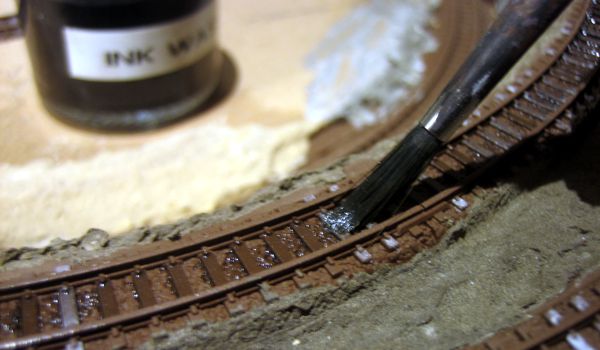
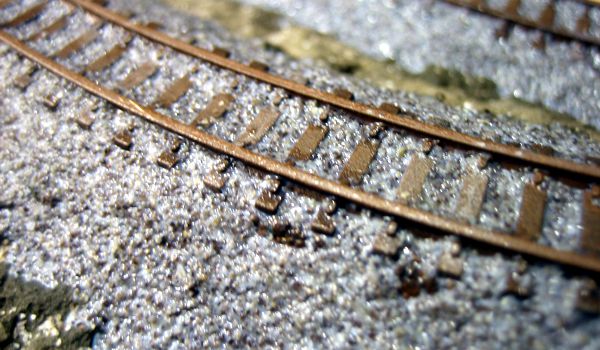
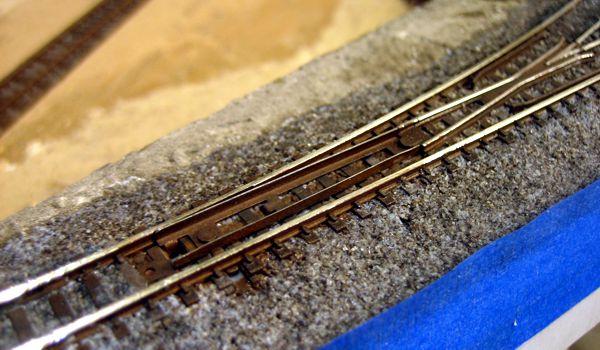
The track had already been spray-painted with a base coat of ruddy brown. This served mostly just to deal with the shiny silver of the rails. To correct the color of the ties—and give them realism-boosting individuality—I applied varying amounts of Doctor Ben's Driftwood stain to random ties. When this had dried, I then applied an India ink wash to all of the ties; this adjusted the ruddy primer to a nice basic tie brown, and also toned down the driftwood stain.
Originally I'd planned on using Highball Grey Mix ballast, but when I put some on the track it looked like white sand. So, I switched to minitec ballast (Gleisschotter Grauwacke Z), which is what I'd used on my James River Branch layout. This ballast unfortunately turns darker when it's bonded, so I may need to lighten it afterwards with some powdered chalk.
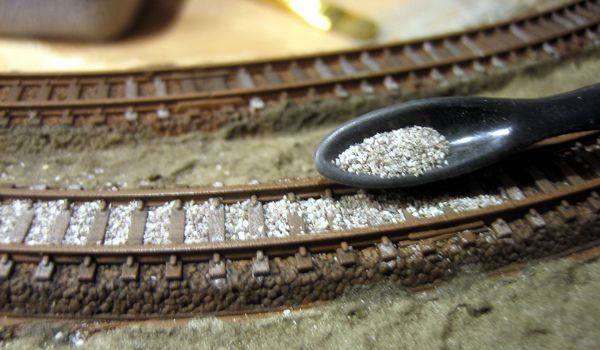
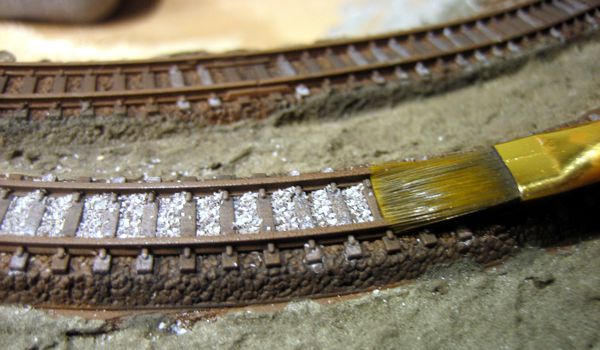
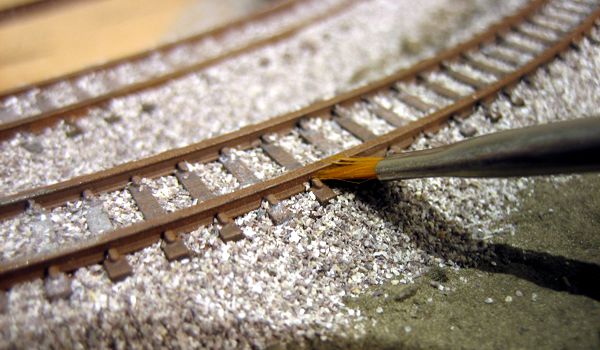
Another FAQ that emerges when discussing ballast is application methods. There are tools sold for the job, and there are DIY widgets one can make, but in all truthfulness all these devices do is deposit ballast on the track; they do not "groom" the ballast into its final form. I've yet to find any device that can efficiently do an acceptable job of grooming, at least for Z Scale; it remains, in my opinion, a task that must be done by hand carefully with tiny brushes. And just to complicate things further, I'm ballasting roadbed track, which is a different kettle of fish when it comes to technique.
Yes, it's a tedious chore, and I can well understand why some modelers skip ballasting altogether, even at the expense of appearance. Admittedly, however, I'm a strange fellow: I actually enjoy the process. For me it's a terrific stress-reliever; it requires focused attention for long stretches of time, which has the effect of blotting out distracting thoughts as effectively as any tranquilizer.
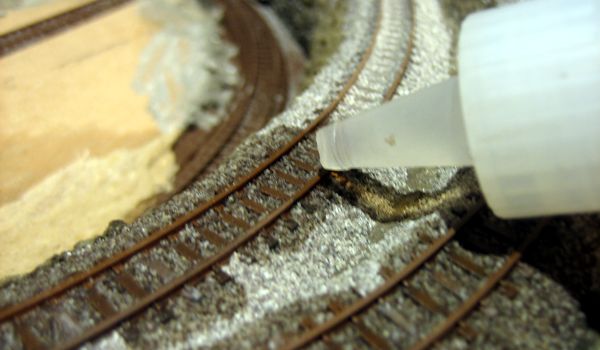
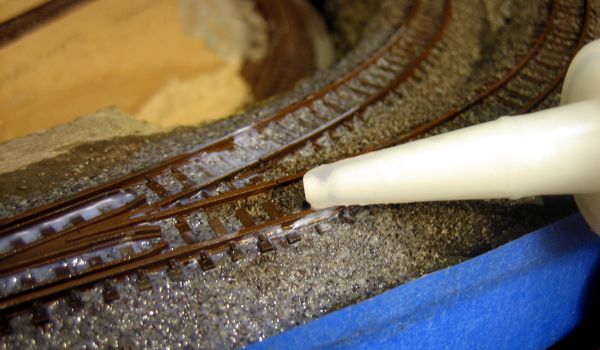
Ballast was bonded in place in the usual manner: apply straight rubbing alcohol, followed by 1:1 diluted matte medium, although I may likely switch to white glue, as matte medium does funny things in the presence of matte medium—the consequence of which may be a great deal of cosmetic touch-up to deal with what I call "slimers," or globs of otherwise clear matte medium that turned opaque white.
For obvious reasons, I paid extra special attention to the switches. I'd already sealed the roadbed to the subroadbed to prevent any bonding agent from creeping under the switch and freezing the slider bar. To avoid freezing the points, I avoided applying ballast anywhere near them. I had planned on painting the plastic ballast between the ties in the points area to match the "real" ballast, but once I'd cleaned off the railheads, I decided it wasn't worth the trouble.
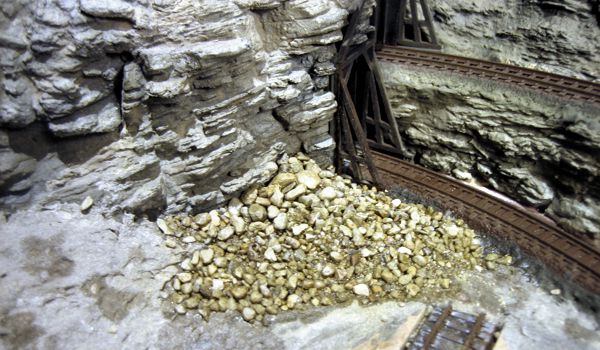
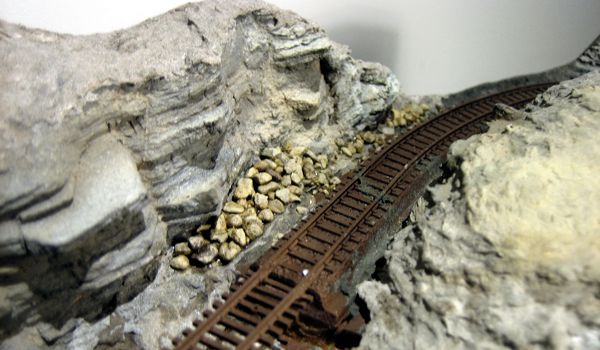
And so the ballasting is well under way, with the branchline switch and the upper two tracks on the right end of the layout completed at this writing. Incidentally, while I was in a bonding mood, I also added a couple of talus slopes to the layout (something John Allen never did on the original). I think they provide a touch of added realism and interest, and I like the variety of textures they create.