6.3. Playing Mad Scientist
Problem: I'm using Code 80 sectional track for the Greystone—a deliberate choice. I've been doing my best to "deal with it," but lately, as I've been working on some decent-looking structures for the layout, I've become somewhat conflicted about the track choice. I'm not able to hand-lay track anymore, and there are no commercial products that would work with the same track plan. Consequently I've become somewhat divided over the conundrum.
My prior work with custom-made Code 25 rail demonstrated that the actual rail profile is secondary to the rail height with respect to overall aesthetics. This has become a key factor in my insane new idea: converting Code 80 track to Code 40. In situ. "How," you ask? False ties.
Here's the concept: make laser-cut tie parts that fit in between the existing plastic ties of Code 80 track—new wooden tie parts that are tall enough to cut the apparent height of the rail in half. Now, I already know this won't fix the "European" tie spacing of most Code 80 sectional track. But I believe that rail height is the overriding aesthetic factor above any others.
Yes, it would be a seriously tedious process, requiring the installation of three parts for each tie: the center and both ends. But I'd never entertain this as a solution for a large layout; the Greystone is small enough that it shouldn't take all that long to upgrade all of the visible track.
Visually speaking, this is what I devised. In the illustration below, a cross-section of typical Code 80 track is first. Second, the three laser-cut parts necessary for the illusion. Third, the result. (Drawings are not to scale.)
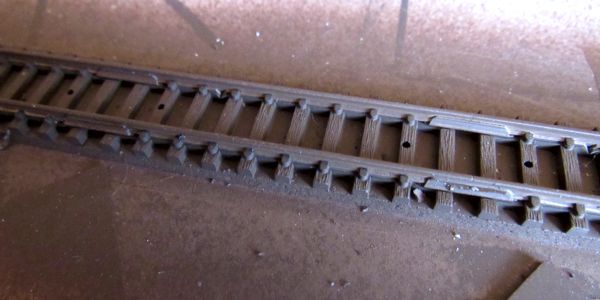
It took two tries to get ties that worked, but once they did, I had bunches of them made, as well as "special" parts for the rail joiner areas and the turnouts. Here's how things looked with the first test; it may seem uninspiring, even awkward-looking right now, but wait until the ties are painted and the track is ballasted (the gaps are areas awaiting arrival of the "special" parts).
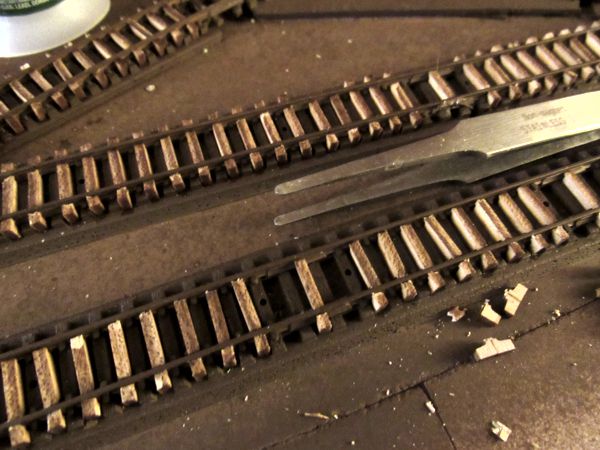
One nice byproduct of the process is that the ties are a little irregular; there's variability in spacing and angle, giving the track an appropriate "rustic" look, perfect for an old backwoods shortline. In hindsight, I wish I'd not painted the track, because the tie parts would be held in place by the double-sided tape under the track; instead, I must apply CA to each part. But as much as a PITA as it'll be, it's still far more practical for me than handlaying anything, especially Code 40-ish rail.
One little wrinkle: calculations are one thing, and actual conditions are another. While the ties were carefully measured and cut to visually reduce the Code 80 by half, in practice many of the false ties wound up being taller than predicted after installation, likely due to glue, paint and debris in the spaces between the ties. Consequently, the Shays hit many of the ties, and I've had to shave them down a little with a knife. It's not terrible, but it does add another step to the process. Once that tedium was done, though, I colored the ties using an India ink wash, followed by a very thin white wash applied randomly.
Next came the "acid test" to see if all this has been worthwhile: ballasting. Although I prefer to ballast track after the scenery base is done, I ballasted a short stretch of track to see how it looks, using my traditional process: first, "wet" the ballast with 70% isopropyl (rubbing) alcohol, followed by white glue diluted roughly 50% with water, plus a dash of alcohol so it's "friendlier" with the wetted ballast.
Incidentally, I'm using ballast from Minitec of Germany: 50-0321-02 for the mainline, 50-1021-01 for the quarry sidings (it's lighter, more like crushed granite), and 50-0021-01 for the yard area (slightly darker and finer). These are made for Z Scale, but I've found them ideal for N, as I think most commercial ballast made for N is a bit too coarse. And because I was impatient to see the results, I used a trick I learned from Rick Spano: place a small fan near the ballasted area; this substantially accelerates the drying process.
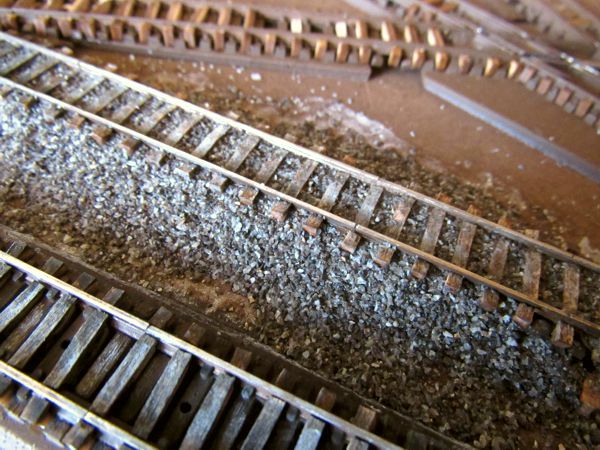
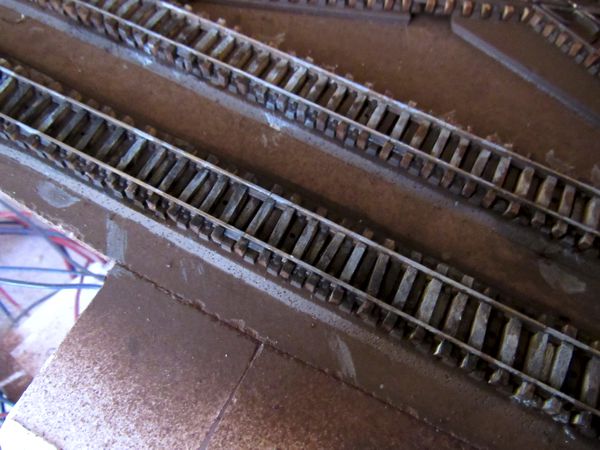
It even holds up fairly well under macro photography in natural sunlight (which would not be considered "normal" viewing conditions):
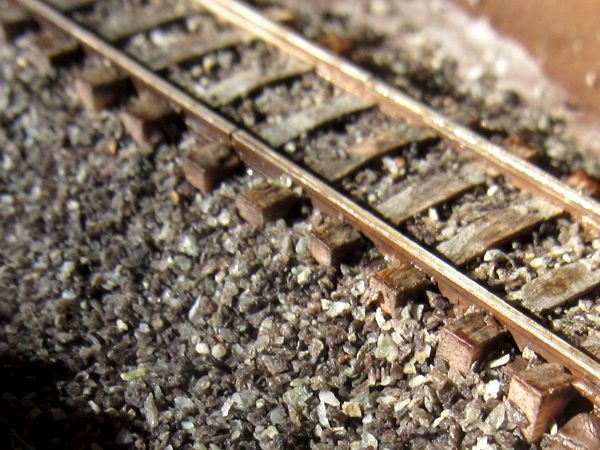
Compare the above with unmodified track:
I'd say it's worth the effort! Up next, turnouts. By necessity, they look rather strange, as there's nothing I can do about the points, but anything is better than nothing, I should think. The first two images represent "normal" viewing angles and distances.
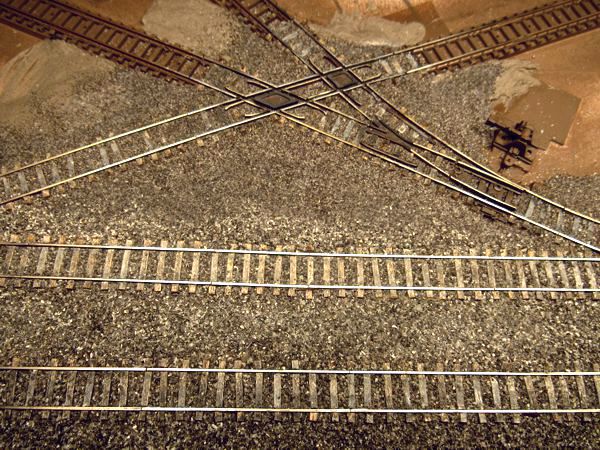
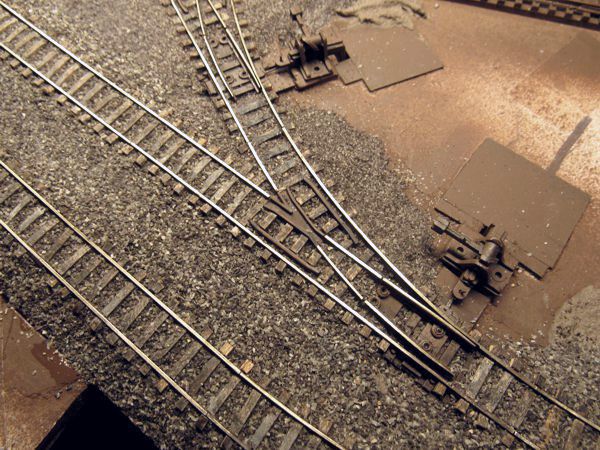
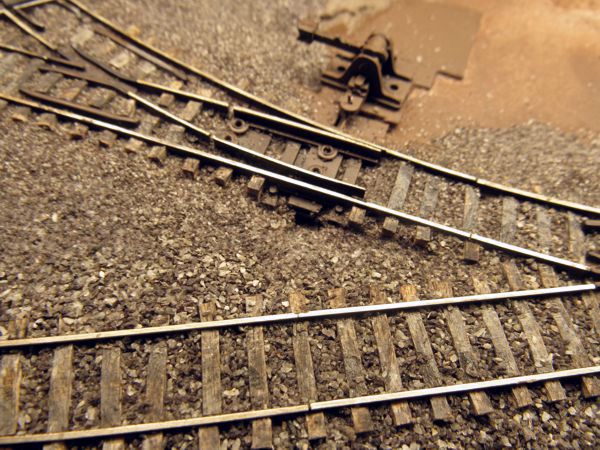
I had some reservations about how turnouts would look, but I was encouraged by these results. Unfortunately the project ended before I could finish the layout, and now it's all gone.