
Steel Shop
Reference
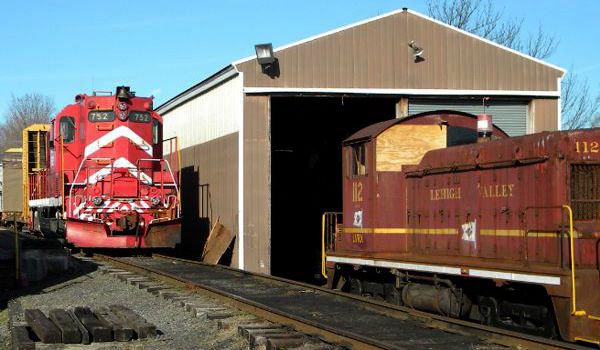
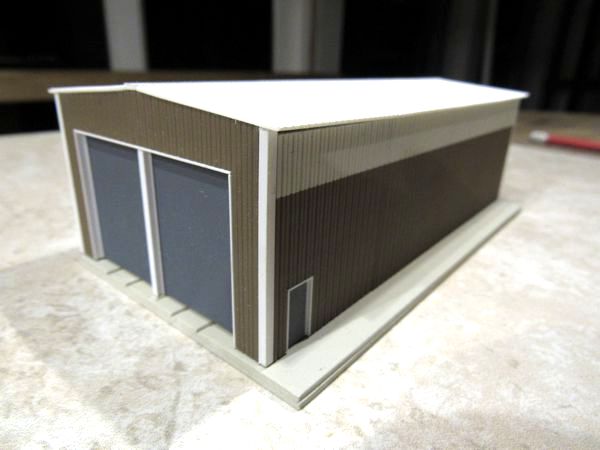
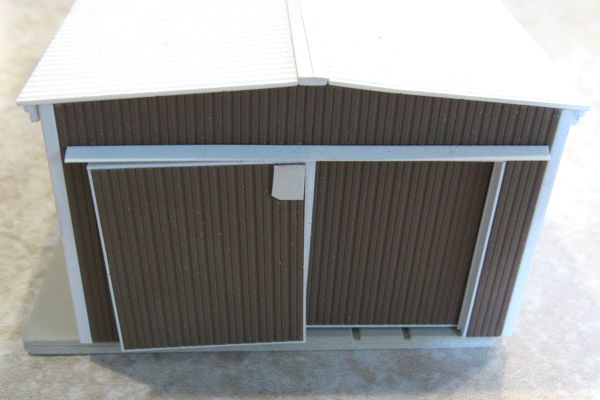
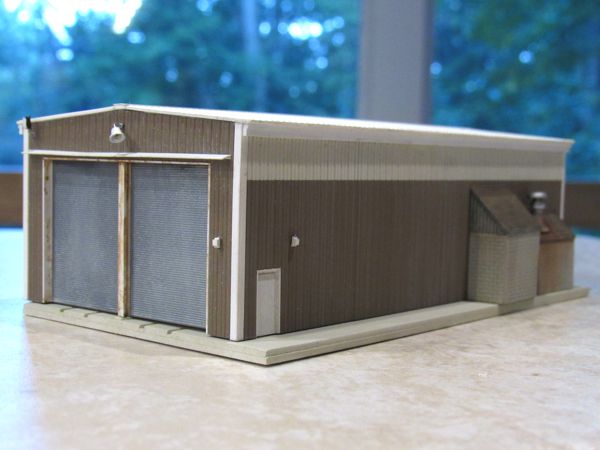
Built in the early 1980s, the steel shop originally had sliding doors on both ends; much later, the doors on the south end were replaced with roll-ups. Unfortunately, I've already finished the model in its more modern configuration, so I'll have to do some retrograde work.

The Model
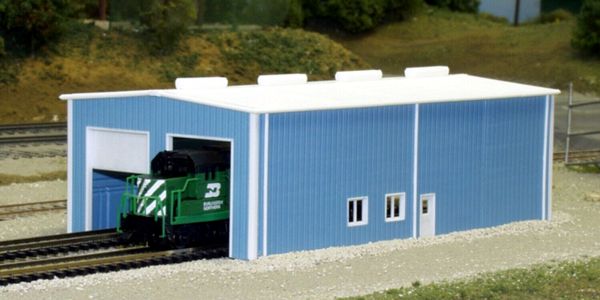
Given that the Rix Products Pikestuff stock number 541-8007 enginehouse kit was quite close to the real one in Ringoes, it seemed like "low-hanging fruit" that I could tackle first. Originally I was just going to do a straight build, but partway into the project, I began to feel as though I'd do the BR&W a disservice if I didn't at least try to bring it closer to the 1:1 shop. I also thought about modeling it with the doors open to show a fully-detailed interior; however, the showstopper became the translucent panels along the tops of the long walls—I simply couldn't envision a practical way to simulate these, so the doors shall remain closed.
That said, since the BR&W is virtually guaranteed to be my last layout, I wanted the structure to reflect my best modeling abilities (such as they are now), so I invested a considerable amount of time and effort making sure it was as good as I could possibly make it. Not to mention that this will be a foreground structure, located just an inch or two from the edge of the layout. Consequently, I spent the better part of three days working on the main wall subassemblies alone, and the whole project took a week.
Main Subassemblies
To bring the basic kit closer to reality, I swiped a few parts from Rix Products 541-8002 (a smaller enginehouse), along with Evergreen sheet and strip styrene, plus L and H shapes. I realized the roof pitch was all wrong, but I decided I could live with that as long as I nailed as many other details as I could without going nuts. The model would also be shorter than the real building, but this suited my need for selective compression, and since #60 would never be stored inside, it would not be evident that it's too short.
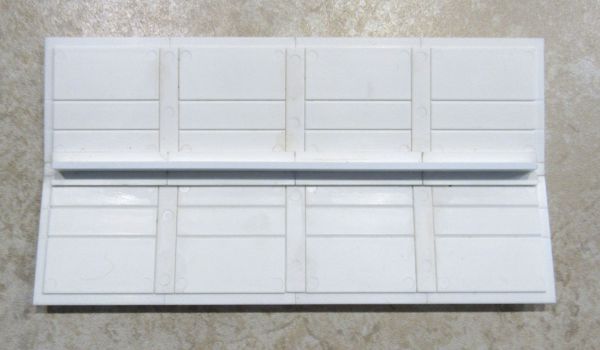
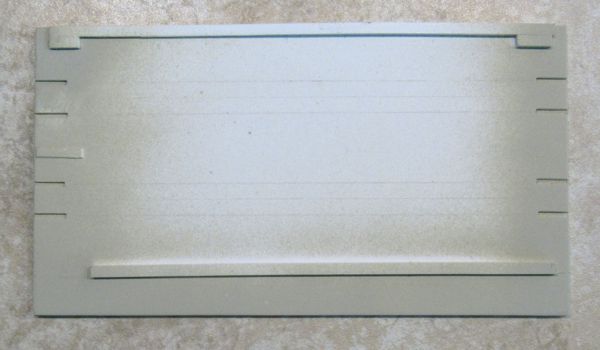
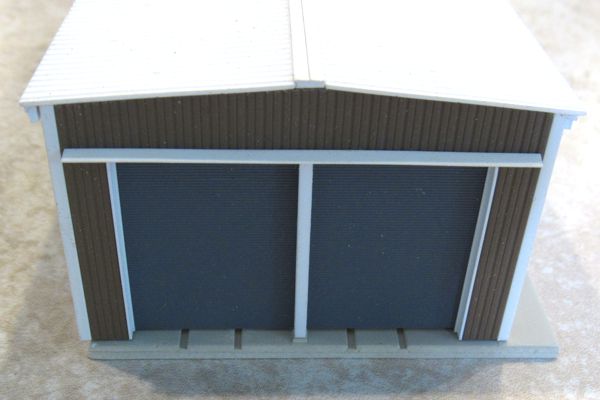
Work began on 8 September 2019 with the sidewalls. The original kit had a lot of door and window openings, while the real shop has one man-door and no windows (just translucent wall panels), which is where the smaller enginehouse kit came into play: I used a few of its plain wall sections to replace the ones from the original kit that had openings. Then, because I didn't plan to use any of the gutter/trim parts on the roof—the real building had none—the walls had to be trimmed down in both length and height to compensate. And finally, I added plenty of Evergreen 0.080" x 0.250" strips to keep the walls straight and true.
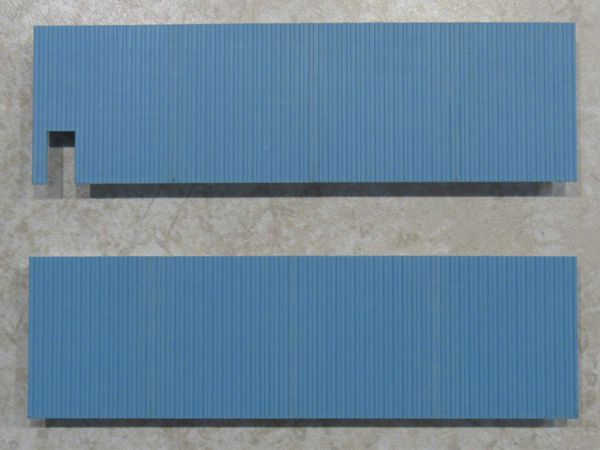
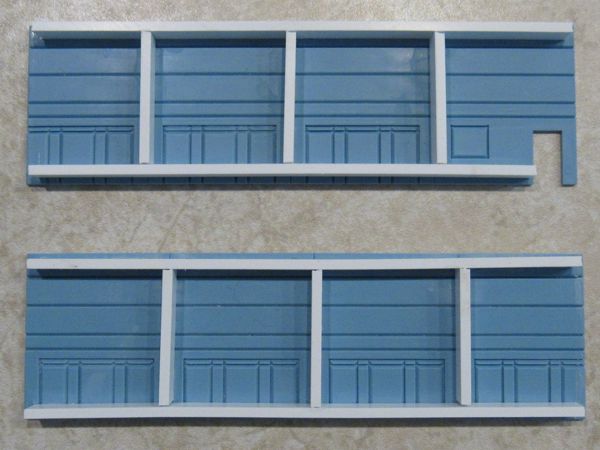
End wall modifications included removing the center wall sections (the real building just has H-columns there), and reducing the width to fit the modified roof. Splicing plates and stiffening ribs help strengthen the parts and keep them true.
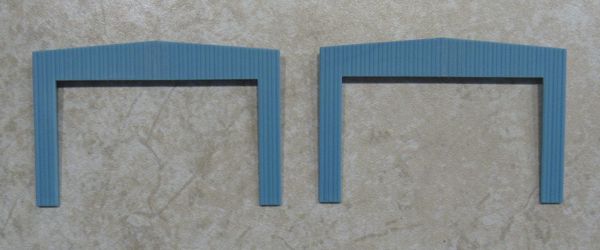
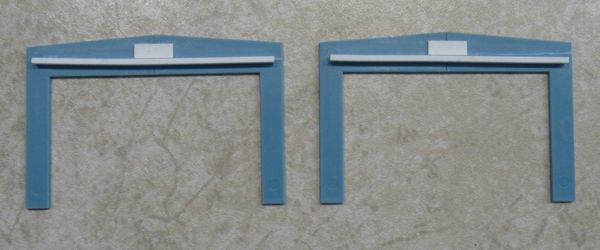
As mentioned before, I omitted the trim parts from the roof, which forced all of the wall dimensions to change; I also had to modify the end ridge cap parts to fit. I added an Evergreen 0.080" x 0.250" strip down the center to keep it true, and I also added a new ridge cap made from two 0.010" x 0.080" strips, as the kit's original was so shallow that it sat below the roof parts.
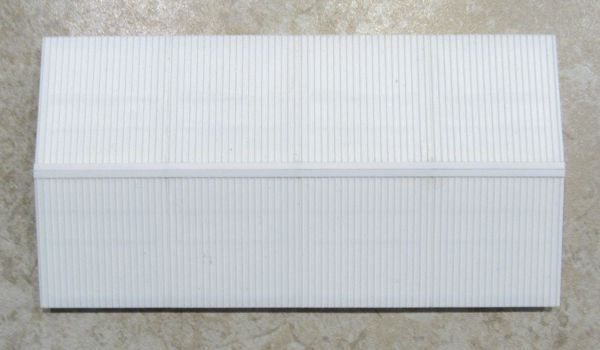
All of the subassemblies were completed on 10 September. Everything was bonded together with MEK.
Painting and Final Assembly
Painting was something of a chicken-and-egg case where some things were painted before assembly, and some after. I started with the white trim pieces (Rust-Oleum Flat White Primer), followed by the brown walls (GAF Shingle Match Shakewood), two of them having translucent panels (Rust-Oleum Satin Almond). I had to fight the compulsion to start assembling things while the paint was still fresh, and managed to let everything sit overnight.

Once the parts were thoroughly dry, I could assemble them and then construct the concrete foundation/floor, which I made from two pieces of 0.060" thick sheet styrene laminated together, with 0.040" x 0.080" index strips to hold the walls in place, as well as slots cut for the rails emerging from the shop bays at both ends (sized for Code 40 rail). I had to resist the urge to add cracks and such to the concrete surface, since the real foundation is still in very good shape. I painted it with Testors Light Aircraft Gray.
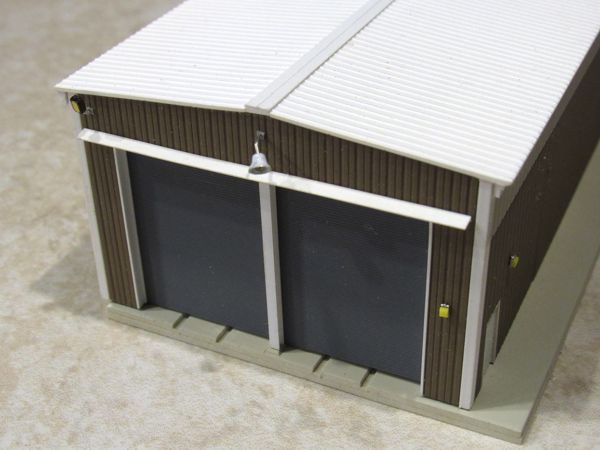
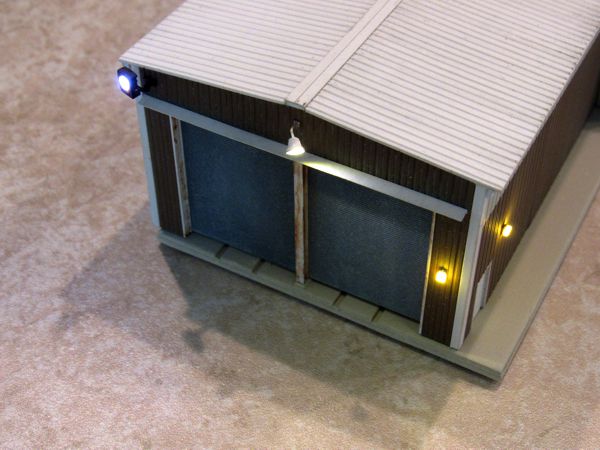
Since the door openings were radically altered, I couldn't use the kit door frames, so I made my own with Evergreen .080" angles, with .080" H-beams in between the pairs; I also framed the sliding door panels with the same stock. Apparently the building originally had sliding doors on both ends, but at some point the ones on the end facing away from the station were replaced with roll-ups (painted with GAF Shingle Match Pewter Gray). One of the sliding doors is deliberately cocked on an angle, since it would appear the roller on one end of the real door had broken.
Parts that didn't fit perfectly, or had paint along joints that was impractical to remove, were bonded together with brush-on Krazy Glue.
Additions and Details
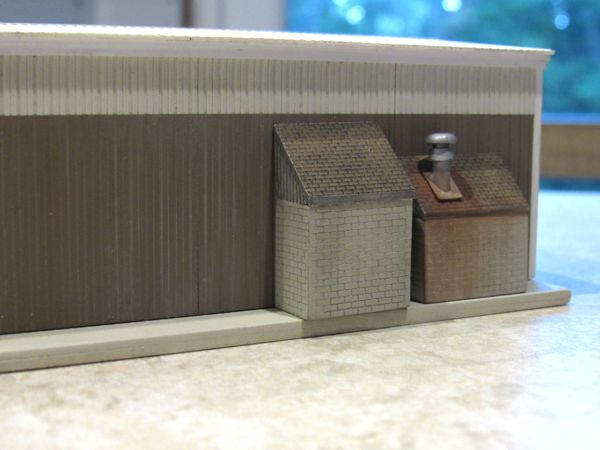
Next up were the additions on the side of the building. These were made from a variety of scrap box parts: the concrete block walls came from the "brick" control house included with Pola's rolling lift bridge; the shingle roofs were swiped from one of Atlas' classic house kit series; the wooden bits under the roof were cut from a Grandt Line shack; and the vent is from a Cornerstone industry kit. The additions were sprayed with Testors Light Aircraft Grey, and the shingles with GAF Shingle Match Shakewood; the vent is dull silver.
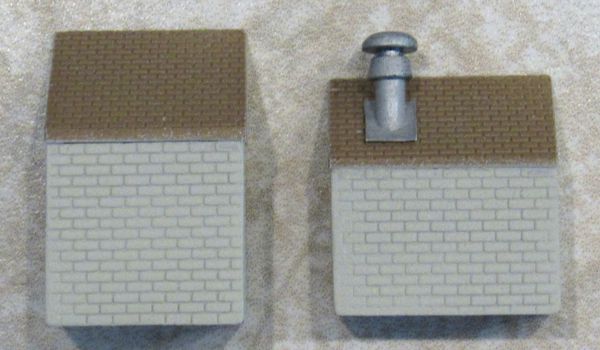
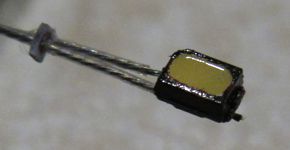
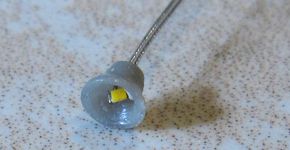
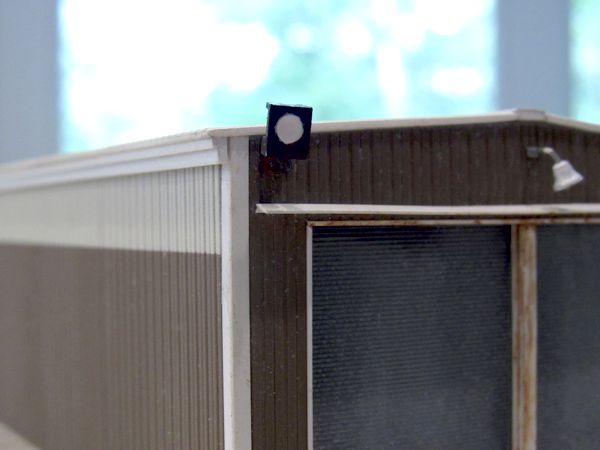
With the structure more or less complete, I started adding details, beginning with the soffits on the long sides (0.040 x 0.060 strip pairs). I added protective covers over the door tracks on both ends (0.010 x 0.100 strip with 0.010 x 0.020 joint reinforcement), plus the patch on the angled door. Then came the lights, of which there are four. The yellowish ones by the man-door are raw 0402 SMDs; the incandescent floodlight at the roof peak is an 0201 SMD fitted into an HO Scale diesel bell (below left); and the big security light is an 0804 chip with the body simply colored with a sharpie (below right).
Weathering
Weathering, for the most part, was fairly subtle, and consisted almost entirely of a thinned grey acrylic wash applied on all surfaces as a "fade." Rust washes were applied to the steel H-beams at the doors and the door frames with a small spotting brush. The shingles and wooden parts of the additions were hit with an India ink wash, and powdered chalk was used for the stains around the vent and the weathering on the concrete block walls.
Wiring
Subsequent to the weathering, I made a new security light. The original one was too small, so I used the largest white SMD LED I had, and then assembled a styrene box around it to better approximate the size and shape of the real one.
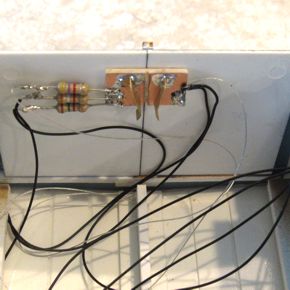
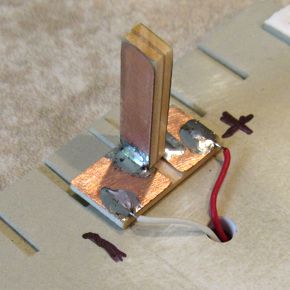
Then I wired the building. First, I used my handy-dandy LED tester/evaluator to determine the appropriate resistor to use for each of the three types of LED. Since my preference is to make buildings removable, I fabricated a simple slide-on connector out of PC board scraps and bits of etched brass fret. The brass fingers are sprung to maintain contact with the double-sided bar that sticks up from the base.
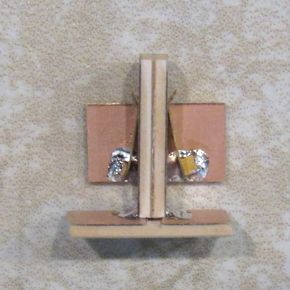
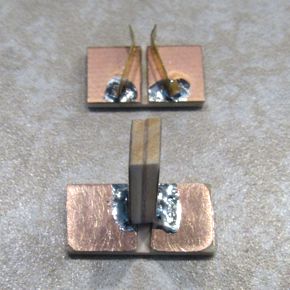
The connector parts also serve as terminals for the resistors and wiring.
The building still needs the electrical service inlet, a couple of small fixtures, and a door knob, which I'll add when I get a round tuit. Otherwise, this brings the model to the 99.98% mark, as of 14 September 2019. Admittedly there are plenty of mistakes and flaws, but all in all it hit the mark as intended.