
A Classic Tower Made More Classic, Part 2 of 2
The Stairs
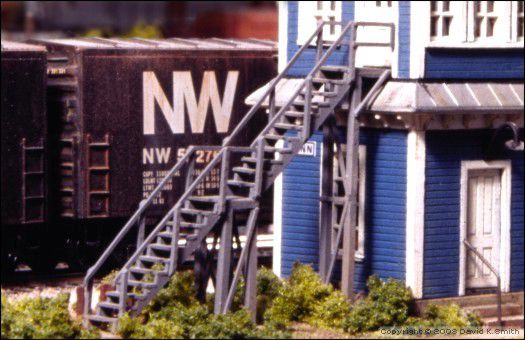
The stairs are a lot of work to scratchbuild, but the result is worth it. Cut four pieces of .020 styrene sheet roughly ½ by 2 inches. (Working with such large pieces makes them easier to handle and prevents them from warping.) Align the long edges and place the parts in a smooth-jaw vice. File the tops flat and even, and then make 12 parallel marks across the edges spaced one scale foot apart.
At each mark, make a notch with a square jeweler's file; work carefully, and check your progress frequently. Stop when the notch is a scale foot wide. Remove the parts from the vice and clean the filed edges. Cut off the notched sides in .060-inch strips, and trim the ends to produce two pairs of 11-step stringers as shown in Figure 4A.
To assemble the stairs, attach a strip of masking tape upside-down to a flat work surface. Place the stringers, smooth edge down, on the tape in parallel pairs 33 scale inches apart—be sure they stand exactly vertical. Cut 22 half-inch long sections of .010 X .060 strip stock. One by one, position these oversized steps on the stringers and bond them in place, using a fine brush to apply liquid cement.
When all steps are secured and the bonds have set, very carefully separate the assemblies from the masking tape: apply rubber cement thinner liberally to the tape and, when the adhesive is softened, lift the assemblies off with a knife blade. Then remove the excess strip stock by placing each step upside down on the edge of a cutting board and trimming against the stringer sides with an X-Acto. See Figure 4B.
Make landings from .020 V-groove stock and add .020 X .020 strips on the underside along all four edges. Attach the landings to the stair assemblies; a simple profile drawing will help get the angles right. Cut legs from .040 X .040 stock, apply .010 X .020 bracing as shown in Figure 4C, and secure the leg assemblies to the landings.
Assembling the railings requires a delicate touch. Make posts from .020 X .020 stock—note the beveled ends. Bond a set of posts to one side of the stairs, attach over-length .010 X .020 rails, and trim the rails to length. Then repeat the process for the opposite side.
Figure 4A: Making stringers
Figure 4B: Assembling stairs
Figure 4C: Railings, landings and legs
Finishing
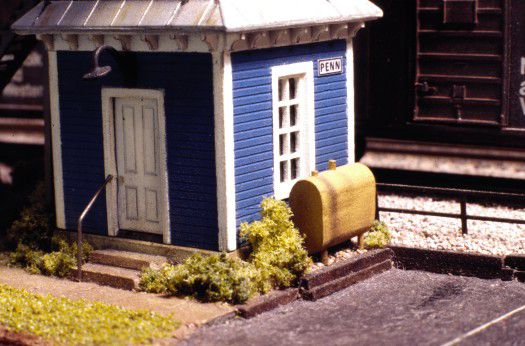
Because of the brilliant, semi-translucent color of my kit's walls, I airbrushed everything inside and out with Floquil Gray Primer before applying the final finish. The color scheme for my tower consists of Floquil D&H Blue walls and Refer White woodwork, trim and interior. The steps are Refer Gray.
To simulate a sheet metal roof, I brushed on Floquil Old Silver and rubbed it firmly with a soft cloth. Then I applied dry-brushed streaks of Floquil Rail Brown. Black was applied around the top edge of the first floor roof to simulate tar sealant.
Detailing
Naturally, detailing is a matter of individual taste. Since the second-floor interior is fairly visible, some details will be necessary if the model is in the foreground. Note that the interior is even more visible at night if the building is lit. For my layout setting, the tower was converted to an office, so I made a desk, filing cabinet, locker and water cooler from styrene scraps; I also included a Preiser figure.
Exterior details include lamps over the doors (I used brass parts from Period Miniatures) and railings for the first floor doors (blackened .015 steel wire). Don't forget signs; I made mine by printing graphics on self-adhesive label stock using a PC and a laser printer. A decent photocopier would work, too.
Base
Because the stairs require precisely sized and positioned footings, I recommend making a styrene base from a rectangle of .080-inch thick styrene, roughly 2 by 4 inches. Bond the original kit foundation near one end. Then cut footings for the stair assembly from .080 sheet, bond them in place, and sand or file them to the proper thickness.
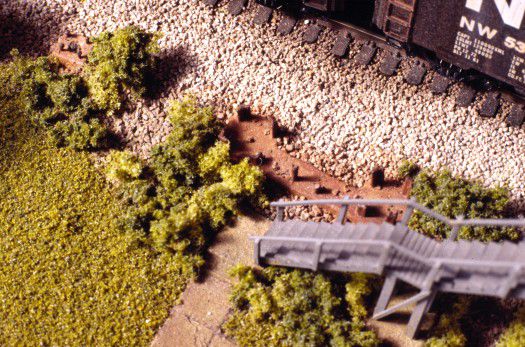
I attached other details to the base before installation in the layout. These include a sidewalk (made from individual squares of sheet styrene, some of which were sanded or shimmed to simulate sinking and heaving), old signal bridge footings, and a fuel oil tank.
Since my tower is a recently-renovated and well-maintained structure, I was not excessive with either weathering or ground clutter. You may want a different look. The results of your efforts should be a nifty little building that you'll want to place in the foreground of your layout.
Bill of Materials
Dimi-Trains Classic Tower Kit (Tichy Train Group #TIC-2601)
Evergreen styrene strip stock:
- .010 X .020
- .010 X .030
- .010 X .080
- .020 X .020
- .040 X .040
- .060 X .060
Evergreen styrene sheet stock:
- .010 plain
- .020 plain
- .020 V-groove, .020 thick
- .080 plain (optional base and stair footings)
Miscellaneous:
- door from Model Power General Electric building kit
- wall-mount lamps
- .015 steel wire
- finial (something from the scrap box)