
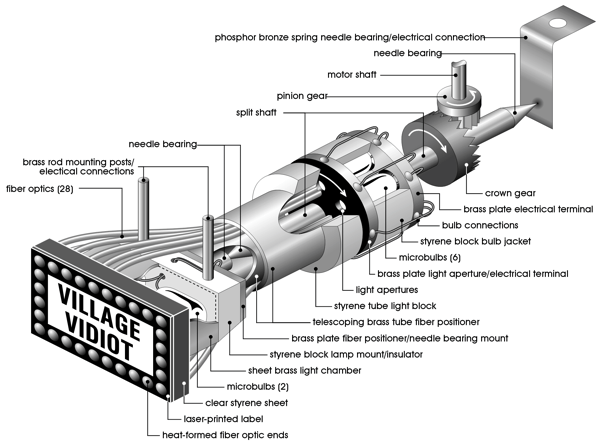
Chaser Light Sign
First Generation
It would have been too easy to make a chaser light sign using LEDs and a flasher circuit. And it also would not have looked realistic, because the LEDs flash differently from light bulbs on a real chaser light sign. So I devised a mechanism that rotated a series of microbulbs past the fiber optics. This created a much more true-to-life lighting effect.
Built for the White River & Northern IV in the late 1990s, the mechanism was outrageously complex, with over sixty parts in a space of roughly an inch and a half. Plus, it had to be built on an angle to fit within an odd-shaped building.
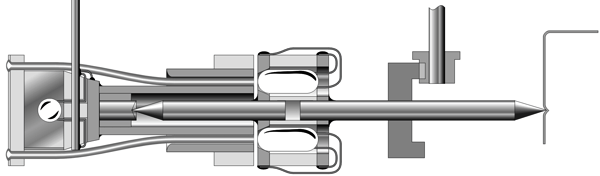
A cross-section view:
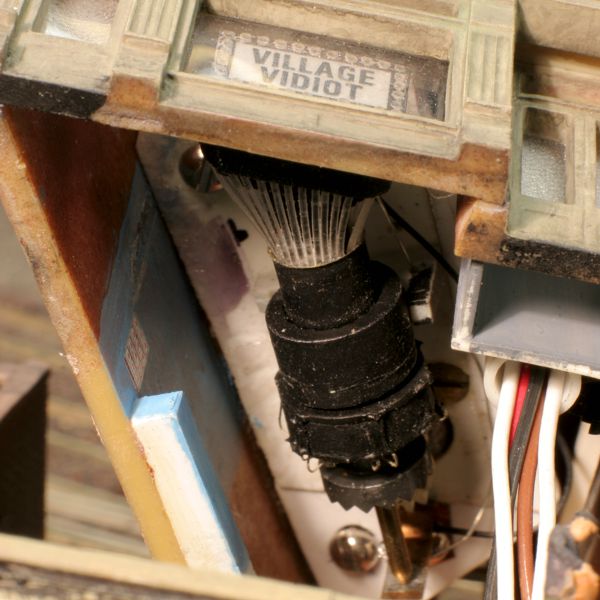
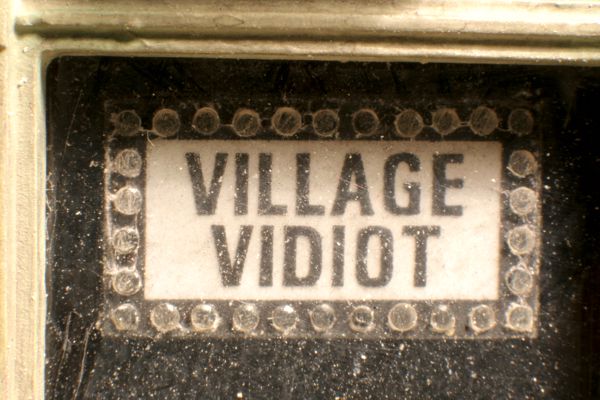
The completed mechanism looks like this:
The video store now resides on Rick Spano's Sceniced and Undecided. I believe most or all of the microbulbs have burned out (fast-forward 24 years, and now we have warm white 0201 SMD LEDs, which are smaller than the fiber optic ends!).
|
|
Second Generation
Decades later, having learned much in the interim, I set about using LEDs and a custom electro-mechanical device to flash them in sequence. This was accomplished with a motorized drum with wiper contacts and insulated segments to produce the proper pattern, which is a variation on the player piano principle. I chose to use a motorized device for two reasons: first, it was cheaper for me, since I'm on a tight budget and didn't want to spend money on electronics, whereas I had loads of surplus motors and such on hand; and second, it's a lot more fun, because I enjoy building mechanical devices far more than electronic ones.
|
|
Anyway, it's sort of a throwback to the earlier days of such signs in the real world, when motors and contacts were employed to produce animated flashing effects, as above. The only downside to this approach is that the flasher device is a bit noisy.

I made a drum from telescoping brass and styrene tubing that press-fit onto the shaft of a small geared motor. I applied three strips of heavy duty packing tape—each of which was two-thirds the circumference of the brass tube—and made four wiper contacts from brass wire soldered to a scrap of PC board. Then I mounted everything to a base made from thick sheets styrene (above).


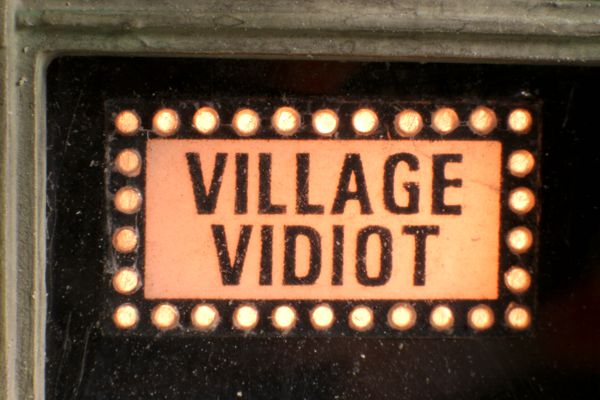
I wanted to make a sign of roughly the same size and shape as the video store one, but I didn't have a storefront available for it. Note that I'd attempted to make a chaser light sign with exposed LEDs, but it did not look good at all, so I designed a new one as one of those portable roadside signs, following the technique I used for the mail truck 4-ways, which created the perfect effect: point sources of light smaller—as well as significantly cheaper—than the smallest LEDs.
First, I created the artwork for it, which went through several drafts until I got the desired size with the number of chaser lights divisible by three (above left). Next, I printed it on plain paper, taped it to a scrap of 0.020" black sheet styrene, and drilled the light holes with a #76 bit (above right). Then I re-drilled the holes partway through to create recesses for warm white prewired 0603 SMD LEDs. After re-printing the sign on plastic label stock, I applied the graphic to the drilled styrene, using a small flashlight to help align the graphic to the holes. Finally, I poked the label with a pin at the holes (below left), and installed the LEDs in the recesses with CA (below right).
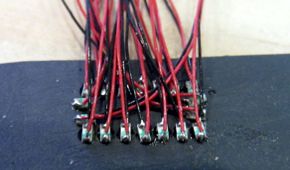
After trimming the sign top and sides, I sorted and bundled the LED wires in three groups of six. Then it was time for a quick test:
|
|
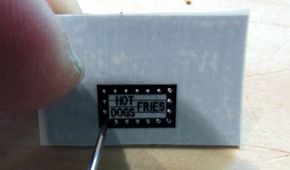
Originally the sign was going to advertise a hot dog stand on the Men at Work diorama; it was since moved to the Saturday at the Park diorama to advertise the kiddie train ride. So, instead of saying "hot dogs fries" it says "train rides."