
Spillway/Waterfall
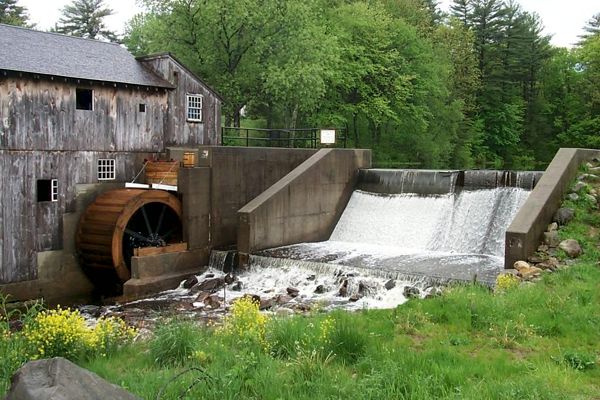
Now we come to an animation I've hotly sought to do, but lacked the nerve to give it a try. What finally pushed me into it was a photo of a mill spillway in New Hampshire.
First Generation
I'd wanted to make an animated waterfall around 75-100 N Scale feet tall, but that's obviously not an option for a layout of this size. The spillway is essentially a 16 N Scale-foot-tall waterfall. I began the project on 3 September 2020. At first I built a complex device based on the principles I'd devised for a 100-footer. It didn't work. I tried a few variations on that theme. They didn't work. Ultimately what did work was unexpectedly simple—the KISS principle to the rescue. But although the mechanism is quite simple—particularly when compared to the original design—it still took many tries at every step of the way to achieve success. Nothing I did worked the first time.
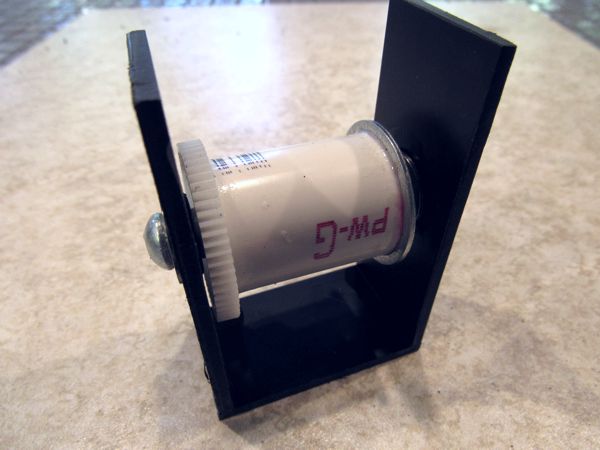
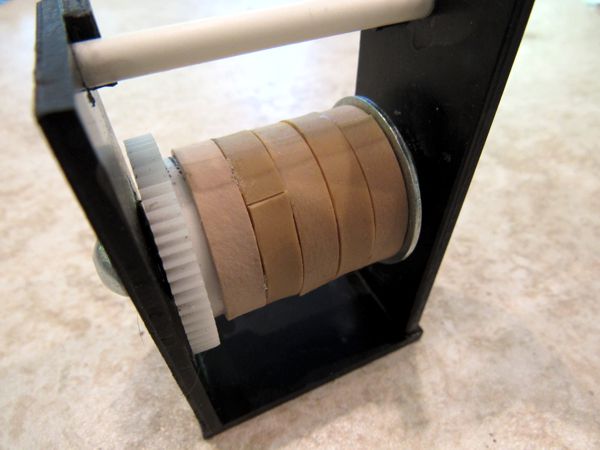
First, I made a frame from ⅛-inch sheet styrene. I drilled the sides for roller bearings that press-fit in place. Then I sandwiched a drum made of 1" PVC pipe in between a fender washer and a gear, on a ¼-20 bolt. Because the PVC pipe is smooth and slippery, I created a rubberized surface by bonding lengths of elastic band to it with CA.
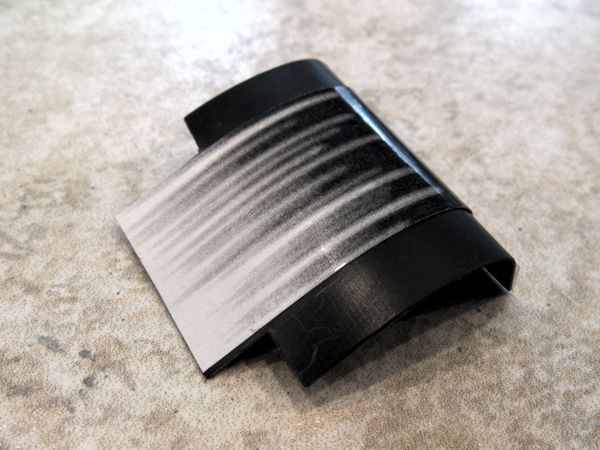
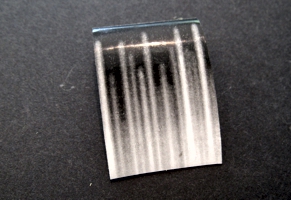
Next came the profile plate. This part serves three purposes: it shapes the water belt to the trajectory of the falling water; it has a graphic that shows through the belt to simulate the increase in the volume of white water as it descends; and it also provides spring tension on the water belt to keep it tight against the drum. I made it from 0.020" sheet styrene bent roughly to a parabolic shape. I created a graphic of fuzzy, irregular tapered streaks and printed on label material, then laminated it with clear plastic to protect the image and provide a smooth surface on which the water belt can slide.
The sharply-curved end of the profile plate simply rests on a styrene tube installed across the top of the frame; a pair of retaining blocks behind the tube hold the profile plate in place with no need to bond it to anything.
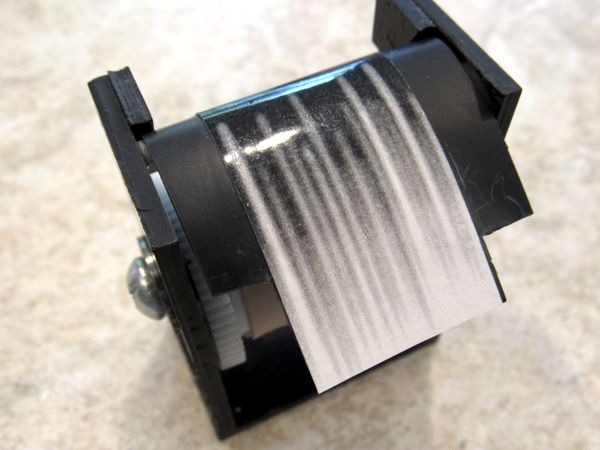
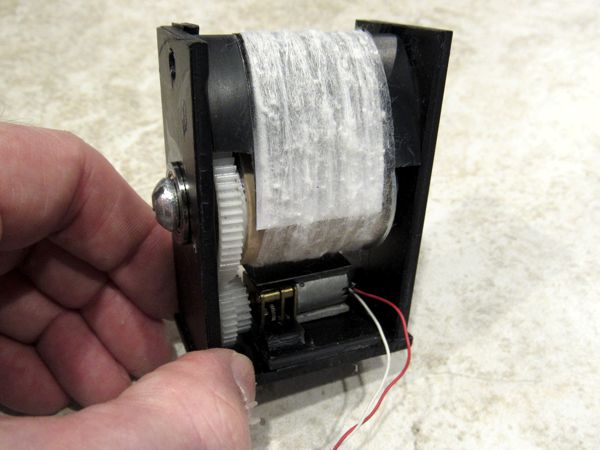
The water belt is simply clear Scotch tape wrapped around the drum and profile plate about 6-8 times, with the adhesive facing outward. This was the single most difficult step: I made probably a couple dozen belts before I got one of the right size with a minimum number of blemishes. Once that challenge was met, I installed the geared drive motor, and with the motor running, I dry-brushed on thin, irregular lines of white acrylic paint as the belt moved.
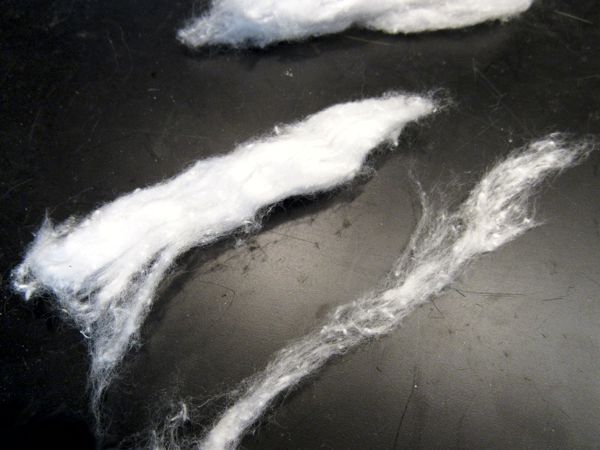
I then applied thin, wispy tendrils of fiber (plain old pill bottle cotton). It's surprising how little was required, because its purpose is to simulate mist, not water; indeed, I removed most of what I'd initially applied. Finally I sprayed the water belt with clear fixative, again with the motor running, to hold the cotton securely in place and to help keep it clean (a trick I learned when I was making static waterfalls back in 1975), as well as to seal up any remaining exposed tape adhesive.
I completed the effect on 5 September 2020.
|
|
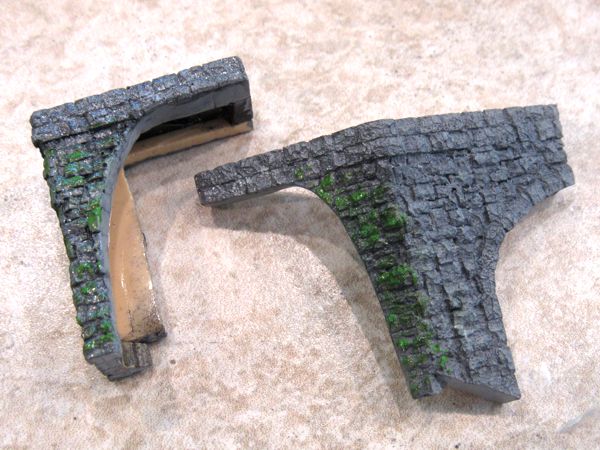
The final step was to fabricate the stone walls on the sides, which I made from old Chooch castings. Using a paper template, I carefully cut the parts to fit the shape of the falls. (The odd shape of the piece below right provided extra stone that would be trimmed back prior to installation.) I sanded the edges facing the fibers until they were silky smooth to prevent snagging, and after painting and weathering, I sprayed these areas with clear gloss both to make them look wet and to further smooth the surfaces. To avoid any surprises, I permanently installed the stone parts on the frame while the waterfall was running.
Then I made a pile of talus rubble at the base of the falls, bonding the rocks in place individually with CA, followed by generous amounts of gloss medium tinted lightly with acrylic white paint for a translucent effect. The last detail on the talus pile was a tiny strip of wispy cotton glued to the top edge of the talus pile to help blend it into the descending water.
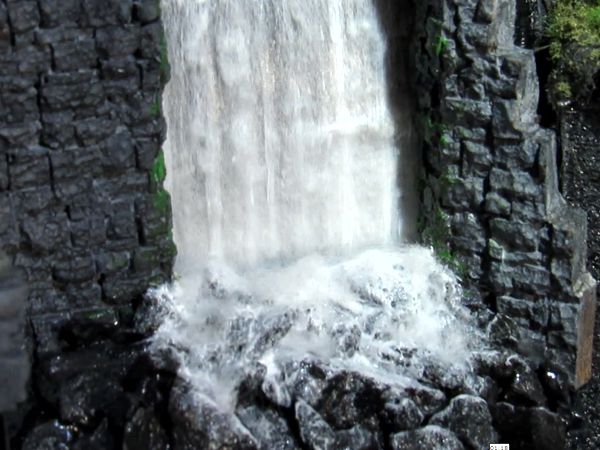
The final touch was a temporary threshold, until such time as the upper waterway gets modeled. It's just a piece of plastic baggie with a tattered edge laminated to a thin piece of black styrene with a similar tattered edge. The tattered plastic baggie conforms to the irregular water flowing under it, adding tiny changing glints, and also makes the black styrene look super-glossy.
|
|
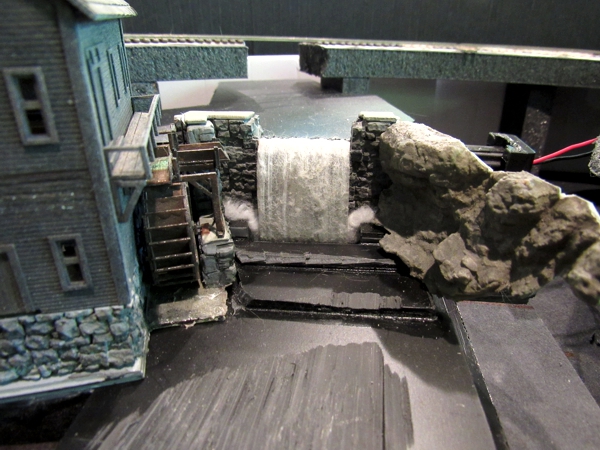
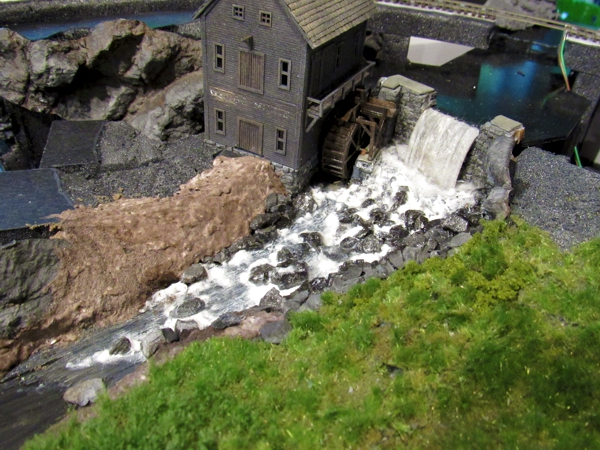
On 19 October 2020, I permanently installed the spillway (below).
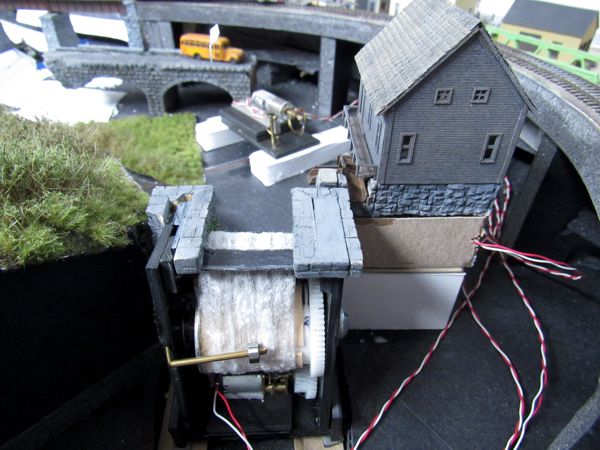
Unfortunately, permanent installation resulted in the motor drive noise being greatly amplified. However, before I got around to replacing the drive, I decommissioned the layout. The mill and spillway then migrated to the White River & Northern X, where the spillway was eventually rebuilt.
Second Generation
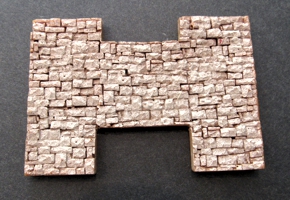
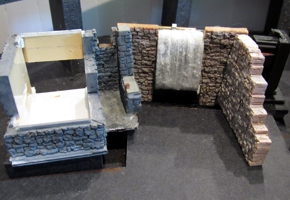
It made no sense to include the mill without the spillway. However, the new layout has different topography, and the spillway I'd made for the Mountain Vista was too tall. Since I had to rebuild it to make it shorter, I decided to see if I could pull off a "free falling" waterfall—that is, having no sides to the spillway. That was a visual compromise I had a feeling wasn't actually necessary. So I dismantled the old falls mechanism and started over, beginning with a chunk of stone wall that I notched for the waterfall loop (below left). I kept the background part from the first mechanism (below right); this part not only gives the water loop some added visual depth, it also provides spring action to keep the loop taught.
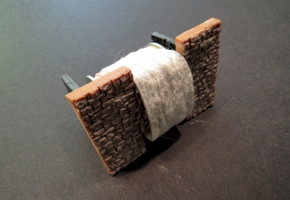
After attaching the background part to the stone wall (below left), I installed the water loop along with the drive drum, which this time is located behind the falls (below right), rather than under it as before.

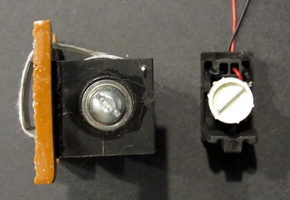
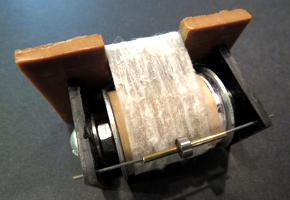
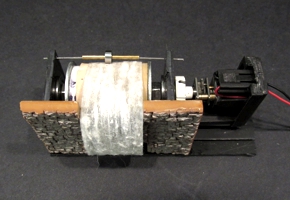
Because the parts were rearranged, the water loop tended to slip on the drum, so I had to add a roller to apply some pressure on the drum (below left). I changed the motor and drive scheme as well, using a more powerful motor to directly drive the drum shaft (below right), rather than a gear train as before. This made the mechanism much quieter. Also, the link between geared motor and the drum is self-adjusting, so precise alignment wasn't necessary.
After giving the mechanism a test-run (below left), I posed it on the layout to get a sense of what I'd need to do to finish the scene (below right).
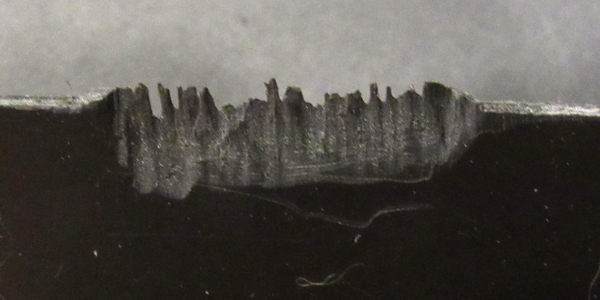
The upper water level was a key part: I shaped the edge of the black sheet styrene "water" with a Dremel cutoff disc to fit around the top of the water belt, and blend it into the body of water; this will be coated with gloss medium later on. (Incidentally, this is much further than I got with the Mountain Vista.)
By the afternoon of 17 May 2021, I had all of the main components finished and sitting in place. Satisfied with the results, I permanently glued the mill foundation and spillway mechanism in place.
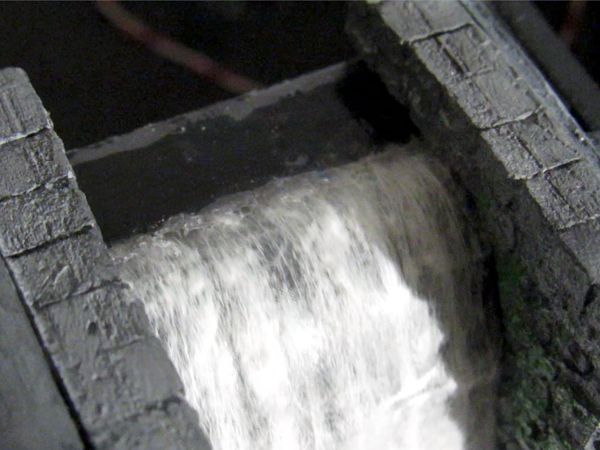
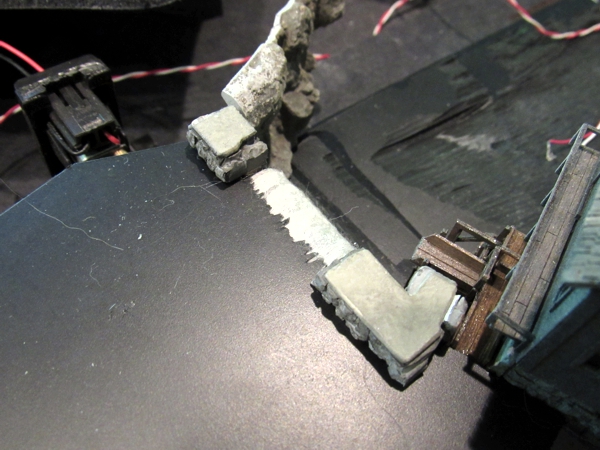
The next day I added the rip-rap (below). These stones were all glued in place individually, one at a time, in order to maintain strict control over shape and clearance.
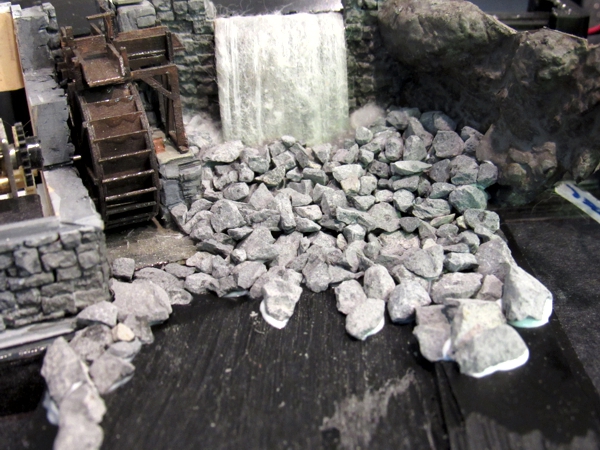
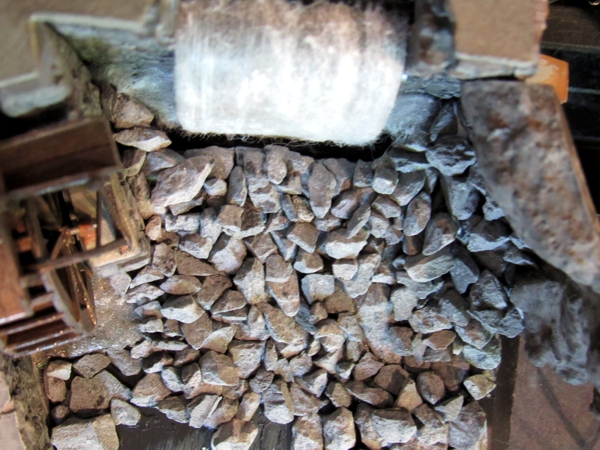
Looking straight down (below), one can see the comfortable amount of room I left around the falling water belt. This gap is not apparent from normal viewing angles.
Next, I applied two layers of heavy clear acrylic gloss; the second contained a tiny amount of white acrylic paint mixed in. Before it dried, I wiped off the rock surfaces with water to remove excess white, and to help settle it into the spaces between the rocks. Ever impatient, I set up a fan to accelerate drying (below).
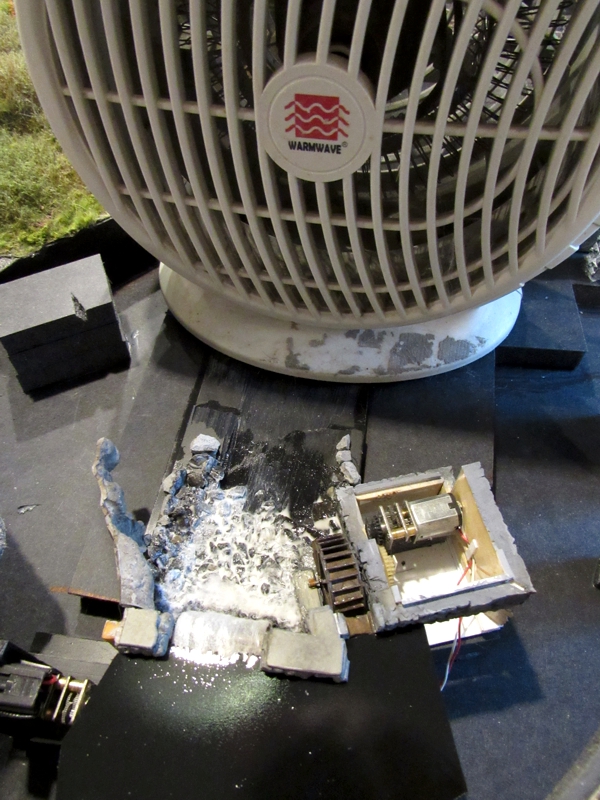
Meanwhile, I sprayed the styrene for the upper level of water with a heavy coat of clear gloss finish (above, bottom).
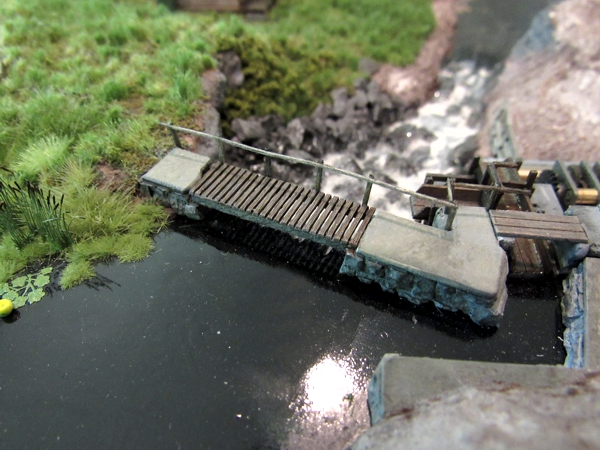
A footbridge over the top of the spillway helps obfuscate the rough transition from a flat body of water to the falls.
|
|
New Venue
The spillway is now part of the Field of Dreams diorama.
|
|