Hobby Shop Layout
First Generation
The first layout of a layout I built was a proof-of-concept project, circa 1998. I sort of threw it together from bits and pieces of plastic. It still runs to this day on Rick Spano's Sceniced and Undecided. He rigged it up with a little battery pack with a switch so it can be run forwards or backwards. I took no photos of it during construction, but I did shoot a video of it running on Rick's layout:
|
|
In terns of scale, it was roughly equivalent to an American Flyer or Standard Gauge layout in N Scale.
Second Generation
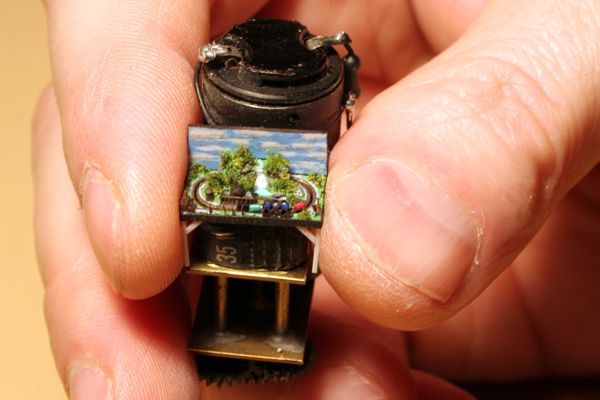
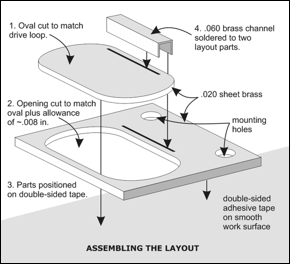
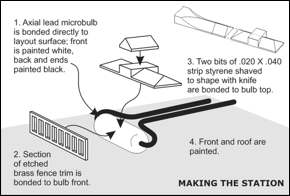
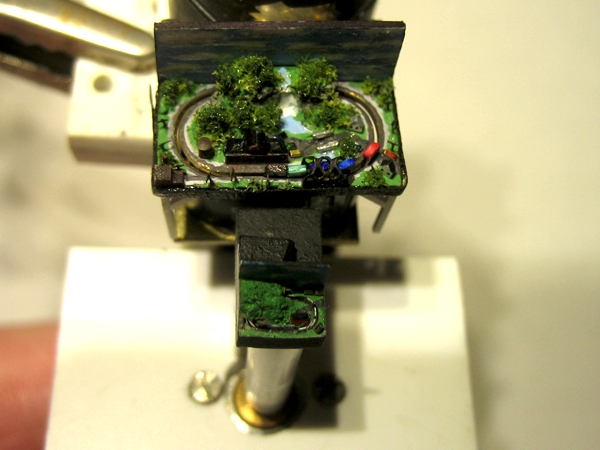
With the success of the proof-of-concept, I proceeded to build a more robust version, mostly out of brass, slightly smaller than the first. It represents a 4 x 8 foot HO Scale layout in N Scale, which works out to a modeling ratio of 1:13,920. The layout included a lighted station, water tower, through truss bridge, houses, factory with smokestack, tunnel, waterfall and river, road bridge, vehicles, and even telephone poles. It may look crude, but remember that it's only a little over a half-inch wide.
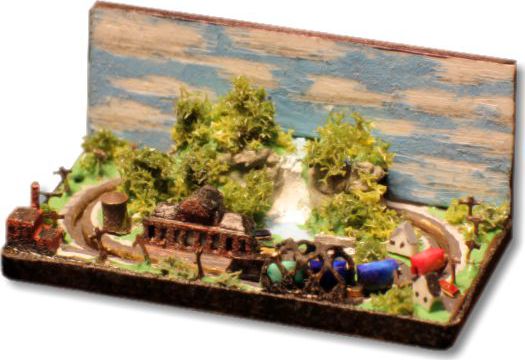
I'd prepared an article for publication, complete with detailed construction drawings, but no one would buy it—which came as no surprise, really.

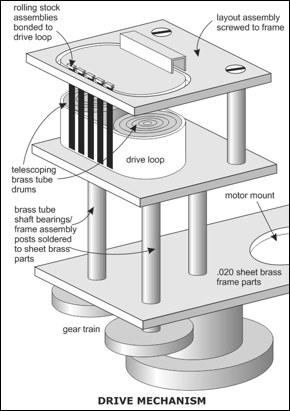
The sad irony is that, while it was meant to be a robust model, the plastic drive belt dried out and disintegrated, and since it wasn't built to be dismantled and repaired, the layout no longer exists.
|
|
Third Generation
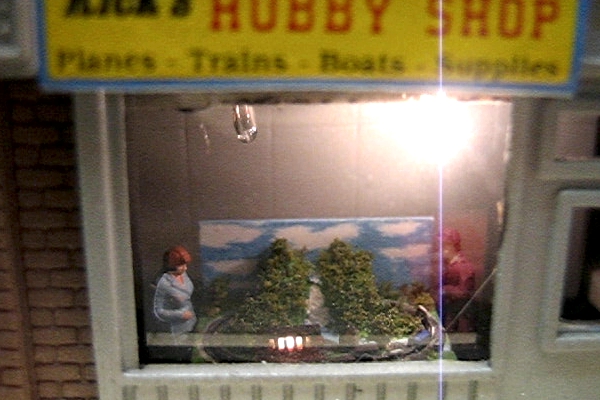
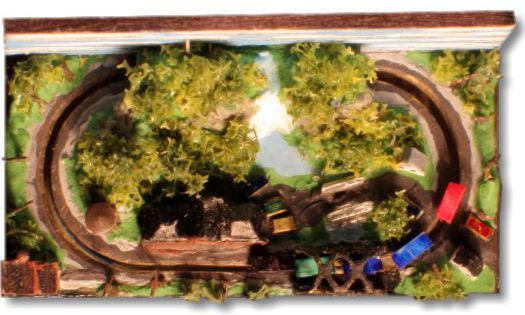
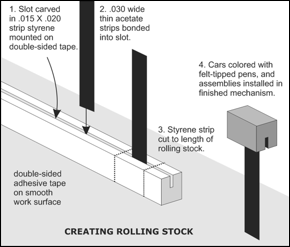
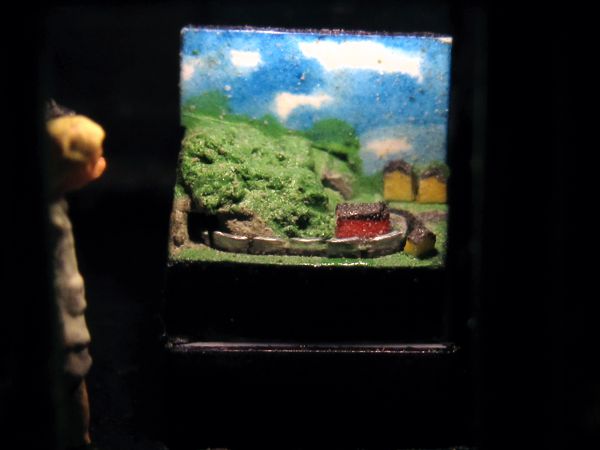
If I'm going to do something more than once, then I'm going to up the ante. This time I made an N Scale layout in Z Scale, which works out to a modeling ratio of 1:35,200. Appearing in a hobby shop window on my James River Branch, it measured a mere 0.2" wide (which was dictated by the window).
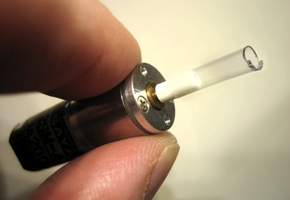
I tried using the same belt-drive concept as before, but owing the tiny size, it failed miserably. Consequently I pursued a wholly different concept: a piece of flexible plastic tubing attached to the shaft of a low-RPM miniature geared motor. The train was simulated by cutting teeth in the edge of the tube that would poke up just above the surface of the layout; I painted them with a silver Sharpie (it's a passenger train) to make them more visible.
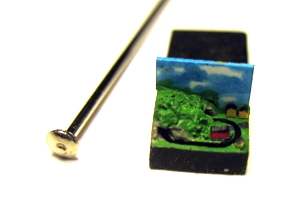
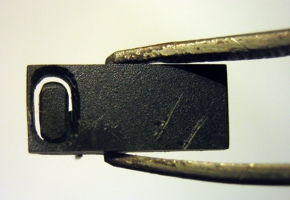

I made the layout from bits of styrene. After carving an oval hole in a piece of 0.060-inch sheet stock, I shaped some miniscule styrene scraps into a mountain and tunnel, which served the functional necessity of suspending the center of the layout in the oval hole (just as it had on its predecessor). Then I added a sky backdrop made from 0.010 white styrene colored with a Sharpie. I covered the mountain with a thin, lumpy layer of Squadron putty to make a forest. After painting the layout, I made buildings from nearly-microscopic bits of strip styrene; I colored them with Sharpies to avoid adding thickness. Here's the end result compared with its bigger brother:
The original version of this video got over a half-million views, and gained worldwide attention. I received multiple requests from Japanese television stations who wanted to send reps over to interview me. After checking to see the kinds of programs I'd appear in, I refused; I wasn't interested in being the next "freaky things freaky people do" star.
|
|
After bouncing around a few layouts, it finally got its "forever home" on the Saturday at the Park diorama. I made an extra effort to locate it as close to the front of the display as possible so that it can be clearly seen and enjoyed.
And Then There's This...